|
Developing and Deploying Siebel eBusiness Applications > Getting Started in the User Interface Layer >
Inactivating Screens
NREC's implementation of the Siebel Partner Portal application does not include every screen that comes with the product, such as Service, Solutions, and Campaigns. These screens are not part of the design and NREC does not plan to use them in the future. Therefore, NREC has decided to remove the screens from the user interface. NREC has chosen to remove the screens by inactivating objects in the repository. Screens appear in the user interface as first-level navigation tabs and as links on the Site Map, as shown in Figure 13. These links are controlled by two child objects of the Application object, Page Tabs and Screen Menu Items. You can remove these links by making the object types inactive.
- Page Tabs control the first-level navigation tabs in the user interface.
- Screen Menu Items control the links that appear on the Site Map.
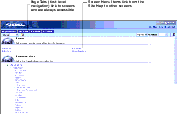
Figure 13. Page Tabs and Screen Menu Items
|
An alternative approach is to create a responsibility that does not include any of the views within the screen and assign users to that responsibility. This removes the screens from the user interface, but leaves the screen objects active in the repository. This approach allows you to add the screens back in the user interface without having to recompile the repository file. However, because these screens are not part of the design, assume NREC has chosen to inactivate the Screen Page Tab and Screen Menu Items in the repository. To inactivate screen page tabs and screen menu items
- In the Object Explorer, expand the Application object type.
- Select the Siebel eChannel application.
NOTE: The application object named Siebel eChannel is the application called Partner Portal. The employee application is Siebel Partner Manager.
- Lock the project locally by choosing Tools > Lock Project.
The project to which the application belongs (Siebel eChannel) is locked and a Pencil Icon appears in the W column indicating that you can modify the record.
- Change the value for the Project property from Siebel eChannel to NREC Configuration.
This moves the application object to the NREC project making it easier for you to track changes.
- In the Object Explorer, select the Page Tab object type (child of Application).
The Page Tabs window appears in the Object List Editor.
- Inactivate unnecessary screens listed in the Page Tabs window by selecting the check box in the Inactive field for each record.
Inactivate every Page Tab record except the following.
- Accounts Screen (SCW)
- Activities Screen (SCW)
- Contacts Screen (SCW)
- Opportunities Screen (SCW)
NOTE: These are the screens that should remain active in NREC's application. The others are not part of the design. SCW is a designation used for many of the Siebel Partner Portal screens, views, applets, and so on.
The inactive Page Tabs turn red in the repository and do not appear as first-level navigation tabs user interface at run time.
- In the Object Explorer, select the Screen Menu Item object type (child of Application).
The Screen Menu Items window appears.
- Inactivate the unnecessary screens listed under Step 6 in the Screen Menu Item window by selecting the Inactive field for each record.
Inactive Screen Menu Items do not appear on the Site Map at run time.
- Compile and Unit Test your changes.
- Choose Tools > Compile Projects.
- In the Object Compiler dialog box, select the Selected Projects or Locked Projects option button and then define the path to the Siebel repository file (SRF) to which you are compiling your changes.
Typically, this is the SRF file used by the Mobile Web client installed on your machine for testing. For example:
C:\Program Files\Siebel\7.7\web client\OBJECTS\ENU\siebel.srf
NOTE: Be sure to make a back up of the siebel.srf file before you compile any changes.
- In the projects list, select the NREC Configuration project.
- Click Compile.
Siebel Tools compiles the object definitions for the locked project to the repository file.
For more information about compiling, read Compiling Projects.
- Open the Partner Portal application.
The results of your changes appear when you start Siebel Partner Portal.
|