| Bookshelf Home | Contents | Index | Search | PDF | |
Developing and Deploying Siebel eBusiness Applications > Pick Lists, Drilldowns, and MVGs > Configuring Pick Lists >
Dynamic Pick Lists
Like static pick lists, dynamic pick lists allow the user to populate fields by selecting values from a list. However, rather than drawing the values from the list of values table, a dynamic pick list draws its values from another user-maintained business component. Fields that use dynamic pick lists are typically joined fields displaying data from a table other than the business component's base table. The dynamic pick list allows users to update the joined field.
NREC design includes a dynamic pick list on the Activity Detail Applet. The opportunity field that you exposed on the applet (see Adding the Opportunity Field to a Activity Detail Applet (SCW)) is a joined field. Creating a dynamic pick list on this field will allow users to update the activity record by pulling in the opportunity name from the Opportunity table.
The Pick List Wizard walks you through the process of creating a dynamic pick list and related objects, which include:
- Pick List. Object that defines the properties of the pick list, including the originating business component and the pick business component.
NOTE: The originating business component is the one on which you are creating the dynamic pick list. In the current example, it is the Action business component. The pick business component is the one from which you are picking values to display to the user. In the current example, it is the Opportunity business component.
- Pick Maps. Child object of a business component field that map the source field in the pick business component with the target field in the originating business component.
- Pick Applet. Pop-up applet that allows you to display the a list of records from which the user can select.
Before creating a dynamic pick list you must lock the projects for both the pick business component and the originating business component. For the current example lock the Action project locally and then change the value of the Project property to NREC Configuration. In previous chapters, you should already have associated the Opportunity business component with the NREC Configuration project, which should be locked.
To create a dynamic pick list
- Choose File > New Object.
- Under the General Tab, select the Pick List icon, and then click OK.
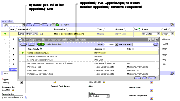
- In the Pick List dialog box, enter the following.
- In the Pick List Type dialog box, select the Dynamic radio button.
- In the Pick List Definition dialog box, select the Create new Pick List radio button.
- In the next Pick List Definition dialog box, enter the following values and then click Next:
- In the Pick List Specifications dialog box, accept the defaults; leave all of the check boxes unselected.
- In the Pick Map dialog box, use the drop-down lists to select the following and then click Add:
This information is used to define the Pick Maps for the Pick List. They are the mappings between the source field and the target field.
- In the Finish dialog box, review the information you entered and then click Finish.
The Pick List wizard creates the pick list, pick maps, and checks to see if a pick applet already exists that can be used to display the records. For the NREC example, there is already an Opportunity pick applet defined, so the New Applet Wizard does not open. If an appropriate pick applet did not exist, then the New Applet Wizard automatically opens.
- Compile and test.
Be sure to compile the Activity project.
| Bookshelf Home | Contents | Index | Search | PDF | |
Developing and Deploying Siebel eBusiness Applications Published: 18 April 2003 |