| Oracle® Business Intelligence New Features Guide Release 10.1.3.4.2 Part Number E10416-07 |
|
|
View PDF |
| Oracle® Business Intelligence New Features Guide Release 10.1.3.4.2 Part Number E10416-07 |
|
|
View PDF |
This chapter describes a feature of BI Publisher that was introduced in Release 10.1.3.3 and that applies to Releases 10.1.3.3 through 10.1.3.4. Information about this feature is also provided in the BI Publisher documentation set that has been updated for Release 10.1.3.4.
BI Publisher uses a modern report architecture that separates the report data model from the report layout. By doing so, it allows users to create multiple layouts for a single data model. BI Publisher also supports many types of data sources such as SQL query against a database using JDBC, file data, HTTP feed, and Web service.
Using the Discoverer Web service, you can create reports based on the data that is returned from Discoverer worksheets. When you install the Discoverer Web service and configure BI Publisher to use it, the Web service returns data from selected worksheets that provide the data for BI Publisher reports.
BI Publisher 10.1.3.3 includes the ability to use Discoverer worksheets as the data set for a report. This provides the following three key benefits to Discoverer users:
Create highly formatted reports
Schedule execution and delivery of reports to a wide range of destinations
Generate reports in a greater range of formats
This chapter includes the following sections:
Section 18.1, "Configuring the Oracle BI Publisher and Discoverer Integration"
Section 18.2, "Creating Reports Based on Discoverer Worksheets"
The process to configure the Oracle BI Publisher and Discoverer integration includes the following steps:
Step 1: Install the Discoverer Web Service
Step 2: Install Oracle BI Publisher 10.1.3
Step 3: Configure Discoverer to Use Oracle Application Server Identity Management
Step 4: Set Up a Dedicated User to Access the Discoverer Web Service from Oracle BI Publisher
Step 5: Configure Oracle BI Publisher to Use the Discoverer Web Service
Install Application Server Patch Set 10.1.2.3 patch or the Discoverer one-off patch that includes the Discoverer Web service. This installs and deploys the Discoverer Web service file (discWS.jar) into the same Oracle Containers for J2EE (OC4J) that hosts Discoverer services. After installation, the Discoverer Web service is accessible from:
http://<1012AppServer>:<port>/discoverer/wsi
Release 10.1.3.3 of BI Publisher supports access to Discoverer worksheets as data sets in BI Publisher reports. BI Publisher and Discoverer can be, and usually are on separate computers.
To configure Discoverer to use Oracle Application Server Identity Management, see Oracle Business Intelligence Discoverer Configuration Guide, Section 14.7 "Using Discoverer with Oracle Identity Management Infrastructure," which is available from the Documentation pages on the Oracle Technology Network (OTN) or directly at:
http://download.oracle.com/docs/html/B13918_03/security2.htm#i1021521
The Discoverer Web service is accessible only to trusted clients. The Administrator must set up the dedicated user that Oracle BI Publisher uses to access the Web service.
To set up the user:
Log in to an Application Server Control instance that has access to the Discoverer middle tier computer.
Select the Discoverer middle tier computer.
Select OC4J_BI_FORMS.
Select the Applications.
Select the deployed application named 'discoverer'.
Under the Administration section, choose Security.
Click the Add User button.
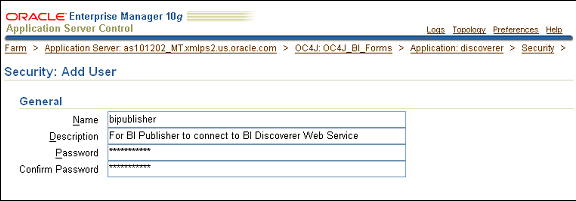
Map this user to security role sr_users by selecting the sr_users Security Role and clicking on the "Map Role to Principals" button. On the Role: sr_users page, check the box next to the newly created user in the "Map Role To Users" section and click Apply.
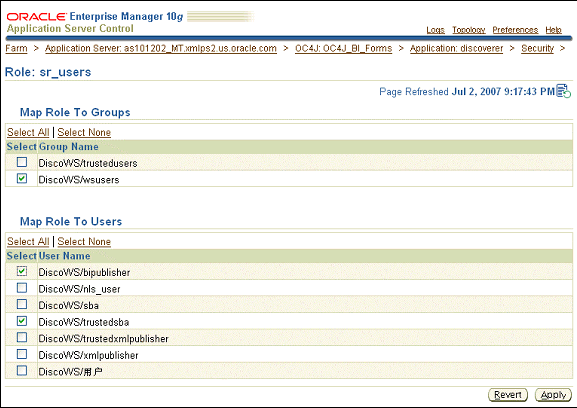
The role sr_users is pre-defined in the Discoverer web.xml file.
For more information, refer to "Security Role Mapping" in Oracle Application Server Containers for J2EE Security Guide 10g Release 2 (10.1.2), which is available from the Documentation pages on the Oracle Technology Network (OTN) or directly at:
http://download.oracle.com/docs/cd/B14099_19/web.1012/b14013/jaas_integrate.htm#sthref270
Configure the Discoverer Web service in Oracle BI Publisher Admin pages using the Discoverer Web service URL from Step 1: Install the Discoverer Web Service (http://<1012AppServer>:<port>/discoverer/wsi) and the dedicated user that you defined in Step 4: Set Up a Dedicated User to Access the Discoverer Web Service from Oracle BI Publisher.
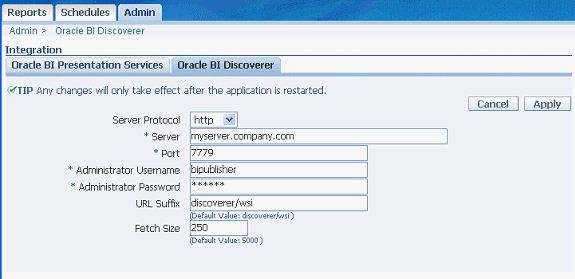
Note that in this release, any Oracle BI Publisher server or cluster of servers can be configured with only one Discoverer instance.
Restart the application server that is running Oracle BI Publisher to allow these changes to take effect.
The following configuration parameters that control the behavior of the Discoverer Web service can be set in the Discoverer configuration.xml file:
Loglevel — Can be set to any one of following: WARNING, DEBUG, FATAL, ERROR, TRACE, NOTIFICATION.
MaxSessionPoolSize — Determines the maximum number of Discoverer sessions that can be active and available at the same time.
These should be changed only under the direction of Oracle Support.
BI Publisher's modern report architecture provides benefits in report development and maintenance.
With this architecture, it is possible to have IT staff focus on extracting exactly the needed data with minimal impact on transactional systems. Then end users or IT staff can easily create as many layouts as needed for each query or data model. Layout development can even be done offline to further insulate transactional systems. Likewise it is a very straightforward process to create translations as needed for each layout.
In Oracle BI Publisher, each report has a data model that can be comprised of one or more data sets. Each data set is based on a data source that is defined in the Admin page.
For integration with Discoverer, the data source is configured through the Oracle BI Discoverer tab on the Integration page from the Oracle BI Publisher Admin page (see Section 18.1.5, "Step 5: Configure Oracle BI Publisher to Use the Discoverer Web Service"). When you want to create a report that uses data from Discoverer, you identify a Discoverer connection and select a worksheet that defines the data set. Note: A data model can include only one data set based on a Discoverer Worksheet.
There are two ways to create an Oracle BI Publisher report that uses a Discoverer Worksheet as a data set. One way is to create the report directly through the Oracle BI Publisher web interface. The other way is to indirectly create a report and data set while creating a layout template using the Oracle BI Publisher Template Builder for Word.
Creating a report directly through the Oracle BI Publisher Web interface gives you control over the naming of the report and offers the option of creating sample data for layout development. This is helpful when the Discoverer Worksheet returns substantial amounts of data or has parameters with default values that return no data. In general, creating a report directly through the Web interface is the preferred method of creating the report and data model.
You can also create a report indirectly through the Oracle BI Publisher Template Builder add-in to Word. This method creates a report with a name that is of the form workbook.worksheet in the directory of your choosing in the Oracle BI Publisher report repository. This method does not allow you to change or set default parameter values or to limit the amount of data that is returned from the Discoverer worksheet. This method is recommended only if the Discoverer worksheet returns a relatively small amount of data and does not have default parameter values that return no data. If the worksheet returns too much data, then it overwhelms the Template Builder. See Section 18.2.4, "Prerequisites, Limitations, and Known Issues." Conversely, if the worksheet has parameters with default values such that no data is returned, then no sample data is available to build the layout template.
To create a report and data model based on a Discoverer worksheet through the Web interface to the Oracle BI Publisher server:
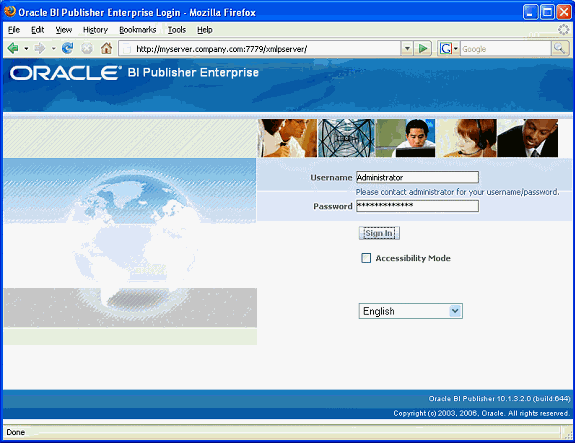
Connect to Oracle BI Publisher through the browser (for example, myserver.company.com:7779/xmlpserver)
Navigate to or make a directory to hold the report to create.
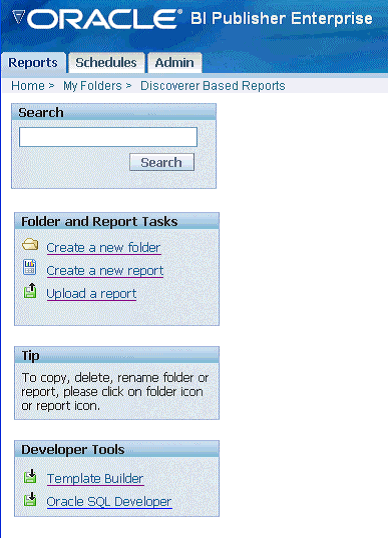
Click Create a new report in the Folder and Report Tasks frame on the left side of the browser page. Provide a name and click Create.
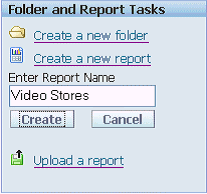
The report is displayed on the right-hand side of the screen.
Click the Edit link under the report name.

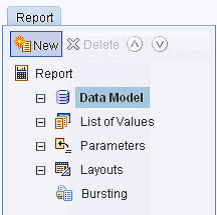
Select Data Model from the Report tree and click the New button at the top of the tree to create a new data set.
Under the General Settings section of the data set, optionally name the data set and select Oracle BI Discoverer in the Type field.
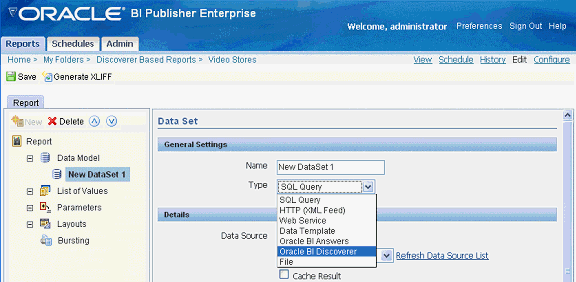
Under the Details section of the data set, click the flashlight icon to the right of the Connection field. Navigate to and select the Discoverer connection that owns the worksheet to use in the report.
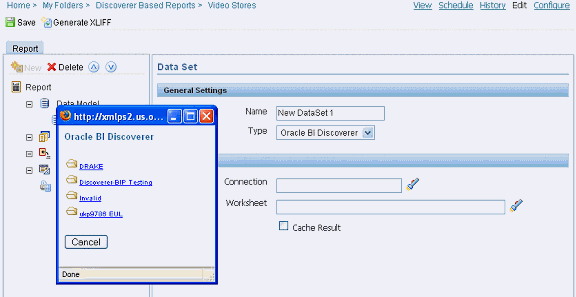
After you have selected a connection, click the flashlight icon to the right of the Worksheet field. Navigate to and select the workbook and then the worksheet to use in the report.
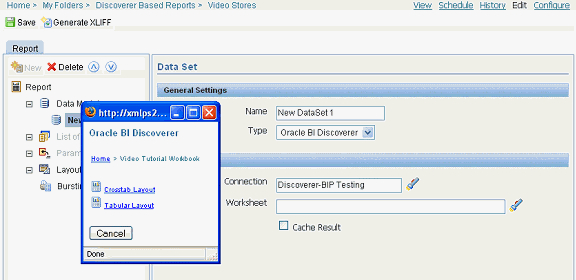
The fully qualified path to the worksheet is entered in the Worksheet field.
Regardless of whether the Discoverer worksheet is a tabular or crosstab layout, the Discoverer Web service returns the data to Oracle BI Publisher as flat tabular data. This is by design so that you can take full advantage of the layout capabilities in BI Publisher. You can lay out this data as a crosstab in BI Publisher.
Save the report by clicking the Save icon on the upper-left side of the page below the navigation links to the report.
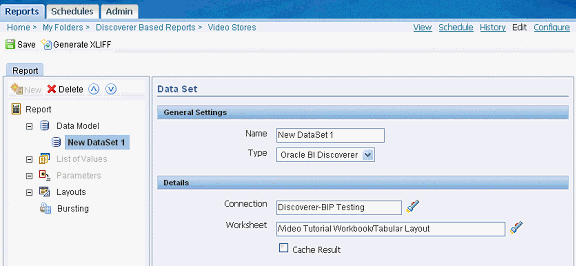
When the report is saved, click the View link in the upper-right corner of the screen to the right of the navigation links to see that the Discoverer worksheet that you selected returns data to the report. If the worksheet contains parameters, then you might need to select values other than the default ones and click View to get the worksheet to return data.
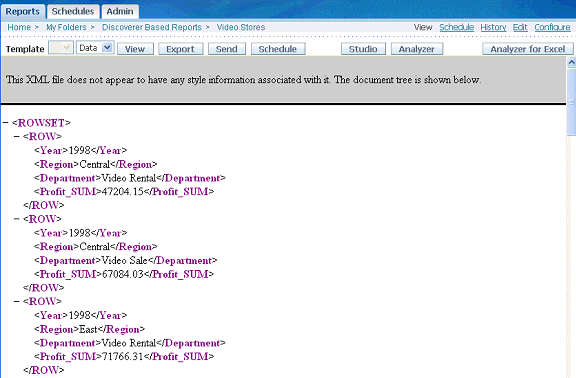
You have successfully created a report with a data model based on a Discoverer worksheet.
At this point, you can continue by creating a layout template by using either the online method or offline method. Continue with the section entitled Section 18.2.3.1, "About Creating Layout Templates".
You can also create a report using Oracle BI Publisher Template Builder, an Add-in to Microsoft Office Word.
If you have not installed Oracle BI Publisher Template Builder, then download it by clicking the Template Builder link in the Developer Tools section on the left side of any page, visible in the BI Publisher Web interface when viewing any folder below Home in the report repository.

Then run the BIPublisherDesktop.exe that is downloaded. This installs Oracle BI Publisher Template Builder.
Note that you should exit all Microsoft Office products before installing and that you might also be prompted to download and install Microsoft .Net 2.0 if it was not previously installed.
After the installation is finished, continue with the following steps.
Start Microsoft Word. Connect to the Oracle BI Publisher server by selecting Log On from the Oracle BI Publisher menu.

In the Oracle BI Publisher Login dialog, supply your Oracle BI Publisher user name and password. Note that, if this is the first time that you are logging into the Oracle BI Publisher server, then you must supply the report server URL (for example, myserver.company.com:7779/xmlpserver).
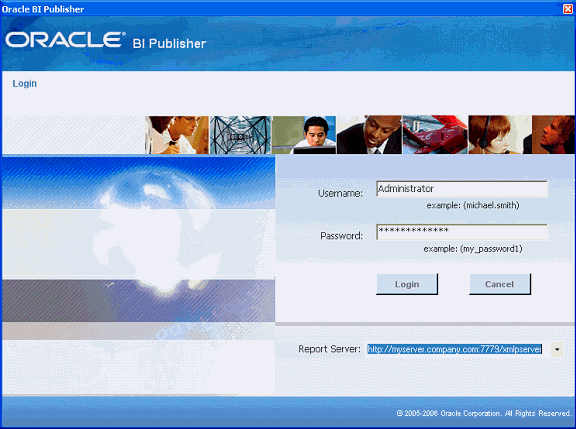
After the first log in, you can select the Report Server from the drop-down list.
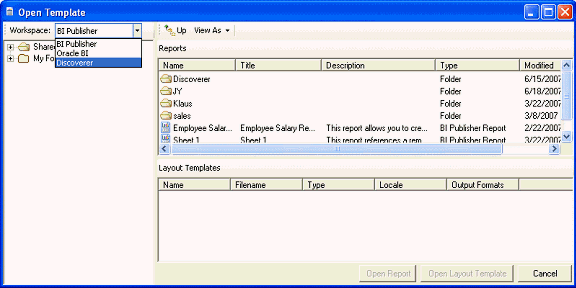
When connected, you see the Open Template dialog. Select Discoverer from the Workspace list.
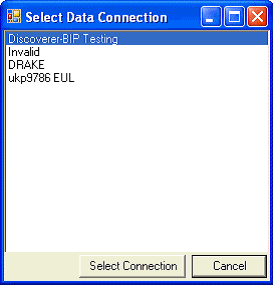
Complete the Select Data Connection dialog.
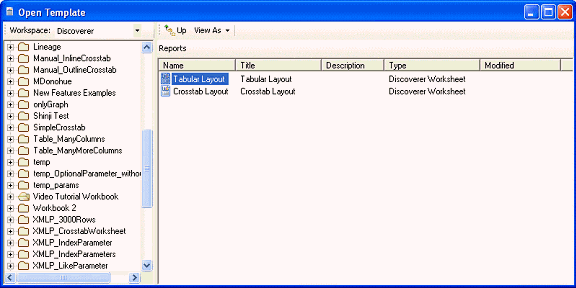
When you have selected a Discoverer connection, the Open Template dialog displays a list of workbooks on the left. As you select workbooks, the worksheets display in the right pane. Navigate through the workbooks and select a worksheet by double-clicking the worksheet name.
You are prompted to save the worksheet as an Oracle BI Publisher report. You can navigate through the Oracle BI Publisher report repository and select the folder where the report is created.
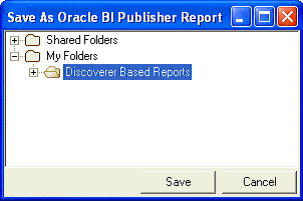
A report is created that has a name of the form workbook.worksheet and it uses that worksheet as the data set. You cannot name or rename the report from this dialog or from the Template Builder. If a report exists with that name, then a new report is not created and the existing report remains as it is. If you want to rename the report, then use the Web interface to the Oracle BI Publisher report server.
At this point you can proceed with creating a layout template by following the online method described below. Continue with the section entitled Section 18.2.3.1, "About Creating Layout Templates".
BI Publisher provides several types of layout templates. The most common are RTF layout templates created using the Template Builder. You can also create PDF templates in Adobe Acrobat, eText templates, and Adobe Flex templates. This document briefly describes only the process of creating an RTF layout template. See Oracle Business Intelligence Publisher Report Designer's Guide for more details on creating other types of templates and for more depth on RTF templates.
Note that even though a layout template created with the Template Builder is in RTF format, at run time the layout template is converted to Extensible Stylesheet Language Formatting Objects (XSL-FO) and the report output format can be PDF, HTML, Excel, PowerPoint, and RTF.
There are two methods you can use to create an RTF layout template for a report:
Offline - meaning not connected to the Oracle BI Publisher report server. Using the offline method, you generate sample XML data for the report. This method has the advantage that you place no load on the report server or underlying data source while creating the layout. It is also the preferred method if the report returns a large amount of data or has parameters that must be set to limit the amount of data returned or to ensure that some data is returned.
Online - meaning connected to the Oracle BI Publisher report server. The online method enables you to connect directly to the report server to download report data. This method is suitable if the report has been set up to provide a reasonable amount of data. This method also can be seamlessly integrated with the indirect method of creating a Discoverer report as described above.
Generate sample XML data.
From the Oracle BI Publisher Web interface, navigate to the report to create a layout against, and select View to see the report output.
If there are parameters that can be set to either reduce the amount of data or to ensure that some data is returned, then set the parameter values and click the View button.
Then select Data from the menu to the left of the View button and click the Export button.

A new browser or tab opens that contains the exported XML data.
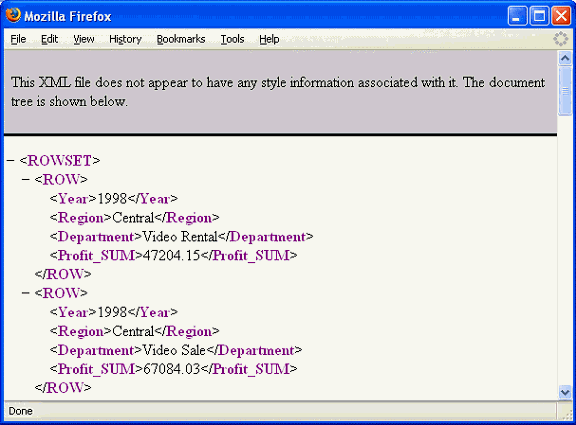
Using the Web browser's File menu, save the file with an XML extension.
If the size of the XML file is still excessive, then open it in a text editor and remove data from the file to get it to a smaller size. Ensure that you preserve the tag structure in the file. Ensure that you have enough data so that previewing the report shows how the actual report is generated. For example, if you plan to group data by year, then ensure that you include some data from at least two years, so that you can confirm that the grouping displays as you want.
Upload the sample XML data file to the Template Builder.
After you generate the sample XML data file, move it to the computer on which you run the Template Builder. From the Oracle BI Publisher menu or the Template Builder toolbar, load the sample XML data.
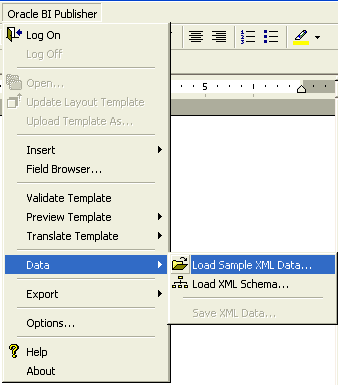
Now that you have uploaded the sample XML data to the Template Builder, you can use the Template Builder Insert menu and toolbar to launch wizards and dialogs that help you create the layout template. You can also insert any boilerplate text and you can format fields and tables using standard Microsoft Office Word layout and formatting functionality.
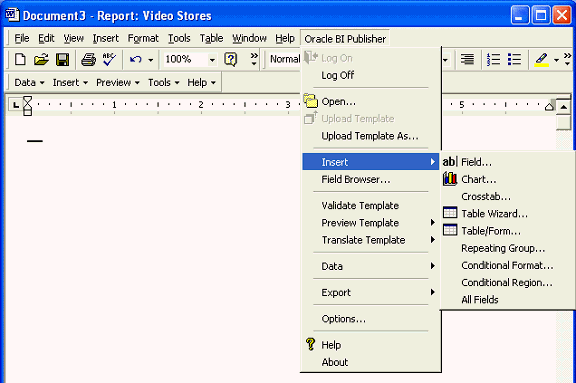
The following figure shows the Template Builder Insert Menu:
The following figure shows the Template Builder Insert Toolbar:
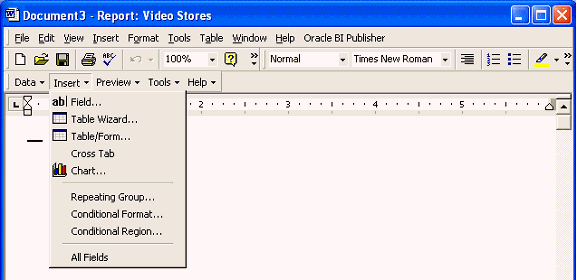
You can also manually include data field tags and other markup in the template using BI Publisher's simplified tags for XSL expressions. These tags associate the XML report data to the report layout. If you are familiar with XSL and prefer not to use the simplified tags, then Oracle BI Publisher also supports the use of pure XSL elements in the template.
See the section "Creating an RTF Template" in Oracle Business Intelligence Publisher Report Designer's Guide for more details, available from the Documentation pages on the Oracle Technology Network (OTN) or directly at:
http://download.oracle.com/docs/cd/E10091_01/doc/bip.1013/b40017/T421739T481157.htm
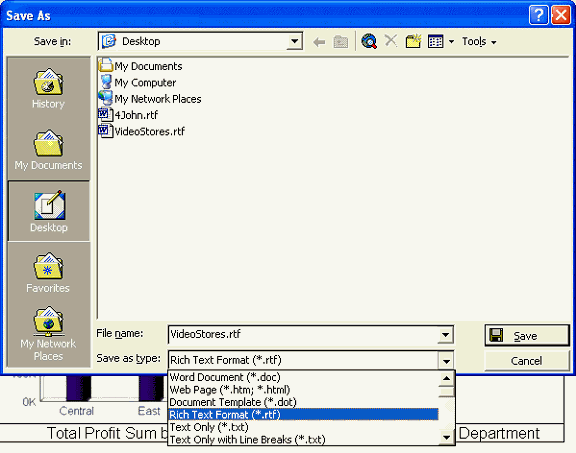
Save the layout template as an RTF file.
From the File menu, select Save As. Ensure that you set the type to Rich Text Format (*.rtf).
Preview the report output.
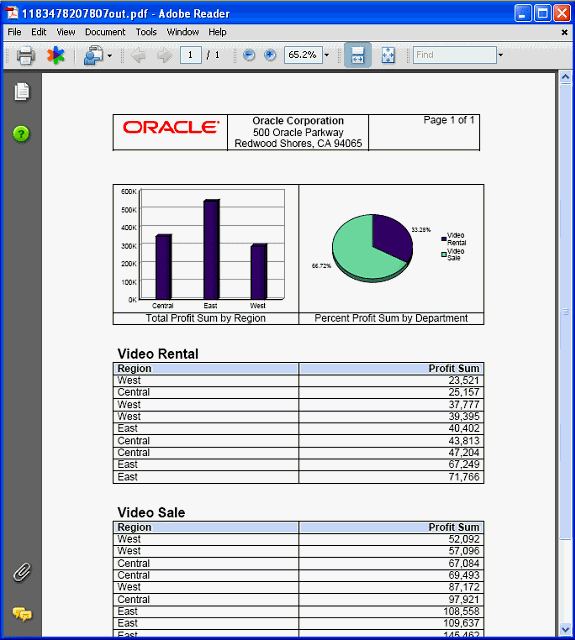
After you have created and formatted the layout, you can preview it in the desired output format from the Template Builder to confirm that you have created the layout exactly as you want. Previewing generates the output document, merging the layout template that you just created with the data that is loaded in the Template Builder.
Select the desired output format from the Preview menu item on the Template Builder toolbar or from the Oracle BI Publisher menu.

You see the generated document in the application suitable for displaying the requested output format. The following figure shows an example of previewing PDF output in Adobe Reader.
Upload the RTF template to the report.
When you have made the desired changes to the RTF template, save it to the file system. Return to the Oracle BI Publisher Web interface and navigate to the report that is associated with this layout template.
From within the report edit page of the Oracle BI Publisher web interface, select Layouts from the Report tree. In the Manage Template Files section of the Create Layouts frame, click the Browse button to select the RTF template. When the RTF template is selected and the Upload Template field is populated with the full path to the RTF template, click the Upload button.
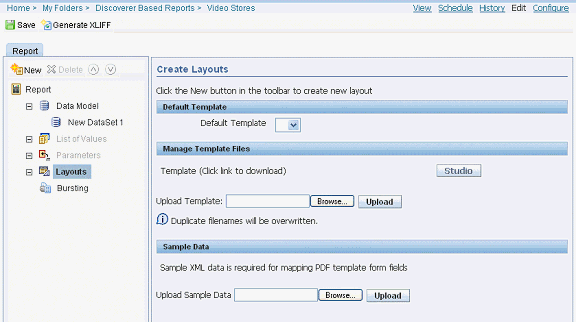
You then see the uploaded template in the Manage Template Files section of the page.

Create a named layout and associate it with the template file.
From the report tree, with Layouts still selected, click the New button at the top of the report tree to create a new layout.
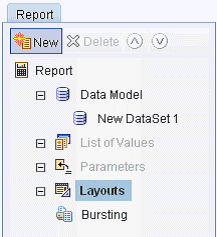
Provide a name for the layout and associate it with the template file that you uploaded. You can also optionally determine what output formats are available for this layout.

Save the report.
Ensure that you save the changes that you have made to the report by clicking the Save button below the path to the report.

Continue with Section 18.2.3.4, "Viewing and Scheduling Reports".
Connect to the Oracle BI Publisher report server through the Template Builder.
Note:
If you have followed the method described above to create a report indirectly through the Oracle BI Publisher Template Builder, then you are logged on to the Oracle BI Publisher Server and the report is open. Skip ahead to Step 3 Create a layout template.If you have not previously logged on to the Oracle BI Publisher server, then do so by following these steps:
Start Microsoft Word. Connect to the Oracle BI Publisher server by selecting Log On from the Oracle BI Publisher menu.
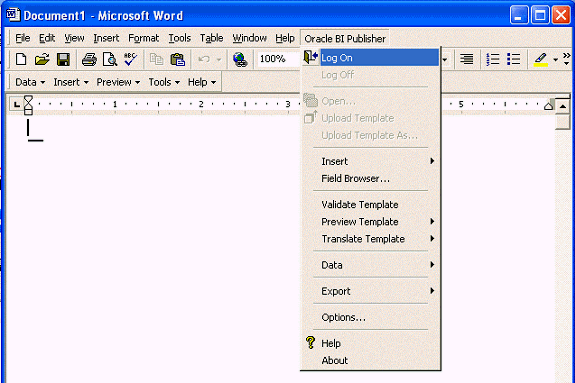
In the Oracle BI Publisher Login dialog, supply your Oracle BI Publisher user name and password. Note that if this is the first time that you are logging into the Oracle BI Publisher server, then you must supply the report server URL (for example, myserver.company.com:7779/xmlpserver).

Create or open the desired report.
The method for creating a report indirectly through the Template Builder is described above in the section entitled Section 18.2.3, "Creating a Report Indirectly Through Oracle BI Publisher Template Builder".
To open an existing report, in the Open Template dialog, select BI Publisher as the Workspace. Navigate through the folder tree until the appropriate report is displayed in the list of reports.
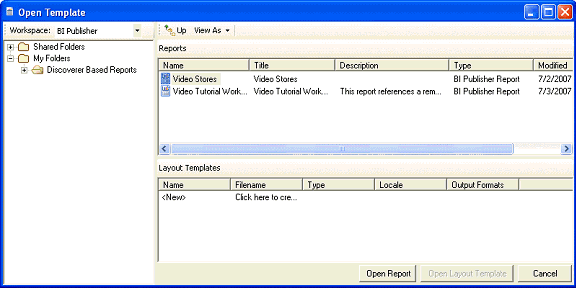
Select the report name and click Open Report. Alternatively, select the report and then select <New> or any one of the existing layout templates listed in the Layout Templates section and click Open Layout Template.
When you have opened an existing report or layout template or created a new report or new layout template, the data model definition and fields and data are loaded into the Template Builder and you can start to create the layout template.
Now that you have opened or created a report based on a Discoverer worksheet, you can use the Template Builder Insert menu and toolbar to build the layout template.
See Step 3 in Section 18.2.3.2, "Creating a Layout Template Offline" for guidance on creating a layout template.
Save the layout template as an RTF file.
From the File menu, select Save As. Ensure that you set the type to Rich Text Format (*.rtf).
See Step 4 in Section 18.2.3.2, "Creating a Layout Template Offline".
Preview the report output.
See Step 5 in Section 18.2.3.2, "Creating a Layout Template Offline".
Upload the RTF layout template to the Oracle BI Publisher server.
When you have completed the layout template, upload it to the BI server. Select Upload Template As from the Oracle BI Publisher menu.
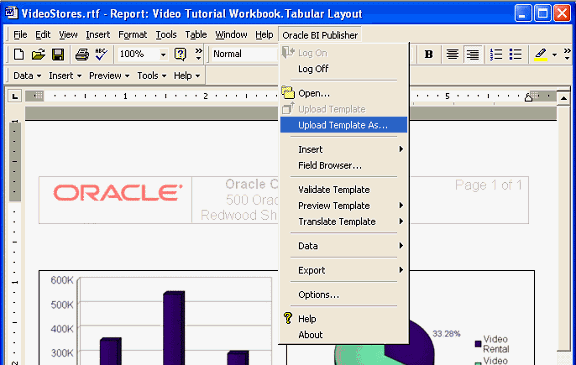
If this is a new template, then you are prompted for a template name. Enter the template name and click OK.

When the template is uploaded, you see a notification dialog. Click OK.

The template has been added to the report.
Continue with Section 18.2.3.4, "Viewing and Scheduling Reports".
See "Viewing and Scheduling Reports" in Oracle Business Intelligence Publisher Report Designer's Guide available from the Documentation pages on the Oracle Technology Network (OTN) or directly at:
http://download.oracle.com/docs/cd/E10091_01/doc/bip.1013/b40017/T421739T421742.htm
This section describes the prerequisites, limitation, and known issues in this release.
The following are prerequisites for this release:
Oracle BI Publisher 10.1.3.3
Oracle BI Discoverer 10.1.2.3 or Discoverer 10.1.2.2 with a Discoverer one-off patch that includes the Discoverer Web Service
Discoverer configured to use Oracle Application Server Identity Management
The following are limitations with this release:
Only one Discoverer Web Service can be configured per Oracle BI Publisher server or cluster.
An Oracle BI Publisher report can contain only one data set based on a Discoverer worksheet.
The Discoverer Web Service does not support Oracle Applications Single Sign On (SSO), Oracle Applications ICX and non-SSO modes.
The following are known issues in this release:
Issue: Unable to enter parameter values directly for parameters that have associated list of values.
Description: For Discoverer worksheets that have a parameter based on a List of Values (LOV) or an underlying item has an associated LOV, BI Publisher only allows parameter value selection from the LOV. Users cannot directly enter parameter values as they can in Discoverer.
Workaround: If users want to allow other users to enter parameter values directly, then they must remove the associated LOV in the Discoverer worksheet or item.
Issue: BI Publisher cannot communicate with the Discoverer Web Service when Discoverer is configured with Secure Socket Layer (SSL) (that is, uses https://)
Description: You might be unable to make any calls to the Discoverer Web Service. You might see errors such as "SSL received a record that exceeded the maximum permissible length."
Workaround: When using a Web service that is protected through SSL, you might need to export the certificate from the Web server that is hosting the Web service and import it into the Java keystore on the computer that is running BI Publisher. This step should not be required if the server certificate is linked to some certificate authority (such as Verisign); the default Java keystore can handle that. But if the Web service server is using some self-generated certificate (such as in a testing environment), then you must perform the export and import.
Issue: Discoverer server CPU reaches 100%.
Description: If a report that is based on a Discoverer worksheet takes several minutes to return data and a user becomes impatient and repeatedly clicks the View or Export buttons, then this can overwhelm the Discoverer Server with requests and it might stop responding.
Workaround: There is no workaround for this issue except to not repeatedly click the View or Export buttons while waiting for a report to return data.
Issue: BI Publisher does not return values for a Discoverer worksheet parameter's list of values past the 1000th value.
Description: Oracle BI Publisher limits the number of values in a list of values to 1000.
Workaround: Administrators can change this limit by setting the property DISCO_LOV_LIMIT in the xmlp-server-config.xml file. Example:
<property name=" DISCO_LOV_LIMIT " value="2000"/>
Note that the larger the list of values, the slower it renders.
Issue: See the following error when trying to open a report in the Template Builder: "'Error occurred. Please check the settings and try again.'"
Description: You might be loading a report that returns too much data for the Template Builder to handle.
Workaround: Use the method described above for creating a layout template offline. Ensure that you reduce the amount of data in the generated XML file.