| Oracle® BPEL Process Manager Order Booking Tutorial 10g (10.1.3.1.0) Part Number B28987-01 |
|
|
View PDF |
| Oracle® BPEL Process Manager Order Booking Tutorial 10g (10.1.3.1.0) Part Number B28987-01 |
|
|
View PDF |
This chapter of the tutorial describes how to invoke an asynchronous service.
This chapter contains the following topics:
This phase of the tutorial adds to the OrderBooking process you created in Chapter 2, "Invoking a Synchronous Service". Ensure that you have successfully completed that phase before performing this one. In this phase, you build a simple asynchronous BPEL process. You perform the following key tasks:
Deploy an asynchronous Rapid Distributors service.
Create a partner link to interact with the Rapid Distributors service.
Design the BPEL process to invoke the Rapid Distributors service.
Deploy the BPEL process.
Run the deployed BPEL process from Oracle BPEL Control by completing and submitting an order form to the Rapid Distributors service.
Review the supplier price returned from the Rapid Distributors service to the client.
This section contains the following tasks:
During this tutorial, the BPEL process that you design communicates with the Rapid Distributors and Select Manufacturing services. You must first start these services and test that they are running.
Select Start > All Programs > Oracle - Oracle_Home > Oracle BPEL Process Manager > Developer Prompt to open up an operating system command prompt at the SOA_Oracle_Home\bpel\samples directory.
Change directories to the tutorials\127.OrderBookingTutorial\PriceQuote subdirectory.
cd tutorials\127.OrderBookingTutorial\PriceQuote
Enter the following command:
ant
This deploys and starts the Rapid Distributors service required for using this phase of the tutorial. If successful, a message appears at the end:
BUILD SUCCESSFUL
The Select Manufacturing service and user application are also created. You use these services later in Chapter 4, "Adding Parallel Flow".
Access Oracle BPEL Control to see if all required services are running by selecting Start > All Programs > Oracle - Oracle_Home > Oracle BPEL Process Manager > BPEL Control.
Enter the following details to log into Oracle BPEL Control and click Login:
| Field | Value |
|---|---|
| Username | oc4jadmin |
| Password | password |
Where password is the value you entered during installation.
The services for this phase are running if RapidDistributors and SelectManufacturing display in the Dashboard tab.
Summary:
You now create the partner link for the Rapid Distributors service.Return to Oracle JDeveloper.
Select Services from the Component Palette section.
Drag and drop a PartnerLink activity from the Component Palette section onto the right side of the designer window.
Enter the following values to create a partner link for the Rapid Distributors service:
Note:
For the WSDL File field below, click the flashlight (the second icon from the left named Service Explorer) to access the Service Explorer window for automatically selecting the Rapid Distributors service deployed in "Starting and Testing Your Services".| Field | Value |
|---|---|
| Name | RapidDistributors |
| WSDL File | Access this URL by clicking the Service Explorer flashlight icon and expanding and selecting BPEL Services > my_ integration_server_connection > processes > default > RapidDistributors
http://localhost:8888/orabpel/default/RapidDistributors/RapidDistributors?wsdl See Also: "Setting the Hostname in Your Oracle JDeveloper Web Browser Preferences" if you receive a parsing error when attempting to add a WSDL file in the Service Explorer window. |
| Partner Link Type | RapidDistributors |
| Partner Role | RapidDistributorsProvider |
| My Role | RapidDistributorsRequester |
Click OK.
Select Save from the File main menu.
Select Process Activities from the Component Palette section.
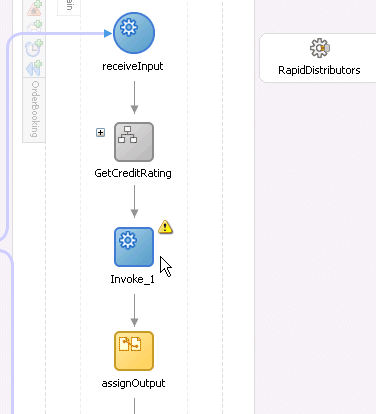
Drag and drop an Invoke activity from the Component Palette section to below the GetCreditRating Scope activity.

Double-click the Invoke icon to display the Invoke window.
Enter the following details:
| Field | Value |
|---|---|
| Name | invokeRD |
| Partner Link | RapidDistributors |
The Operation (initiate) field is automatically filled in.
Click the first icon to the right of the Input Variable field. This is the automatic variable creation icon.
Click OK on the Create Variable window that appears.
A variable named invokeRD_initiate_InputVariable is automatically created in the Input Variable field. This variable is automatically assigned a message type of RapidDistributorsRequestMessage.
Click OK.
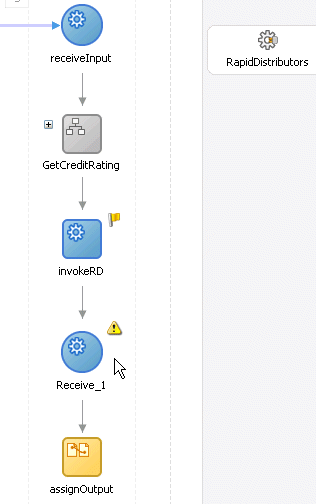
Drag and drop a Receive activity below the invokeRD Invoke activity you just created.

Double-click the Receive icon to display the Receive window.
Enter the following details:
| Field | Value |
|---|---|
| Name | receiveRD |
| Partner Link | RapidDistributors |
The Operation (onResult) field is automatically filled in.
Click OK on the Create Variable window that appears.
A variable named receiveRD_onResult_InputVariable is automatically created in the Variable field. This variable is automatically assigned a message type of RapidDistributorsResponseMessage.
Click OK.
Select Save from the File main menu.
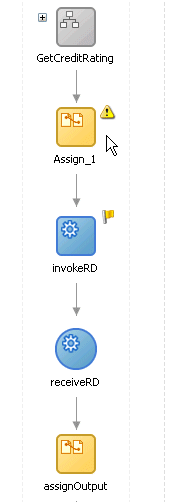
Drag and drop an Assign activity from the Component Palette section to above the invokeRD Invoke activity you just created.

Double-click the assign icon to display the Assign window.
Click the General tab.
Enter assignRDIn in the Name field.
Click Apply.
Click the Copy Operation tab.
Click Create and select Copy Operation to display the Create Copy Operation window.
| Field | Value |
|---|---|
| From | |
|
Variable |
|
Expand and select Variables > inputVariable > payload > ns1:PurchaseOrder > ns1:OrderItems
Note: The namespace number values (for example, ns1, ns2) can vary. Use the namespace values that automatically appear. |
| To | |
|
Variable |
|
Expand and select Variables > invokeRD_initiate_InputVariable > payload > ns1:OrderItems |
Click OK to close the Create Copy Operation window and the Assign window.
Select Save from the File main menu. In this phase of the tutorial, you do not create an additional Assign activity to explicitly copy the received data of invokeRD_initiate_InputVariable into another variable.
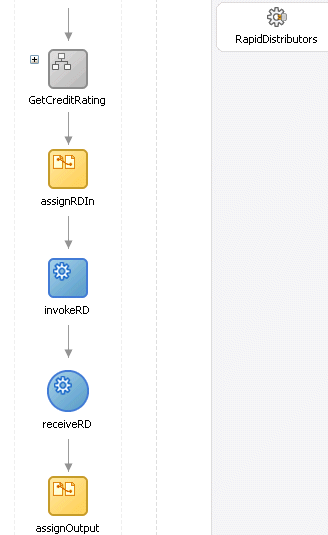
When complete, the designer window looks as follows:

Note:
This tutorial describes how to deploy BPEL processes in Oracle JDeveloper. When you deploy a process with the same name and version, you are prompted to overwrite the currently-deployed BPEL process or deploy to a new version number. The best practice is to always deploy to a new version (as described in this tutorial). Redeploying a process with the same version can have consequences, such as instances being marked as stale.If you deploy BPEL processes in this tutorial using ant from the command line, you are not prompted; instead, the process is automatically overwritten. Follow these steps to deploy a process to a new version:
Open the SOA_Oracle_Home\bpel\utilities\ant-orabpel.properties file.
Change the rev property value. For example, change rev = 1.0 to rev = 2.0.
Deploy the process using the ant command.
Go to the Application Navigator section.
Right-click OrderBooking.
Select Deploy > my_integration_server_connection > Deploy to default domain.
The Deployment Properties window appears.
Increment the version number of the project (for example, enter 1.1) and click OK. When you access Oracle BPEL Control, a new version of the OrderBooking process appears, along with the phase 1 OrderBooking process version you created in "Validating, Compiling, and Deploying the Order Booking Process".
This compiles the BPEL process. Check for errors by clicking the buttons at the bottom of the window. If there are no errors, deployment was successful. If deployment was unsuccessful, see Step 4.
Access Oracle BPEL Control by selecting Start > All Programs > Oracle - Oracle_Home > Oracle BPEL Process Manager > BPEL Control (or refresh the page if it is already open).
Enter the following details to log into Oracle BPEL Control and click Login:
| Field | Value |
|---|---|
| Username | oc4jadmin |
| Password | password |
The Dashboard tab of Oracle BPEL Control appears. Note that two versions of the OrderBooking process appear: 1.0 and 1.1. The new version, 1.1, becomes the default version, so an asterisk appears to the right.
Click the OrderBooking version you increased in Step 4 (for this example, (v. 1.1)) in the Deployed BPEL Processes list.
Enter details in all fields of the HTML Form. You can also use a text editor to copy and paste these details from the contents of the OrderBookingPO_1.xml file you copied into the OrderBooking directory in Step 16:
Note:
Do not copy and paste from Internet Explorer or Mozilla Firefox. You must use a text editor to perform this task.Click the XML Source radio button.
Copy and paste the contents of OrderBookingPO_1.xml into the field that appears.
Click Post XML Message.
The BPEL Processes tab displays a message similar to the following:
Test Instance Initiated
Verify that the OrderBooking, CreditRatingService, and RapidDistributors instances were created. All should appear in the Instance list. The Last Modified list displays the times at which they were created.
Click the instances.
Click the Audit and Flow links to follow the instance execution process.
Click More to the right of receiveRD under the Audit link for the OrderBooking instance.
Click view xml document to see the returned supplier price (returned in the variable receiveRD_onResult_InputVariable).

Verify other process states and variable values at different stages.
Note:
Throughout this tutorial, RapidDistributors always quotes a price of 5000.You have now built a simple asynchronous BPEL process that received a supplier price for an order from a service. You performed the following key tasks:
Deployed an asynchronous Rapid Distributors service.
Created a partner link to interact with the Rapid Distributors service.
Designed the BPEL process to invoke the Rapid Distributors service.
Deployed the BPEL process.
Ran the deployed BPEL process from Oracle BPEL Control by completing and submitting an order form to the Rapid Distributors service. Since the Rapid Distributors service was an asynchronous service, an extended time interval between the external service request and response is possible.
Reviewed the supplier price returned from the Rapid Distributors supplier service to the client.