| Oracle® Retail Price Management User Guide Release 16.0 E80052-01 |
|

 Previous |
 Next |
This chapter explains how to access and use the RPM application.
In this section, you will learn how to access the RPM workspace.
How you access Oracle Retail Price Management depends on how the application is set up at your location. Contact your system administrator for instructions. Use the exit procedure when you are done using the application.
To log out and close RPM:
Click Logout in the global links area of the header.
If any tasks are open, you are prompted to confirm your decision to log out.
Select Exit from the File menu.
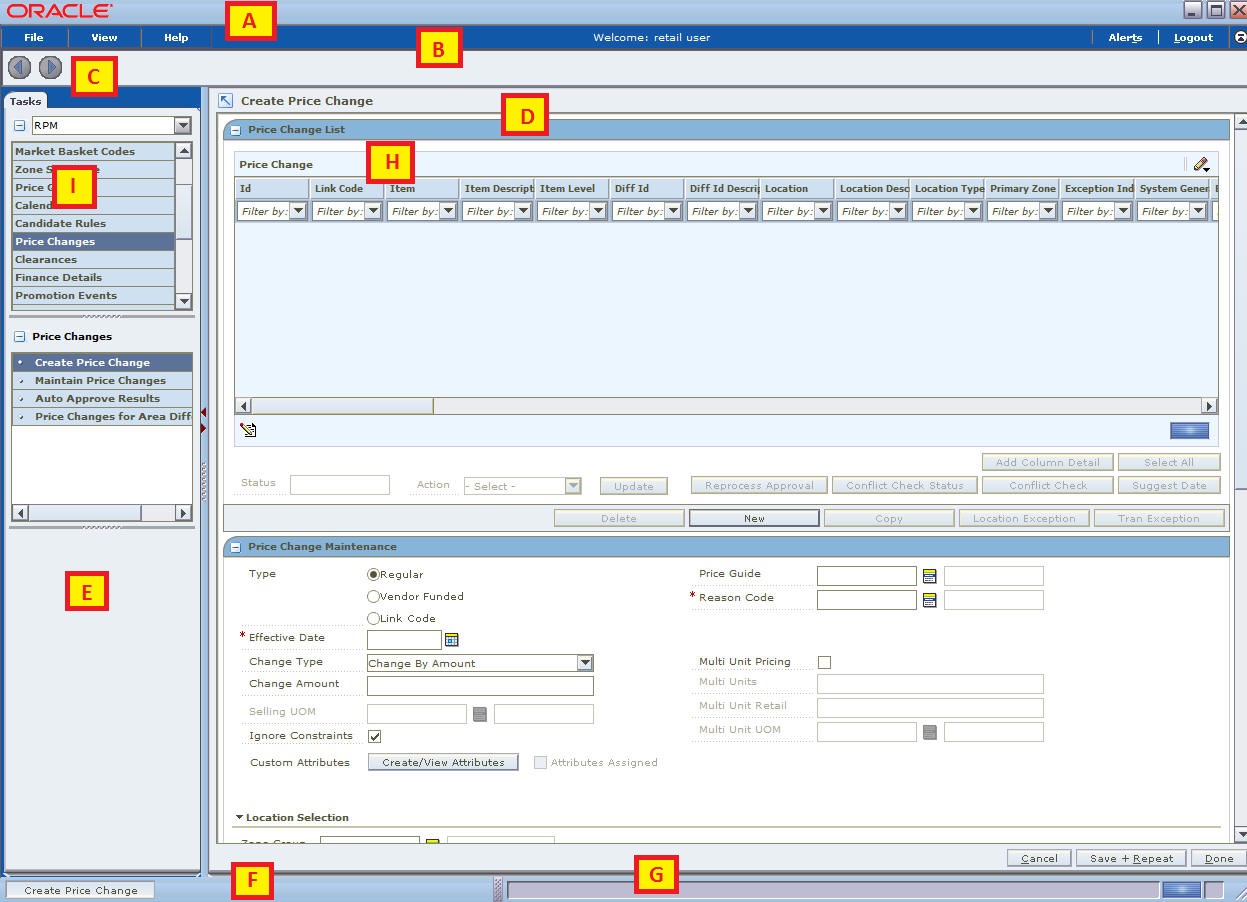
After logging in to RPM, you have access to the application window. The primary elements in the application window are as follows:
The workspace is made up of all the elements within the application window. You can manage the application and perform tasks within the workspace. Many of the elements within the workspace can be minimized, maximized, or manually resized. This allows you to customize the workspace to fit your work habits. Any changes you make are remembered by the application. The next time you log in, the elements appear as you last left them.
Table 1-1 Workspace Elements
| Element | Purpose | |
|---|---|---|
|
A |
Title Bar |
Located at the top of the window. The title bar displays the product name. The three buttons at the far right on the title bar allow you to minimize, restore, maximize, and close the application window. |
|
B |
Header |
Located below the title bar. The header provides access to commands that remain static across all tasks. The menu bar and welcome message appear here. |
|
C |
Toolbar |
Located below the header. The toolbar contains paging control icons. |
|
D |
Workspace |
Located next to the task pad and below the toolbar. What appears in the workspace depends on what you select on the task pad. The workspace is where you complete the tasks assigned to you. |
|
E |
Task pad |
Located on the left side of the application window. From top to bottom, you can access an application, a task group, and then a task. When you select a task, the contents of the task are displayed in the workspace. |
|
F |
Task bar |
Located at the bottom of the window. Task buttons, located on the task bar allow you to switch between open tasks. |
|
G |
Status bar |
Located at the bottom of the window. The status bar lists the status of a task and gives other information. |
|
H |
Pane |
A sub-section of a window that appears in the work space. Multiple panes may appear in the workspace when a task is selected. |
|
I |
Task |
A pane or a group of panes that appear in the workspace, allowing you to work. |
The benefits of resizing become apparent as you customize the workspace to fit your work habits. You can hide or minimize elements that do not pertain to the current task. You can show or maximize the elements that are of greater importance.
You can resize the RPM window to increase or decrease the amount of space it occupies on your desktop.
To manually resize the window, place the cursor over the edge of the window. When the cursor changes to a double arrow, press and hold the left mouse button. Move the cursor until the window is of the desired size. Release the left mouse button.
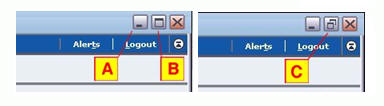
To minimize the window, click the minimize icon (A).
To maximize the window, click the maximize icon (B).
To restore the window to its previous size, click the restore icon (C).
As an alternative method for resizing the window, right click on the RPM button found on the Microsoft Windows task bar. On the context menu that appears, select Restore, Minimize, or Maximize.
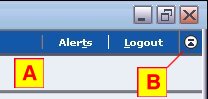
Although the toolbar occupies relatively little space in the window, you can choose to hide it or show it.
To collapse the toolbar (A), click the expand/collapse toolbar icon (B). The icon is located on the far right side of the header.
To expand the toolbar, click again on the same icon.
The workspace is likely to be the most used element in the application. As such, you may want to maximize its size. Should you need to access the task pad, restore the content area to its original size.
To expand the workspace, click the arrow icon (B). The icon is located on the upper left corner of the content area. The content area expands to the width of the window. The task pad and the toolbar disappear.
To restore the window to its original size, click again on the arrow icon. The task pad and toolbar reappear.
The task pad provides access to the tasks assigned to you. Once you are working on a task, you may want to reduce the size of the task pad. You may want to increase the size of the task pad in order to see the full names of the task. As you increase or decrease the width of the task pad, the width of the workspace is resized proportionally.
To maximize the task pad, click the right arrow on the separator bar (A). To minimize the task pad, click the left arrow.
Note that the width of the task pad can be one of three sizes:
Maximized to the width of the application window
Minimized to where it is no longer visible
Restored to its previous size
To manually resize the width of the task pad or the length of the work areas within the task pad, place the cursor over the desired resizer. When the cursor changes to a left/right (or an up/down) arrow, press and hold the left mouse button. Drag the resizer until the task pad or work area is the desired size. Release the mouse button.
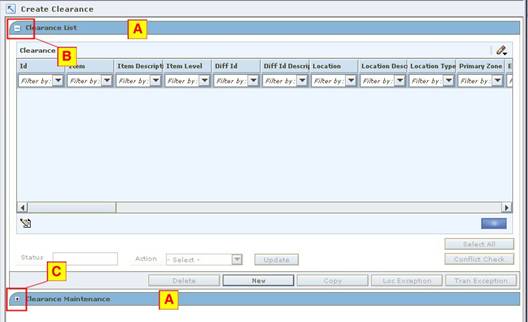
One or more panes appear in the workspace when you select a task on the task pad. You can minimize a pane so that it does not distract you from the panes you want to work on. Only the title bar of the pane is displayed after you minimize the pane.
To collapse a pane (A), click the collapse icon (B).
To expand a pane, click the expand icon (C).
The basic method for entering data in a text field is to type the text in the field. Some fields are restricted, however, as to the type of data that may be entered. The options for entering or selecting data depend on the type of data that may be required or permitted in the field. For example, some fields permit only numeric data, while others permit only alphabetic or alphanumeric data. Some fields require a date to be entered in a specific format. Some fields permit only one value, while others permit multiple values.
Calendars, drop-down lists, lists of values, and transfer boxes provide you with access to preformatted or predefined values. The following instructions are for using these tools.
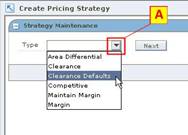
Some fields are restricted to a predefined list of values. You can access a drop-down list from which you can pick the desired value.
Click on the drop-down arrow (A) next to a field. A list of predefined values appears.
Scroll through the list until the desired value appears. Select the value. The field is automatically filled in with the selected value.
When a drop-down list has many values, you can typically access them from the list of values (LOV) button. The following figure is an example list of values for Currency.
Click the LOV within the text field (A). The list of values opens. The number of values in the list and the total number of values appears at the bottom (C) of the LOV.
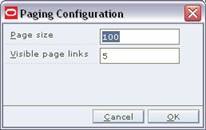
Click the page icon (B) to open the Paging Configuration window and adjust the page size and page links.
To find a value, use one or a combination of the following methods:
Scroll through the list.
Enter a partial value in the Filter by text box (A) and press Enter. Select the desired value from the results.
Select the down arrow next to the Filter by text box (A) and use the Advanced Filter option. Enter conditions in the Advanced Filter and click OK.
Enter the wildcard (%) and letters before or after it in the Filter by text box (A) to limit values.
Select the value and click Select. The field is automatically filled in with the selected value.
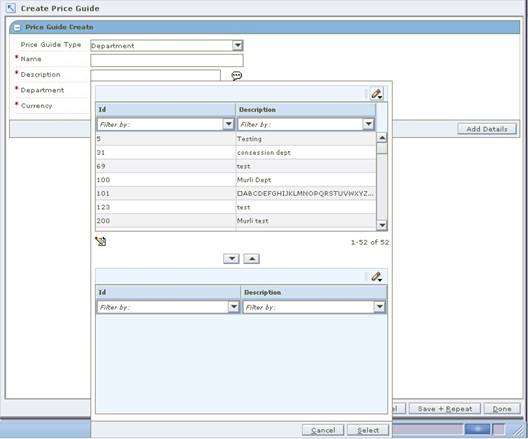
Some lists of values allow you to select more than one value. These lists have a multi-select LOV button. You can select multiple rows by using the Shift and Control keys along with the mouse button, as you can with many other Windows applications. The following figure shows a multi-select list of values for Department.
Click the LOV next to a text field, or click the down arrow. The list of values opens.
Select a row.
Press Shift and click on another row to select that row and all the rows in between.
You search for records when none are displayed. By entering search criteria, you indicate which records must be displayed for your use. Filtering, on the other hand, allows you to reduce the number of records (or values) displayed. Again, you enter criteria indicating which of the currently displayed records must remain visible. The unwanted records are hidden from view. In either case, you are restricting the number of records (or values) displayed to a more manageable and useful number.
Column-level filtering is available in tables that have drop-down lists.
To use a simple filter, select a filter value from the drop-down list.
You can also enter a partial value to limit the choices in the list:
Enter a partial string in the active cell. For example: Enter D or d to retrieve all records that begin with D, such as Department.
Press the Enter key. The records that match the value you entered are displayed in the table.
To show all records again, select Clear Filter.
To use the advanced filter tool:
Click the down arrow in the active cell and select Advanced Filter. The Advanced Filter window opens.
Select a relational operator in the first list box. Then select a value in the second list box.
If another condition is necessary, select a logical operator (And or Or). Then select the second relational operator and value.
Click OK. The records that match the conditions are displayed in the table.
To show all records again, click on the down arrow in the active cell and select Clear Filter.
To reuse a filter:
Click the down arrow in the active cell.
Scroll through the list of recent filters; then select the desired filter.
To show all records again, click on the down arrow in the active cell and select Clear Filter.
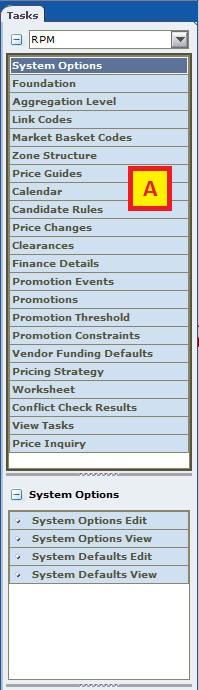
Oracle Retail Security Manager (RSM) is integrated into the RPM application. If you have the necessary security privileges, you can switch between RPM and RSM at any time during your RPM session. (There is no separate login required for RSM, and you cannot start RSM separately from RPM.)
To switch between RPM and RSM, select from the drop-down list on the Task Pad.
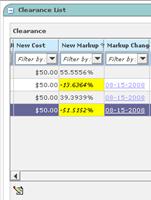
When a price change, clearance, or promotion results in a negative margin, the New Markup % field will be highlighted to alert the user. These alerts are provided when you apply a price change, clearance, or promotion. You can take appropriate action to change pricing, or you can approve the price change, clearance, or promotion with the negative margin.
Negative margin alerts are also provided in the Price Inquiry window.
Before you approve price changes, clearances, and simple promotions, you can view the price change and cost change history for items or locations in the price event. You can view the following details:
Up to 10 previous dates with price changes and/or cost changes (the number depends on your system options settings)
Up to three future dates with price changes and/or cost changes
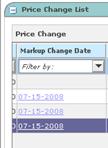
The Markup Change Date fields in the Price Changes list are displayed as hyperlinks, as shown in the following figure.
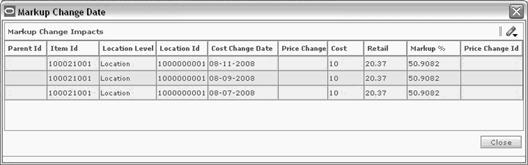
When you click on a link, the Markup Change Date dialog opens.
|
Note: If a price change was created using a link code, or if a promotion was created at a level higher than the parent, the Markup Change Date column is empty. |
The information displayed in the Markup Change Date dialog is as follows:
Table 1-2 Markup Change Date Dialog Fields and Description
| Field | Definition |
|---|---|
|
Parent ID/Diff |
This column has a value when the price event is created at the Parent ID/Diff level. |
|
Item ID |
This column has a value when the price event is created at the transaction item level. |
|
Location Level |
This column displays either Zone or Location. |
|
Location ID |
This column displays either the Zone ID or the Location ID. |
|
Cost Change Date |
This is the effective date of the past or future cost change. |
|
Retail Change Date |
This is the effective date of the past or future retail change. |
|
Price Change ID |
This column contains the ID of the price change for the retail change, if there was a retail change. This column is blank when only a cost change is effective for the date shown. |
|
Cost |
This is the cost on the effective date of the cost or retail change. (If past cost is not available, this column is blank.) |
|
Retail |
This is the regular selling retail on the effective date of the cost or retail change. (If past retail is not available, this column is blank.) |
|
Markup % |
This is the markup percent on the effective date of the cost or retail change. (If either the past cost or retail is not available, this column is blank.) The markup percent is calculated using the calculation method specified by your system options. |
If not all item/locations were included in the cost or retail change, the Markup Change Date dialog displays the minimum retail and the maximum cost, so that the lowest margin of all the item/locations on the effective date is calculated and displayed.
|
Note: The markup calculation for this column hyperlink display is different from the calculation for markup. If not all item/locations have the same cost or retail in other areas of RPM, the retail is based on the average of the item/locations. The cost is based on either the highest or average, depending on your system options settings. |
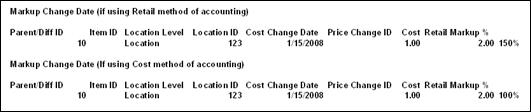
Example 1-1 Aggregation Calculation
A parent (10) /location (123) level price change is created effective January 1st.
Parent item #10 = Yogurt
A future cost change exists that is effective January 15th for Blueberry and Vanilla flavors, but the Strawberry flavor remains the same price.
Item #11= Blueberry Yogurt (January 15 cost = 1.00, retail = 2.00)
Item #12= Strawberry Yogurt (January 15 cost = .75, retail = 2.00)
Item #13= Vanilla Yogurt (January cost = 1.00, retail =2.00)
In the Markup Change Date dialog, this scenario is displayed like the following example (retail and cost accounting methods both shown):