| Oracle® Retail Active Retail Intelligence User Guide Release 15.0 E65706-01 |
|


 Previous |
 Next |
| Oracle® Retail Active Retail Intelligence User Guide Release 15.0 E65706-01 |
|
Previous |
Next |
The Alert Viewer interface alerts you to new events assigned to you. It is your first look at events to which you are assigned individually or as part of a group. From the Alert Viewer, you link to more details about the event and actions you can perform to resolve the event, as displayed in the Event Viewer.
The Alert Viewer is accessed either through the RMS toolbar or main menu. If there are events assigned to you, the button for accessing the Alert Viewer is displayed as Action button. Otherwise, the button is displayed as No Action. The menu choice is Action - ARI - Alert Viewer.
Events displayed in the Alert Viewer are selected using a filter. Filters consist of an event type, state, and other criteria, such as date and priority of the event.
Using the Alert Viewer, you can:
Retrieve events by applying default or user-defined filters to event data.
Add and maintain user-defined filters.
For example, you can filter the view of events to see events from a certain date, of a certain state, or a combination of filtering criteria.
Using filters in the Alert Viewer, you can retrieve event data according to a number of criteria, such as event type, state, date, and priority. Filters restrict the event data displayed in the Alert Viewer.
There are two types of filters available in the Alert Viewer:
Default filters: These are filters that will exist for all users, such as New Alerts, All Alerts, and Deferred Alerts.
User-created filters: In addition to the default filters, you can define, save and reuse filters for your own use.
When setting up a user-defined filter, you can filter by the following criteria:
Event
State
Event Creation Date
Priority
Whether the alerts are deferred or not deferred
If you are supervisor of other Active Retail Intelligence users, you can view events that you supervise in addition to the events routed to you by using the radio buttons at the top of the Alert Viewer.
Owned events: Individual or group based assignments.
Supervised events: Displays events that you supervise.
The default setting for the event type list is Owned Events.
This screen displays a list of all the new events for you, sorted by event type. A priority indicator, to the left of the event types' names, shows the highest priority currently active of the given event type. To the right of the event types' names is a count of the total number of events of that type that are currently active.
The upper left part of the screen displays a list of filters available to apply to the list of event types. This list includes both user-defined and system-provided filters. Selecting a filter from this list applies the filter to the event type list on the right side of the screen.
The buttons below the User Filters list are used to create, modify, and delete user-defined filters. The Add button adds a new filter. The current display of the Alert Viewer is replaced by the Alert Viewer Filter Definition Dialog. On this dialog, you can modify the filter name and criteria. The Edit button edits a selected filter. The Delete button deletes a selected filter from the list.
The list of events assigned to you is displayed on the upper right part of the screen. The information displayed about each event includes:
The priority of the event
The name of the event
The event state
The event count, or number of instances of the event
There is a user-level option that controls the requery settings for this list. It can be accessed through the Requery on Entry option on the Options menu. If the option is selected, the list will be refreshed whenever the user returns to the Alert Viewer. Otherwise, it is only refreshed when the filter or display settings are changed. This setting is useful if you leave the Alert Viewer open in the background and want to see your current list of alerts whenever you return the form.
These radio buttons toggle the display of event types between events that you own (Owned Events) and events that you supervise (Supervised Events), as determined by your user and group definitions configured in Active Retail Intelligence. The default setting for the event type list is Owned Events.
To temporarily filter the event type list to a particular event or state, use the filter fields and Filter button above the event type list. The Clear button clears any filtering.
To sort the events types by priority, event type name, state, or count, click the column headings.
Defer Alert Button
Marks the alert of the selected event type and state to be deferred. You have the option to defer an alert. That is, you can view all New Alerts and decide to perform actions on them immediately, or defer an alert or alerts and resolve them later. If you choose to defer alerts, you can still view those deferred alerts by using the Deferred Alerts filter.
Defer All Button
Marks all alerts in the event type list to be deferred. To view these deferred alerts, choose the Deferred Alerts filter.
Defer Individual Event Button
Marks the event currently selected in the Event Summary block at the bottom of the screen to be deferred. The other events under the same alert will not be deferred. To view the deferred event, choose the Deferred Alerts filter.
Details Button
Launches the Event Viewer, which displays the current events of the selected event. If multiple versions of an event are active, a window asking you which version to show is displayed. Multiple versions can be active because some open events of an older version can still exist even as the newer active version is the only one being created currently. Selecting a version is necessary because the Event Viewer can only display one version at a time, and from a processing perspective, older versions of events are like a different event type.
Close
Closes the Alert Viewer.
Event Summary
The Event Summary displays summary information about the events listed in the event type list, such as the status and the values of the key parameters of the event.
When you add or edit a user-defined filter for events displayed in the Alert Viewer, this screen is displayed. On this screen, you define the criteria for the filter.
Filter Name
The name of the filter. This name is displayed in the User Filters list on the Alert Viewer. This value is required.
Sort By
Identifies the field used to sort alerts that meet the filtering criteria in the Alert Viewer. You must choose a value.
Filter Criteria Area
The middle part of the screen identifies the filter criteria. This filter limits the display of alerts in the Alert Viewer. All the filter criteria fields have lists from which you can choose values.
Descriptions of the possible filtering criteria follow. The Event Name, State Name, and Priority must be valid types, states, or priorities that exist in the Active Retail Intelligence database.
Event Type
Limits the display of alerts to the specified event type.
State
Limits the display of alerts to the specified state for the event type.
Event Creation Date: After and Before
Limits the display of alerts to events that fall within the range of dates selected.
Priority
Limits the display of alerts to events of the selected priority.
Deferred
Limits the display of alerts to deferred or not deferred alerts.
Add Filter Criteria Button
Saves the filter criteria in the Active Retail Intelligence database.
Filter Summary Area
The list at the bottom of the screen displays the filtering criteria in summary form. This list shows all edits to the criteria used for this filter. You can use this list to create and reuse versions of the filter. Using the button, you can also delete particular edits, or delete all edits and create an entirely new set of filtering criteria.
Delete Button
The button deletes the currently selected record in the filter criteria.
OK Button
Saves edits to the filter criteria, closes the screen, and returns you to the Alert Viewer.
Cancel Button
Cancels all edits, closes the Alert Viewer Filter Definition Dialog, and returns you to the Alert Viewer.
This screen is displayed when you click the Details button for an event that has event instances from multiple versions that are active simultaneously.
Multiple versions can be active because some open events of an older version can still exist even as the newer active version is the only one being created currently. Selecting a version is necessary because the Event Viewer can only display one version at a time, and from a processing perspective, older versions of events are like a different event type.
On the RMS toolbar, if you have events assigned to you, you will see the Alert button.
If no new events are assigned to you, the button is displayed as the following figure. Click this button to display the alerts.
In the Alert Viewer, choose a filter from the User Filters list.
-OR-
Create a new user filter that limits the display according to the desired criteria.
In the Alert Viewer, select an event you want to view from the event type list.
Click the Details button.
If there are multiple versions of the selected event type and state, a list of versions is displayed. Select a version and click OK.
The event is displayed in the Event Viewer.
Defer a Single Alert Routed to You
In the list of alerts on the Alert Viewer, select the alert.
Click the Defer button. To view the deferred alert again, choose the Deferred Alerts filter.
Defer All Alerts Routed to You
In the Alert Viewer, select the alert.
Click the Defer All button. To view these deferred alerts again, choose the Deferred Alerts filter.
Defer Individual Event Routed to You
In the Alert Viewer, select the alert for the appropriate event type and version.
Select the event you want to defer from the Event Summary block
Click the Defer Individual Events button. To view this deferred event again, choose the Deferred Alerts filter.
In the Alert Viewer, click the Supervised Events radio button above the event list. The display is changed to only those events that you supervise.
Create a New Filter
In the Alert Viewer, click the button below the User Filters list. The Alert Viewer Filter Definition Dialog is displayed.
Specify a name for the filter in the Filter Name field, and specify how the alerts that meet the filtering criteria should be sorted in the Alert Viewer.
Specify the filtering criteria. Make the filter as restrictive as possible, so that the filter will display only the event data that you want.
Click Add Filter Criteria.
Click OK to close the Alert Viewer Filter Definition Dialog. The filter will be displayed in the User Filters list on the Alert Viewer.
Modify a User Defined Filter
In the Alert Viewer, select a filter from the User Filters list.
Click the Filter button. The Alert Viewer Filter Definition Dialog is displayed.
Modify the filtering criteria as needed.
Click Add Filter Criteria. The edits to the filter are displayed in the list at the bottom of the screen.
Click OK to close the Alert Viewer Filter Definition Dialog.
Delete a User-Defined Filter
In the Alert Viewer, select a filter from the User Filters list.
Click the Delete button.
The Event Viewer allows you to work with the specific events of a selected event type and state that were assigned to you.
Revalidate Events
Revalidating events ensures that all your events are current and should still be assigned to you. Events are reevaluated in two ways: automatically when you start the Event Viewer, and through the Revalidate Events button once the Event Viewer is open.
Automatic Event Reevaluation
When you open the Event Viewer, Active Retail Intelligence automatically attempts to reevaluate the currently selected event.
Revalidate Events Buttons
Once the Event Viewer is open, you can revalidate events by clicking the Revalidate Events buttons to do all events or only the currently selected one. A refresh button re-queries in case new events have occurred since you entered the form.
The Action Dialog is displayed when taking an action requires specifying data. For example, creating a transfer to balance inventory may show a list of parameters related to creating a transfer, such as the destination and source locations and the transfer quantity. Some of these parameters may be editable, which you can edit on this dialog. There may also be an editable comments field to attach comments to the action, such as, "I chose this action to resolve the out of stock issue because…"
Click the Do Action button from the Event Viewer screen to access the Action dialog. At the top of the Action dialog, the action you are about to perform is displayed. Directly below that, a description of the action is displayed.
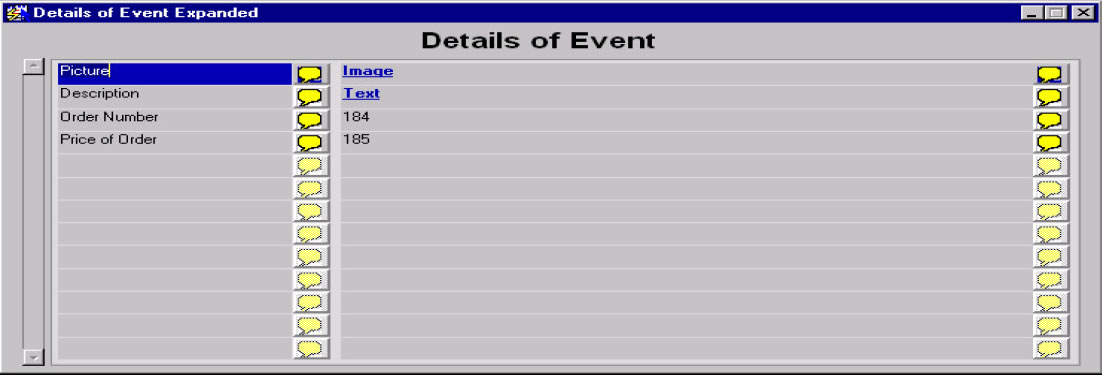
In the center of the screen is a list of parameters that will be used to take the action. Required parameters appear first and are displayed with a yellow background. Optional parameters follow and are displayed with a white background. Parameters that are read-only are displayed last and have a gray background. Click the Comment button to display the full text of the parameter value if it is too long to fit on the screen. Note that you cannot directly edit parameters within the comment box.
When you click inside a parameter field, the Show List button will be enabled if there is a list associated with the parameter. If this button is enabled, click it or press the F9 key to bring up the list associated with the value and you will be able to select a value.
Beneath the parameter list is the optional note to attach. If the action being taken allows comments, the note will be attached to the action as a comment. If the action being taken will route the event to another user, the note will be displayed as a user message from you.
To perform the action, click the Do Action button.