| Oracle® Retail Store Inventory Management User Guide Release 15.0 E64567-01 |
|

 Previous |
Use this procedure to view details of any transaction pertaining to customer orders.
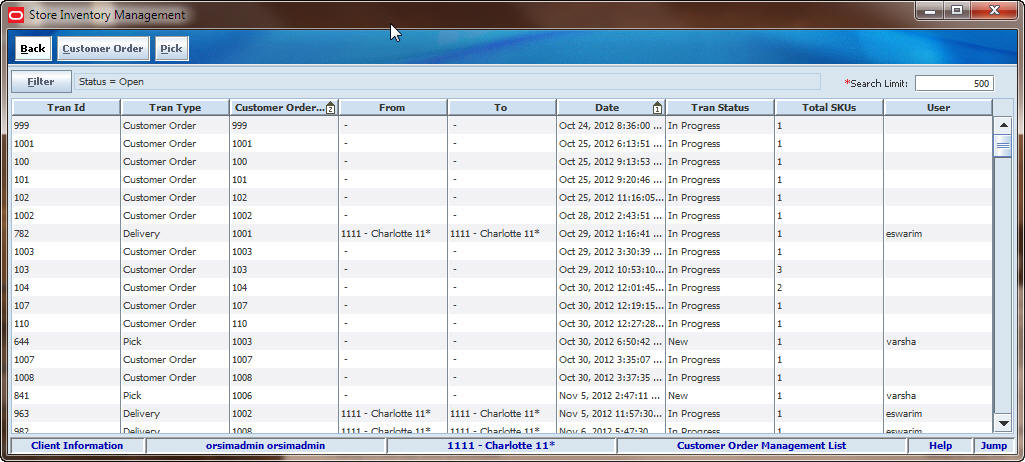
The Customer Order Management List window can display all customer orders, customer order picks, customer order reverse picks, customer order deliveries, store to store transfers, warehouse deliveries, and direct deliveries that pertain to customer orders that are active.
Navigate: Main Menu > Customer Order Mgmt. The Customer Order Management List window opens.
From the Customer Order Management List window, you can do the following:
Click Back to return to the Admin menu.
The list can be filtered. If the list is currently filtered, the active filtering is displayed next to the Filter button.
To change the filtering of the orders listed in the Customer Order Management List window, follow these steps:
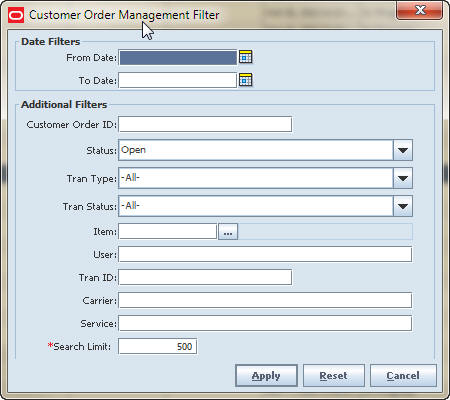
Click Filter. The Customer Order Management Filter window opens.
Enter or select search values to use to filter the list:
From/To Dates – If you know the From and/or To Dates, enter that value in the From Date or To Date fields.
Customer Order ID – If you know the customer order ID, enter that value in the Customer Order ID field.
Status – To filter the list by order status, select a value from the Status drop-down list.
Tran Type – To filter the list by transaction type, select a value from the Tran Type drop-down list.
Tran Status – To filter the list by transaction status, select a value from the Tran Status drop-down list.
Item – To filter the list to show only orders for an item, enter the item ID, or click the Ellipsis button to open the Item Lookup window. In the Item Lookup window, look up and select the item you want, and then click Apply to return to the Customer Order Lookup Filter window.
User – To filter the list by user name, enter the user name in the User field.
Tran ID – If you know the Transaction ID, enter that value in the Tran ID field.
Carrier – If you know the Carrier, select a value from the drop-down list.
Service – If you know the Service information, select the value from the drop down list.
Search Limit – Enter the number of order results to display.
Click Apply. The customer orders that match your search criteria are listed in the Customer Order Management List window.
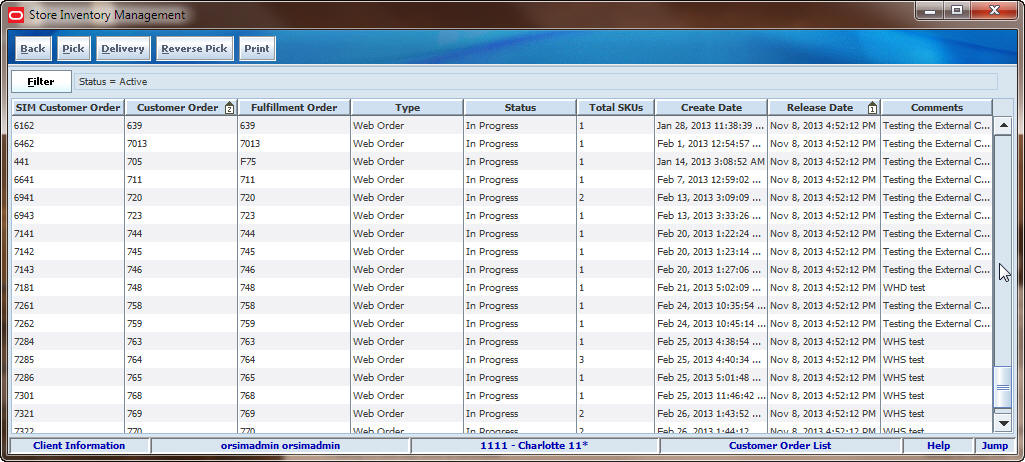
Navigate: Main Menu > Customer Order Mgmt > Customer Order. The Customer Order List window opens. This window displays the details for orders, such as layaways and pickups, as well as the web order customer orders.
To view the details of a customer order, follow these steps:
If the customer orders you want to view are not listed, filter the list. See ”Filter the Customer Order Management List."
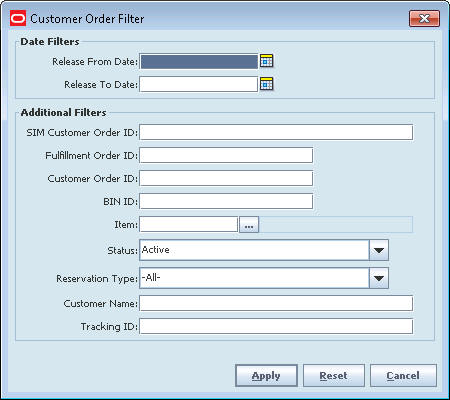
To change the filtering of the orders listed in the Customer Order List window, follow these steps:
Enter or select search values to use to filter the list.
Click Apply. The customer orders that match your search criteria are listed in the Customer Order List window.
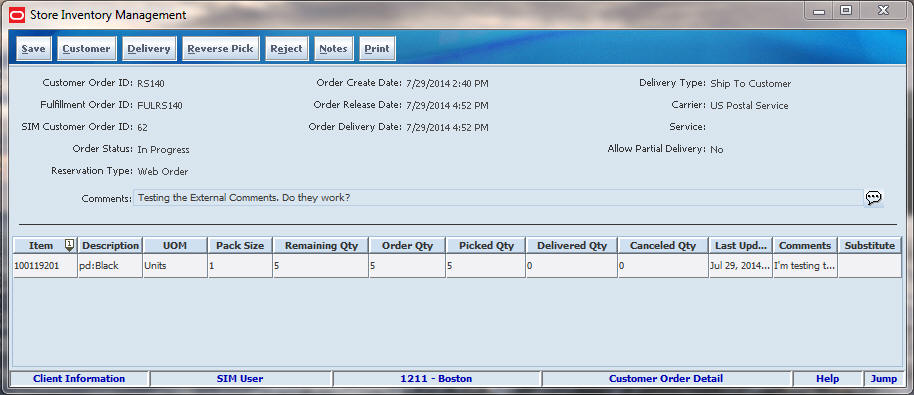
If a customer order you want to view is listed, double-click the customer order. The Customer Order Detail window opens.
Click Notes. The Customer Order Notes window opens.
Click Add to apply more than one detail note about the customer order.
Click Apply to save the changes and return to the Customer Order Detail window.
Click Print to print a report for the Customer Order Detail. The Report Selection window opens.
Select your printer.
Click OK. Your report prints and returns you to the Customer Order Detail window.
Click Reject to reject the order. The customer order is rejected.
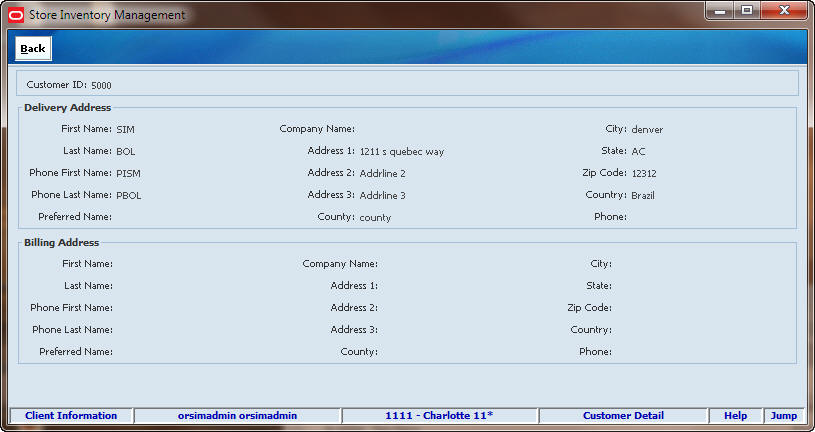
Click Customer. The Customer Detail window opens.
Click Back to return to the Customer Order Detail window.
To create a customer order pick list, follow these steps:
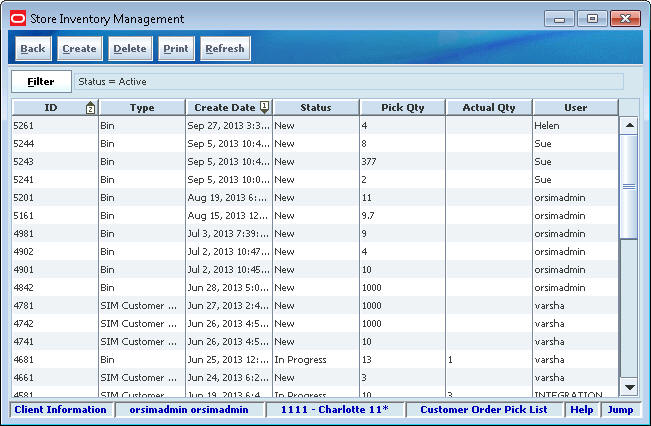
Click Pick. The Customer Order Pick List opens.
To change the filtering of the orders listed in the Customer Order Pick List window, follow these steps:
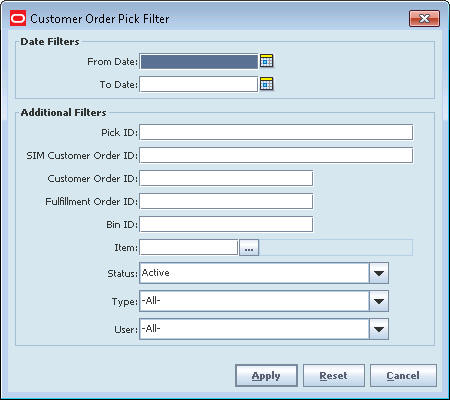
Click Filter. The Customer Order Pick Filter window opens.
Enter or select search values to use to filter the lists.
Click Apply. The customer orders that match your search criteria are listed in the Customer Order Pick List window.
Click Back to return to the Customer Order List window.
To delete a customer order pick list, follow these steps:
Select the customer order pick you want to delete.
Click Delete. A message is displayed: ”Are you sure you want to delete the selected customer order picks?”
Click Yes to return to the Customer Order Pick List.
To print a customer order pick list, follow these steps:
Select the customer order pick you want to print.
Click Print. In the Printer field, select the printer you want to use.
Click OK. A message informs you that the Customer Order Pick Report was printed. (See ”Print or View SIM Reports and Other Output”in Chapter 2 for general information about SIM report output.)
Click OK.
To create a customer order pick list, follow these steps:
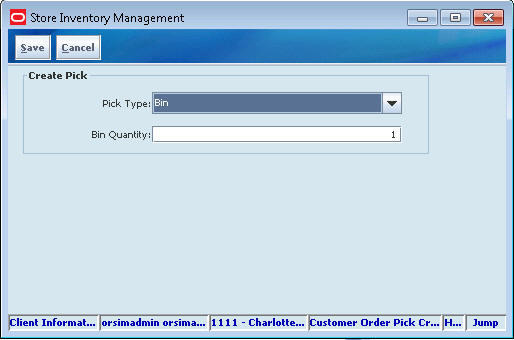
Click Create to create a customer order pick. The Customer Order Pick Create window opens.
From the create pick dialog, select a Pick Type from the drop-down list. Choices include Bin and SIM Customer Order.
If Bin is selected, enter the Bin Quantity.
If SIM Customer Order is selected, select a SIM Customer Order ID from the drop-down list.
Click Save to save the pick and return to the Customer Order Pick List window.
A bin can be associated with a customer order pick.
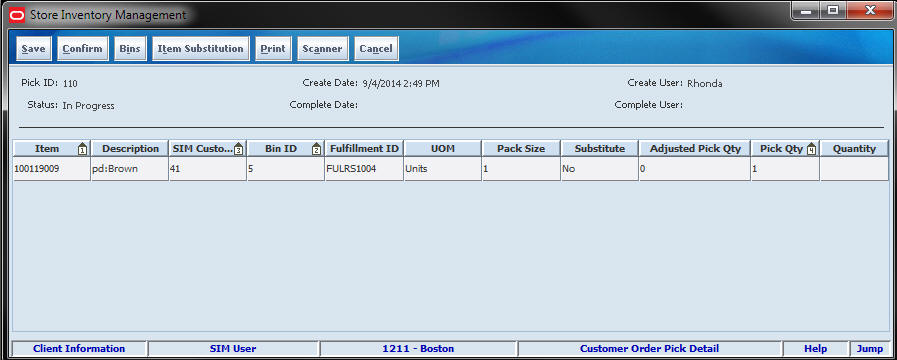
From the Customer Oder Pick List window, double-click a customer order. The Customer Order Pick Detail window opens.
In the Quantity field, enter the quantity to be picked.
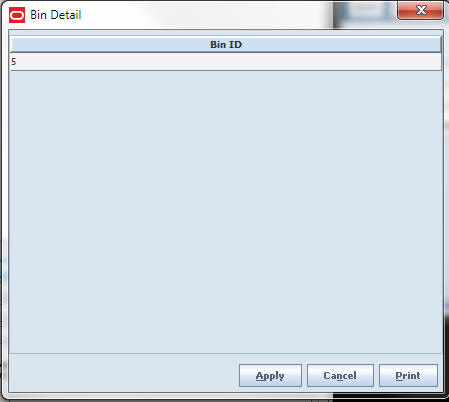
Click Bins. The Bin Detail popup window opens.
Enter the bin identifier.
Click Apply. You are returned to the Customer Order Pick Detail window.
Click Save to save the changes and return to the Customer Order Pick List window.
The Item Substitution window is used to add substitute items to the customer order. More than one item can be substituted for an item. In some cases, especially with fresh food, a retailer wants to give leeway to the shopper to substitute the items that have been ordered. Such as a specific brand of milk is out of stock, while the house brand is in stock.
Click Item Substitution. The Item Substitution popup window opens. All items listed fall under the same type as the item that is on the customer order.
If Item Lookup is available, search for an item to select and then click Add to add the item to the pick.
Enter the substitution, such as UOM or quantities.
Click Apply to add the item to the Customer Order Pick Detail window with default the actual quantity to 1.
This button completes the pick detail and returns the user to the Customer Order Pick List window.
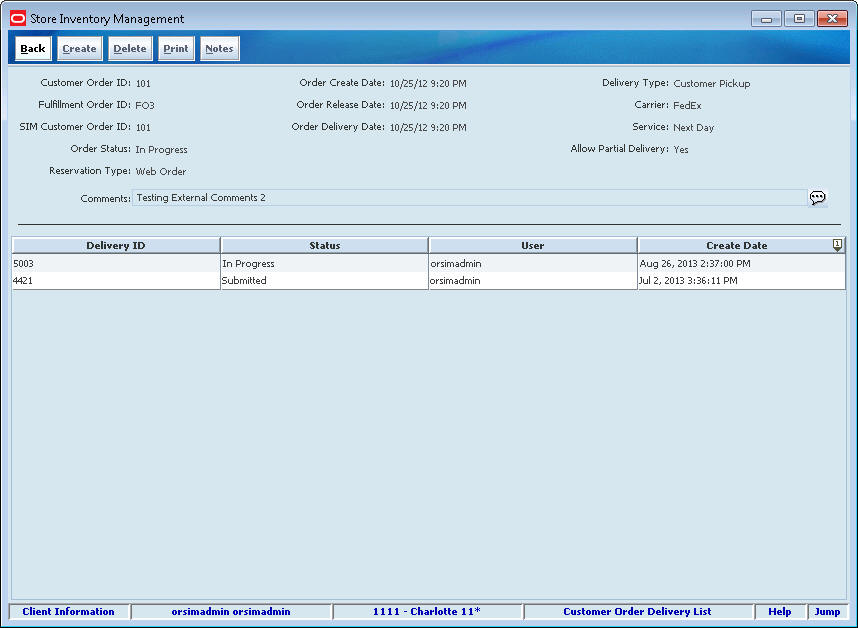
To create a customer order delivery, perform the following steps:
Click Delivery. The Customer Order Delivery List opens.
To delete a delivery, select the delivery you want to delete and click Delete.
To print an delivery, select the item and click Print.
Click Notes to add additional information to the customer order delivery.
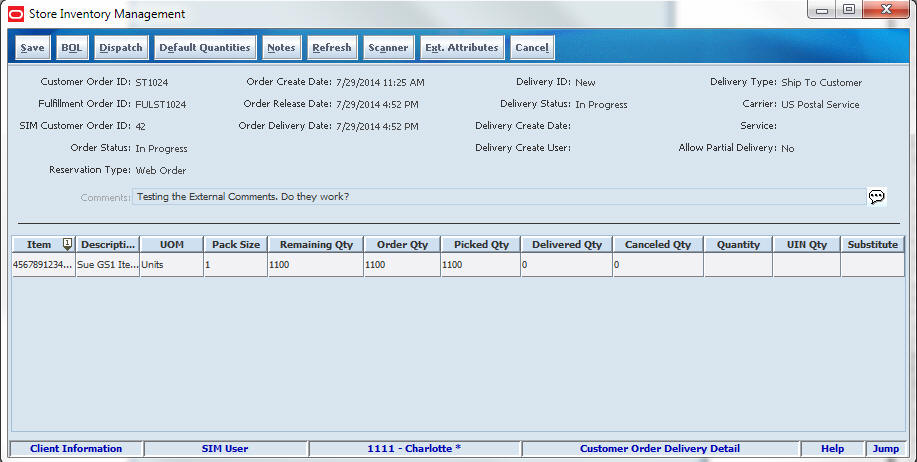
Click Create to create a customer order delivery. The Customer Order Delivery Detail window opens.
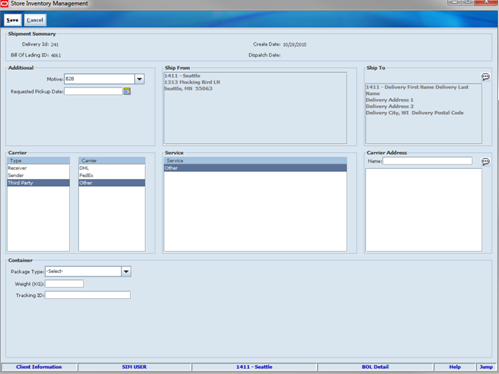
Update bill of lading (BOL) information:
Click BOL. The BOL Detail window opens.
Update the following fields as needed:
Address Type – The primary mailing address is selected by default. If there are multiple addresses, select the address type to which you want to ship the return. (You can also enter a different new address in the Alternate Destination Address field.)
Motive – The default value is Customer Order Delivery. If needed, select a different value.
Tax ID – If this field is blank, enter the tax ID for the supplier.
Carrier – Select the type of Carrier. Select other pertaining information if necessary, including Service.
Weight – Weight of package if required per the service.
Package Type – Select the type of package for the shipment.
Alternate Destination Address – If the return is to be shipped to an address that you cannot select (Address Type under Ship To), enter the full shipping address to which the return will be shipped.
Requested Pickup Date – Enter or select the date when you want the return picked up.
Tracking ID – Enter a tracking ID number.
Click Save.
|
Note: Depending on the deployment of SIM and backend applications, it is possible for the tracking ID field will be filled in automatically by a Manifest system when submitting or dispatching. Check the Oracle Retail Store Inventory Management Implementation Guide vol 2 - Integration with Oracle Retail Applications for more information. |
Click Default Quantities to apply the default quantities to the customer order delivery.
Click Notes to add additional detail to the customer order delivery.
Click Refresh to return the fields back to the original information.
Click Scanner to scan the item. See ”Scan an Item (Scanner Button)”in Chapter 2 for more information.
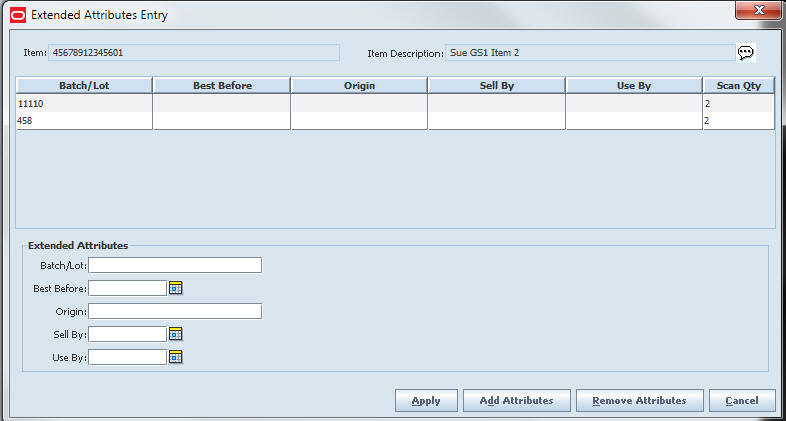
To update the Extended Attributes, select a row and click Ext. Attributes. The Extended Attributes window opens. This window captures additional information about an item.
|
Note: The Extended Attributes Entry window view may vary, depending upon customer chosen attributes. |
- Enter/select the field options.
- Click Add Attributes to add the additional attributes to the item.
- Click Apply to save the changes and return to t he previous window.
Enter Quantity for delivery.
Enter UIN Qty for UIN items.
Click Save to save the information that you entered so that you can create a customer order delivery at a later date. You are returned to the Customer Order Delivery List window.
Click Submit to complete the customer order delivery. You are returned to the Customer Order Delivery List window.
|
Note: You can dispatch an item immediately or save it to be dispatched later. |
Click Cancel to return to the Customer Oder Delivery List window without saving changes.
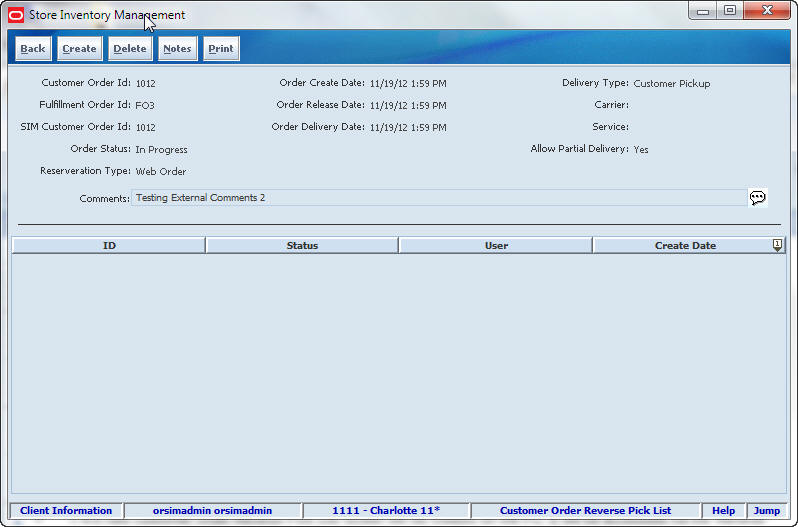
To create a reverse pick, perform the following steps:
Click Reverse Pick. The Customer Order Reverse Pick List window opens.
To delete a reverse pick, select the reverse pick you want to delete and click Delete.
To print an reverse pick, select the reverse pick and click Print.
Click Notes to add additional information to the reverse pick.
Click Back to return to the Customer Order Detail window.
Click Save to return to the Customer Order List window.
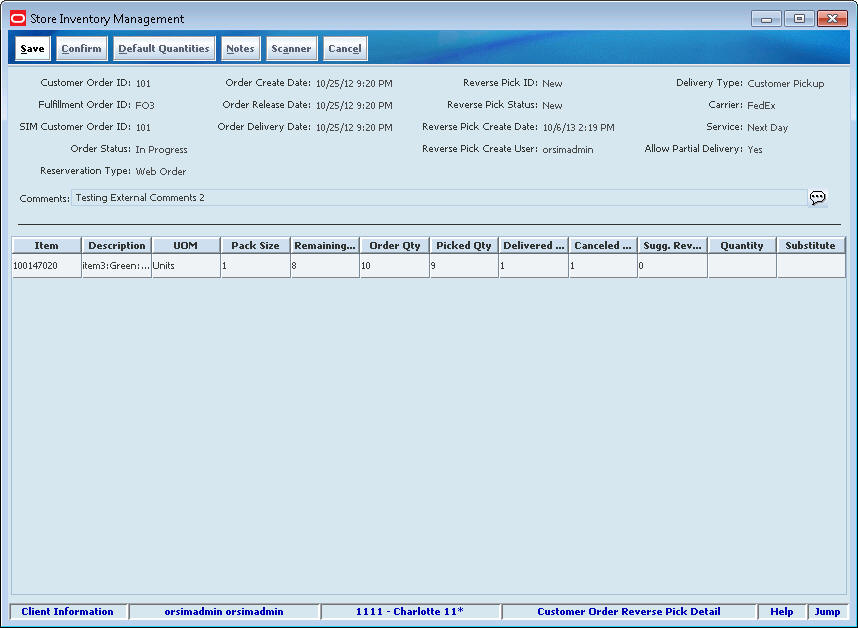
Click Create to create a customer order reverse pick. The Customer Order Reverse Pick Detail window opens.
Click Default Quantities to apply the default quantities to the customer order reverse pick.
Click Notes to add additional detail to the customer order reverse pick.
Click Scanner to scan the item. See ”Scan an Item (Scanner Button)” in Chapter 2 for more information.
Enter quantities of the reverse picked item.
Click Save to save the information that you entered so that you can create a customer order reverse pick at a later date. You are returned to the Customer Order Reverse Delivery List window.
Click Confirm to complete the customer order delivery. You are returned to the Customer Order Reverse Delivery List window.
Click Cancel to return to the Customer Oder Reverse Delivery List window without saving changes.