| Oracle® Retail Demand Forecasting Implementation Guide Release 16.0 |
|

 Previous |
 Next |
Grade is a clustering tool that provides insight into how various parts of a retailer's operations can be grouped together. Typically, a retailer may cluster stores over item sales to create logical groupings of stores based on sales of particular products. This provides increased visibility to where products are selling, and it allows the retailer to make more accurate decisions in merchandising. Beyond this traditional use of clusters, Grade is flexible enough to cluster any business measure based on products, locations, time, promotions, customers, or any hierarchy configured in the solution.
Grades/clusters used within the Grade Solution are defined using the Grade Parameters utility in the RPAS Configuration Tools.
|
Note: For information on building the Grade domain, refer to the Oracle Retail Predictive Application Server Installation Guide. |
To create a Grade solution extension:
Open an existing configuration in which hierarchies (for example, Product, Location, and Calendar) have already been defined.
From the Configuration Tools toolbar, select the Automation menu. If installing a Global Domain environment, go on to Step 3. If installing a Simple Domain environment, go on to Step 4.
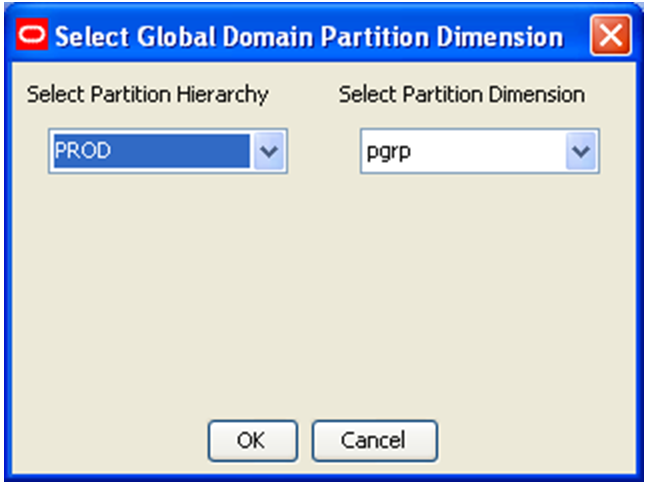
Select Common and then the Specify Partition Dimension. The Select Global Domain Partition Dimension window opens. Select the hierarchy in which the domains will be partitioned, and then the Partition Dimension. Select OK, and continue with Step 4.
|
Note: To access this dialog, the configuration must already be flagged as a Global Domain environment. To do this, select File - Configuration Properties. The Configuration Properties window opens. Select the GlobalDomain option and click OK. |
Optional: The Common plug-in may also be used to create an example hierarchy configuration. Select Common, and then Build RMS Example Hierarchy. The resulting hierarchy configuration is the same hierarchy that is used for the mock installation configurations provided in the release packages.
Open the Function Library Manager and add the ClusterEngine library.
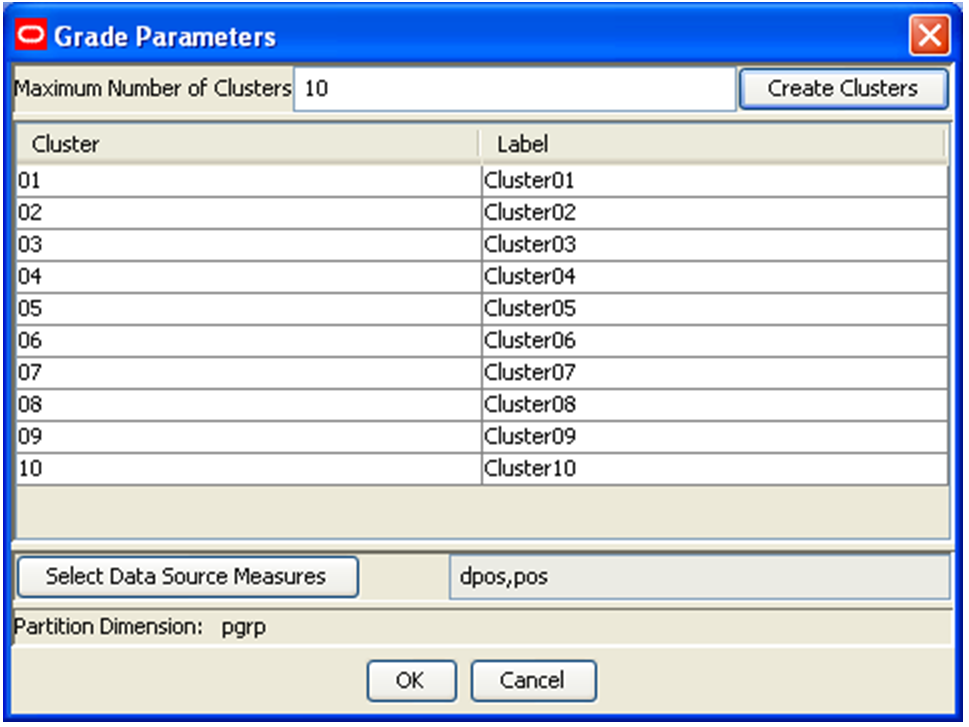
From the Grade option, select Specify Clusters. The following sections outline the process for configuring profiles.
On the Grade Parameters utility, enter the Maximum Number of Clusters that will be required to support any Clustering/Grading process.
Click the Create Clusters icon.
The Cluster and Label parameters will update to reflect the number of clusters specified.
Specify the properties for the clusters. See Editing Grade Parameters for details.
Edit Grade parameters:
Cluster — the system assigned Cluster Name. This value cannot be edited.
Label — the description of the cluster/grade that will be viewed by the user once the domain is created.
Cluster Labels may not exceed 40 characters.
The following characters may not precede or follow the label that is entered in this field:
'( )' Example: (cluster01)
'-' Example: -cluster01-
A colon (:) may not be used in the Cluster Label field.
Example: cluster01:
The following is the process to autogenerate the hierarchies, measures, rules, and workbook templates that are required by Promote to support the promotion configuration entered in the Promote plug-in:
On the Grade Parameters utility, click OK.
The system automatically generates:
Hierarchies - The CLSH hierarchy will be created with a clst dimension. The GRCH hierarchy will be created with the grcd dimension.
Measures - All measures necessary to support the base Grade solution will be created.
Rules - Only the rules and rule groups necessary to support the installation of the Grade solution are visible in the configuration. A special code is used within the domain to create rules as needed for cluster generation and workbook templates.
Workbook Templates - All pre-defined workbook templates to support the base Grade solution will be created; however, only the worksheets necessary to support the domain installation are visible. Additional processes within the application handles the creation of additional worksheets based on the user's selections in the workbook template wizards.
|
Note: You may continue to make changes to the Grade plug-in configuration and the autogeneration process may be repeated as often as needed prior to the installation. |
|
Note: After autogeneration completes, the following rules will display as invalid; however, these should be ignored:Rule: clad_l1 Rule: clad_l2 Rule: clev_l2 Rule: clev_l3 Rule: clev_l4 Rule: clev_l5 Rule: clev_l6 Rule: clev_l7 Rule: clev_l8 Rule: clev_l9 RuleGroup: clad_load Rule Group: clad_refresh Rule Group: clrev_load Rule Group: clrev_refresh |
Follow this process if you need to add clusters to the configuration or remove clusters from the configuration:
On the Grade Parameters utility, enter the new Maximum Number of Clusters that will be required to support any Clustering/Grading process.
Click the Create Clusters icon.
The Cluster and Label parameters will update to reflect the number of clusters specified.
Click OK to regenerate the solution with the changes to the cluster configuration.
The Grade autogeneration process creates all hierarchy dimensions and measures to support the essential Grade functionality; however, only the minimum rules, workbook templates, and worksheets required to support the domain installation are visible in the configuration. Additional processes within the application handles the creation of rules and workbook template worksheets.
|
Note: When a custom taskflow exists in the configuration, the plug-in automation may cause the workbook template field to be blank. If this occurs, save the configuration and then re-open the configuration and the workbook template field is populated. |
|
Note: This limitation allows for fewer options than in RDF and Curve for edits to the GA Configuration. |
Acceptable changes and restrictions are outlined as follows:
| Item | Description |
|---|---|
| Grade Solution Extension Name | The name assigned to the resulting Grade solution after autogeneration occurs cannot be edited. |
| Major and Minor Classes | Additional Major components may be added to the Grade. Additional minor components can only be added under the new Major components. The Major and Minor components that are part of the GA Configuration may not be edited. This restriction also applies to Measure Names and Measure Labels. Adding minor components to GA major components is forbidden. |
| Rules | Additional Rule Sets, Rule Groups, and Rules may be added to the Grade GA Configuration. This includes support for adding new Rules to existing GA Configuration Rule Groups. New Rules that are added to the GA Configuration Rule Groups should include cust (represents Custom) in the Rule Name, which makes it easy to identify Rules that are not part of the GA Configuration. Rule Sets, Rule Groups, and Rules that are part of the GA Configuration may not be renamed. Existing Rules that are part of the GA Configuration may not be modified in any way. |
| Workbook Templates | Additional Workbook Templates may be added to the Grade Configuration; however, new Measures and Rules can only be added to the Configuration Workbook Template worksheets that are visible in the configuration. |