| Oracle® WebCenter Framework Tutorial 10g (10.1.3.2.0) Part Number B31072-02 |
|
|
View PDF |
| Oracle® WebCenter Framework Tutorial 10g (10.1.3.2.0) Part Number B31072-02 |
|
|
View PDF |
The Rich Text portlet is a useful tool for posting enterprise announcements and news items at runtime. Once you add the portlet to a page, authorized users can use the Actions icon to invoke a toolbar with all the rich-text editing tools needed to insert, update, and format display text. Depending on the security privileges set for the page, the Rich Text portlet can be used to broadcast information to a wide audience, or to a more narrowly defined group.
The Rich Text portlet is available through the WebCenter Preconfigured OC4J.
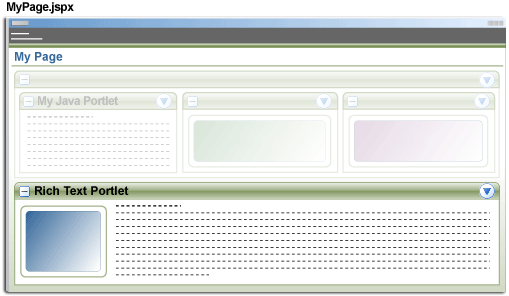
Figure 5-1 shows what your page will look like at the end of the lesson.
Figure 5-1 MyPage.jspx at the End of Lesson 5
This lesson shows you how to work with the Rich Text portlet through the following steps:
The Rich Text portlet is available through the WebCenter Preconfigured OC4J (installed and initialized during Chapter 3 Step 2: Setting Up Your Connection). If this OC4J instance is no longer running, click the Start WebCenter Preconfigured OC4J icon at the far right of the JDeveloper toolbar before you begin this lesson.
In this step you'll register the Rich Text producer with your application. But first, let's check that the Rich Text producer is available through the WebCenter Preconfigured OC4J:
In a browser, enter the Rich Text producer test page URL:
http://localhost:6688/richtextportlet/info
If the producer is up and running you should see the WSRP Producer Test Page shown in Figure 5-2.
The test page displays two Rich Text producer registration URLs (WSDL documents). You'll use the WSRP v2 WSDL URL in this WebCenter application:
http://localhost:6688/richtextportlet/portlets/wsrp2?WSDL
Tip:
Test pages for every portlet producer available through the WebCenter Preconfigured OC4J are accessible from:http://localhost:6688/Now, let's register the Rich Text producer.
In the Applications Navigator, right-click Portlet Producers, then click New WSRP Producer as shown in Figure 5-3.
Figure 5-3 Registering the Rich Text Portlet with the Application
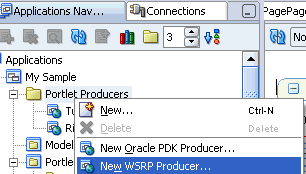
Because you already have one portlet producer registered, you can use this right-click shortcut rather than having to navigate through the New... gallery.
Click Next to exit the wizard's Welcome screen.
In the Name field, enter: RichTextProducer
Click Next.
In the URL Endpoint field, enter:
http://localhost:6688/richtextportlet/portlets/wsrp2?WSDL
This tutorial assumes that localhost can be used in a URL to successfully refer to the local computer on which your preconfigured OC4J installation resides. (If this is not the case, replace localhost with your computer's IP address.)
Click Next.
Click Finish to exit the wizard.
Click OK to close the message box.
Now you are ready to drop the Rich Text portlet onto your page.
From the Component Palette, select RichTextProducer (Figure 5-4).
Select Rich Text Portlet, and drop it on top of h:form in the Structure window as shown in Figure 5-5.
Figure 5-5 Adding the Rich Text Portlet to the Page
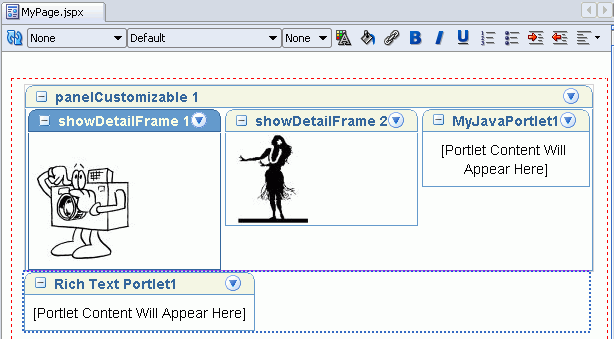
Select Rich Text Portlet1 in the Visual Editor and you'll see its properties displayed in the Property Inspector.
In the Property Inspector, under Display Options, set AllModesSharedScreen to true.
This directs the page to render all changes made through personalize/customize inline, rather than by refreshing the entire page.
Select File, Save All to save your work.
Select Run, Run MyPage.jspx, or click the green arrow in the JDeveloper toolbar.
A new browser opens to display the page (Figure 5-6).
This is what the user sees when the page is displayed. The next step shows you how easy it is to customize the Rich Text portlet, and may suggest some uses as you plan your WebCenter application.
Once you've placed the Rich Text portlet on a page, users can use the Actions icon to enter text that will be visible to everyone.
Click the Actions icon in the Rich Text portlet's header.
The Rich Text portlet should now look something like Figure 5-7.
Figure 5-7 The Rich Text Portlet's Action Menu

Click Customize to display the rich text controls (Figure 5-8).
Figure 5-8 The Rich Text Portlet's Text Controls
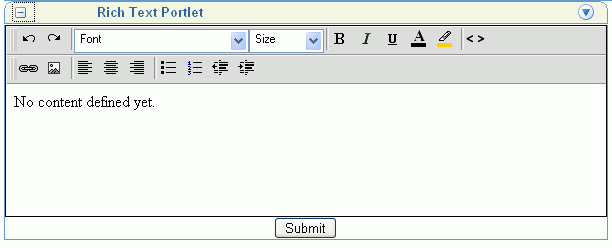
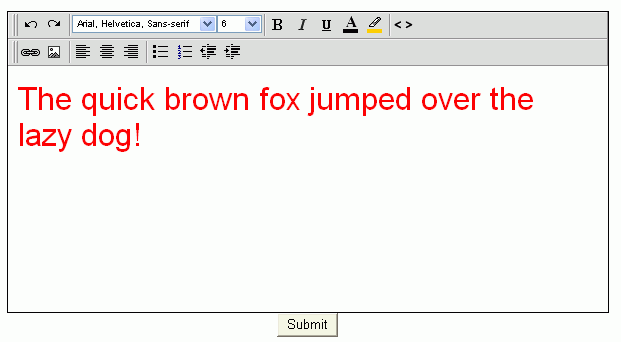
Enter some text of your own, and change the font size, type, and color, and choosing a background color. For example, see Figure 5-9.
Figure 5-9 Text in Arial Font, Size 6, in Red
Experiment with the other controls. For example, display an image in the portlet:
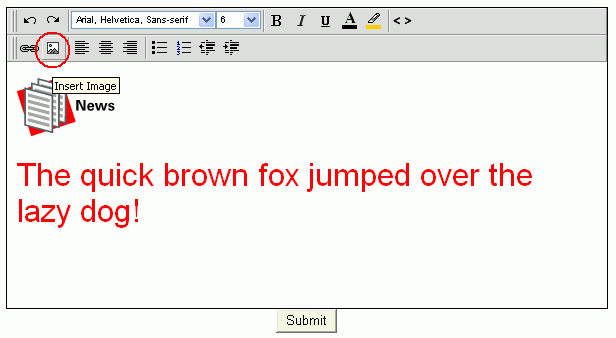
Click the Insert Image icon.
Enter the URL of any image, and click OK (Figure 5-10).
Figure 5-10 Insert Image Using the Rich Text Editor
When you have finished, click Submit.
The page is refreshed to display the new text and image.
For a complete description of the Rich Text portlet, as well as the other pre-packaged portlets, see the Oracle WebCenter Framework Developer's Guide.
Now let's move on to see how to enable communication between two portlets—in effect, how to pass a parameter from one portlet to drive the content that is displayed in the other.