| Oracle® Retail Back Office User Guide Release 14.1 E54470-01 |
|


 Previous |
 Next |
The Administration tab provides access to job schedules and parameters. The job manager functionality enables you, if authorized, to create and schedule jobs, edit currently scheduled jobs, or remove jobs. You can also edit parameters that affect various application functions and maintain foreign exchange rates.
The following topics are discussed:
The Job Manager function enables you to create and schedule data movement jobs such as parameter distributions, file transfers, and the run of reports. A job is a system process that can be scheduled to perform an operation in Oracle Retail Back Office. When a job runs, the system writes the data from an imported file to the database in the system. For example, the Job Manager can choose to import a file of parameter updates and then schedule the system to execute those updates at a specific time. The job manager function enables you to add jobs, edit existing jobs, select registers as recipients of jobs, enter notifications of failure and success of jobs, and view and edit job settings.
XML files are created on another system to be imported into Oracle Retail Back Office. Files can also be exported from Back Office to other systems.
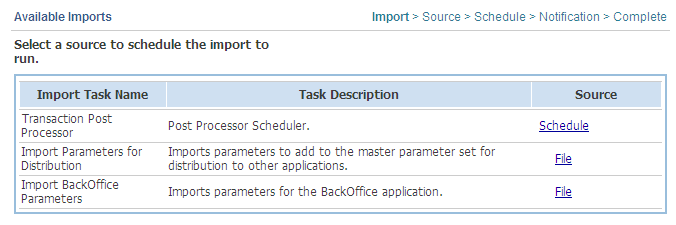
On the Available Imports screen, you can select XML files that are created on another system to be imported into Oracle Retail Back Office.
|
Note: The Data Import (DIMP) Subsystem enables the importing of additional types of data. For information on the types of data that can be imported using DIMP, see the Oracle Retail POS Suite/Merchandising Products Implementation Guide. |
Table 7-1 describes the available import tasks.
Table 7-1 Description of Import Tasks
| Task | Description |
|---|---|
|
|
|
Import Parameters for Distribution |
|
|
Import BackOffice Parameters |
|
To import files:
Click the Administration tab.
Click the Job Manager subtab.
Click the Available Imports left navigation link. The Available Imports screen is displayed.
Table 7-2 describes the information shown for each available import.
Table 7-2 Available Imports Columns
| Column | Description |
|---|---|
|
Import Task Name |
The task that is performed. |
|
Task Description |
The type of data that will be imported. |
|
Source |
File means you first choose the source file to be used for the import and then set the schedule for the distribution. Schedule means you do not choose a source file, you only need to set the schedule. |
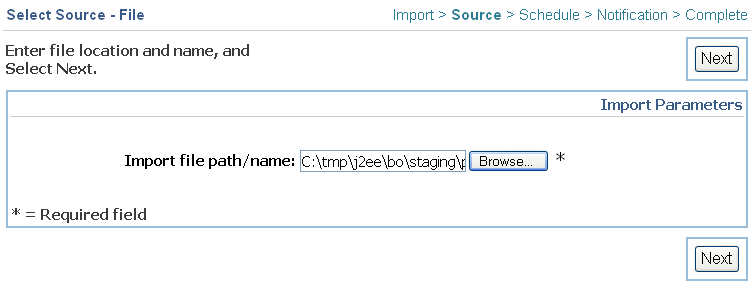
Click the source link of the task to import. The Select Source-File screen is displayed.
|
Note: If the link is a schedule, the Job Manager screen is automatically displayed and you do not need to select a file. |
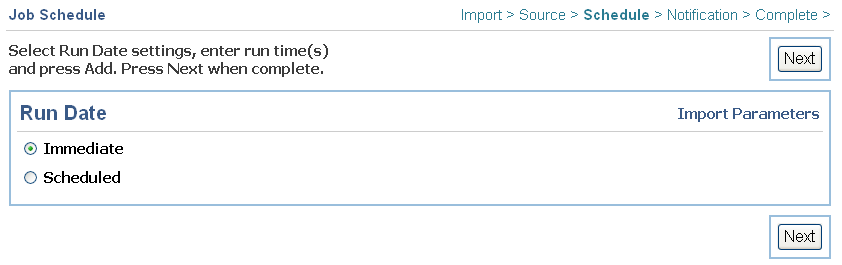
The Job Schedule screen enables you to select the run frequency of an import or export job. You can schedule a job to run at a specific time or interval.
To schedule a job, click Immediate or Scheduled on the Job Schedule screen.
To run the job immediately, click Immediate. The Notification screen is displayed and you do not enter scheduling information.
To run the job at a future date and time, click Scheduled. The Job Schedule screen is expanded. You must enter scheduling information.
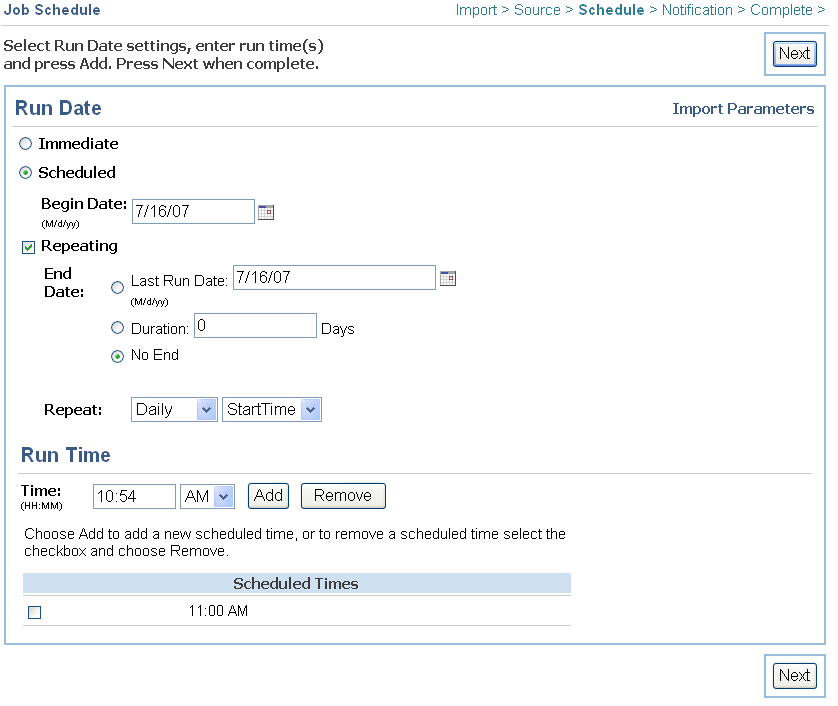
If scheduling a job to run at a future time, you enter scheduling information on the expanded Job Schedule screen.
To schedule a job:
Enter or select a begin date.
If you want the job to run on a repeating basis, click Repeating.
Additional fields appear on the screen.
Set the End date.
The default is No End.
Set when you want the job to repeat.
The default is to repeat Daily at a specific Start Time.
You can set the import to repeat Daily at a specific Start Time or Interval, Weekly on a specific day, or Monthly on a specific week and day.
Set the Run Time for the job.
Run time can be entered in either 12-hour format or 24-hour format. To use 12-hour format, enter the time in hour:minutes am or pm, for example, 5:15 am. For 24-hour format, or military time, the allowed time is in the range of 0:00 to 23:59.
Add or remove scheduled times from the list.
If you specified the job to run on a daily interval, enter the interval and click Add. For example, if you want the job to run every five minutes, enter 0:05.
Otherwise, enter the time you want the job to run and click Add. You can specify multiple times.
If you want to remove a time from the list, select the check box by the time and click Remove.
Click Next. The Notification screen is displayed.
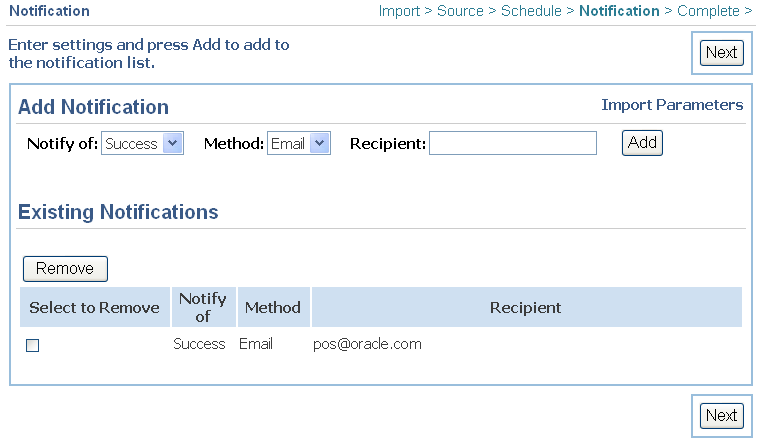
On the Notification screen, you can set the system to notify recipients of the failure or success of jobs. You may want to notify yourself and other store managers if a job runs successfully.
To add a notification:
Select to notify of Success, Failure, or All from the menu.
Select a delivery method from the menu. The default delivery method is Email.
Enter a recipient's email address and click Add. To remove a recipient, select the check box next to the name and click Remove.
Click Next.
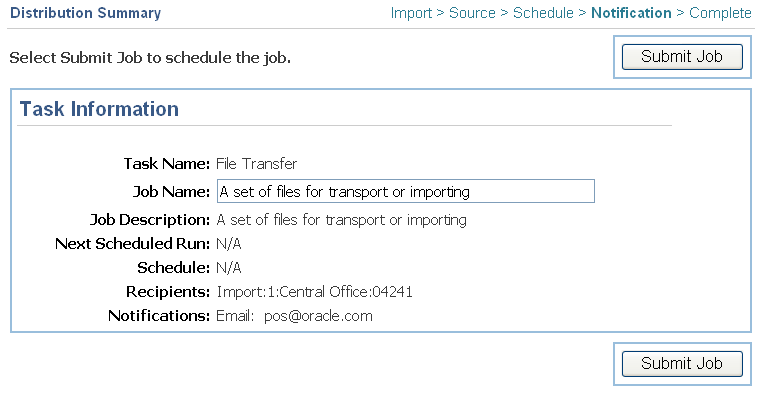
After setting a notification, the Distribution Summary screen may be displayed. This provides a summary of information about the job to be scheduled. The Distribution Summary enables you to edit the job name and approve the job schedule.
To distribute the job:
Enter or edit the job name or accept the default.
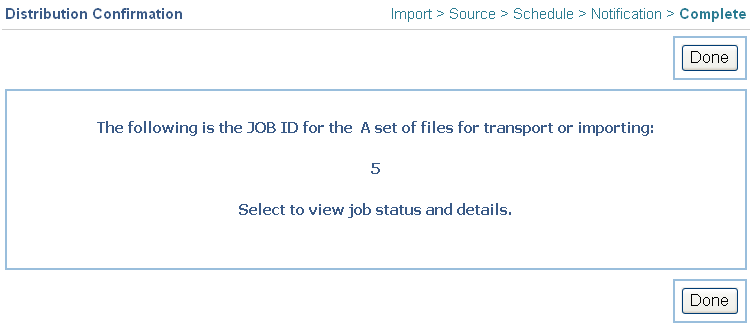
Click Submit Job. The Distribution Confirmation screen is displayed.
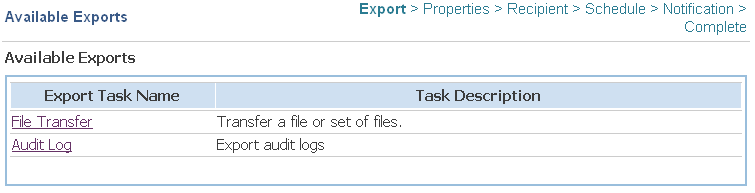
On the Available Exports screen, you can select data to be exported to other stores. Table 7-3 describes the available exports.
Table 7-3 Description of Available Export Tasks
| Task | Description |
|---|---|
|
File Transfer |
|
|
Audit Log |
|
To export data:
Click the Administration tab.
Click the Job Manager subtab.
Click the Available Exports left navigation link. The Available Exports screen is displayed. This screen lists the available exports and a description of each export.
Click the link in the Export Task Name column for the task to export. The File Selection screen is displayed.
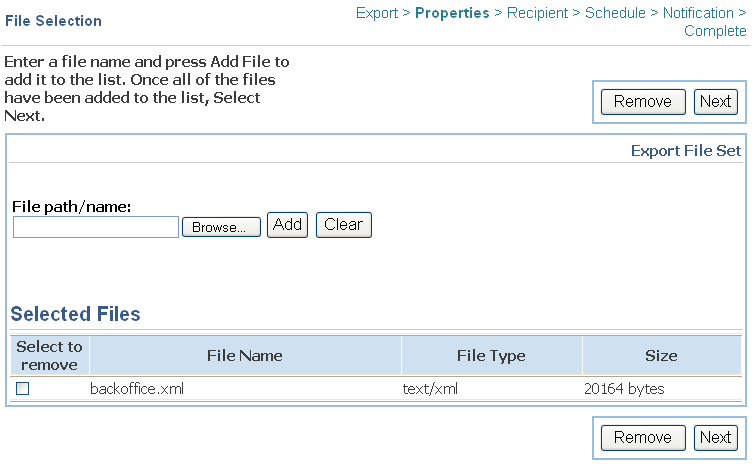
On the File Selection screen, you select the files to be exported.
Enter the path name of the file or click Browse to choose a file. To add the file to the list, click Add.
When you have added all the files for the export, click Next. The Job Schedule screen is displayed. To complete the export, see "Scheduling a Job".
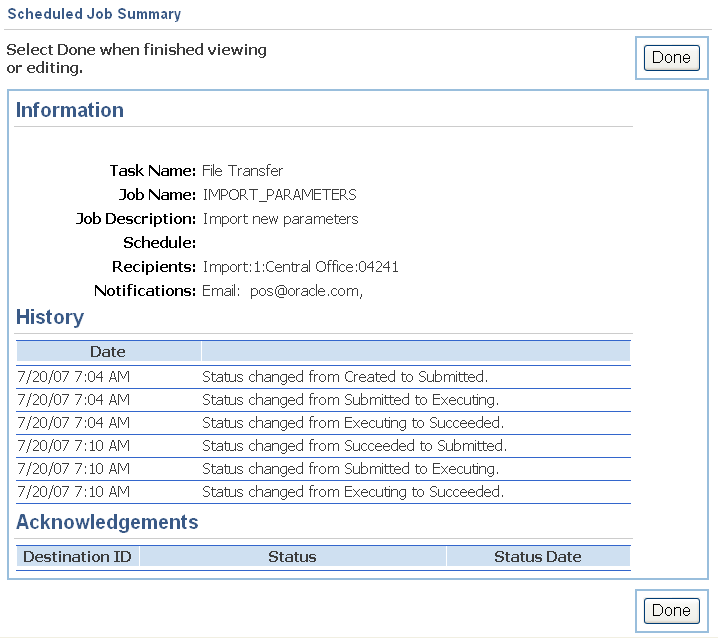
On the Scheduled Job Summary, you view a list of currently scheduled jobs as well as the summary for any specific job that scheduled.
To view scheduled jobs:
Click the Administration tab.
Click the Job Manager subtab if it is not selected.
Click the Scheduled Imports or Scheduled Exports left navigation link. The list of scheduled imports or exports is displayed. The screen contains the job description, scheduled run, recipient (if any), action date, and job status.
Click the job description link to view the summary for that job. The Scheduled Job Summary screen is displayed.
Table 7-4 describes the information shown in the Scheduled Job Summary screen.
Table 7-4 Scheduled Job Summary Details
| Detail | Description |
|---|---|
|
Information |
Type of task performed. Name and description of the job. If the job is scheduled on a repeating basis, the next scheduled runtime is shown. Recipients of the data distribution or file transfer. Type of notification and the user IDs that receive notification of the job's progress. |
|
History |
Log of the status changes that occurred and the data and time of each change. |
|
Acknowledgements |
For a data distribution job, Oracle Retail Back Office can receive an acknowledgement back from each store that the data distribution was received. The acknowledgement includes a text field that can be completed by the store with any type of status information applicable to the job. The store ID number, status, and the date and time the status occurred are shown on this screen. Acknowledgements are only available for data distribution jobs. |
Click Done. Click another job description link to view the summary for that job.
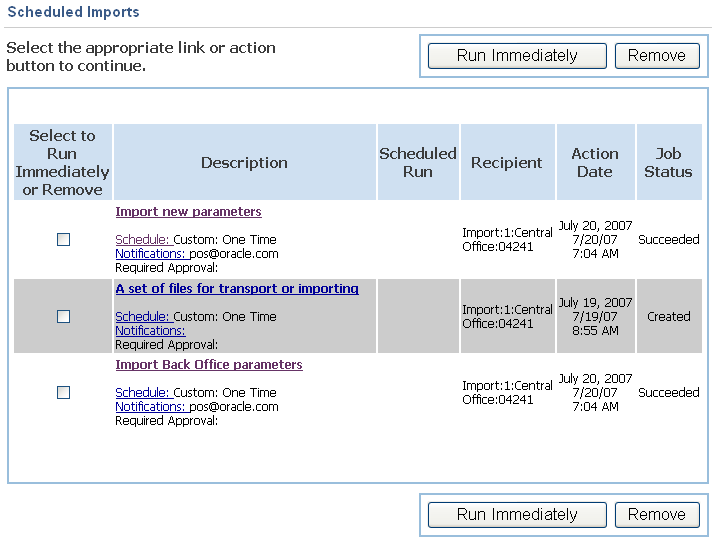
You can edit any of the jobs that appear on the Scheduled Imports or Scheduled Exports screens. You can remove a job, select to run a job immediately, edit the job schedule, or change and add notifications for the job. Both of these screens have the same format. The Scheduled Imports screen is shown here as an example.
Table 7-5 describes the information shown for each available import on the Scheduled Import screen and for each available export on the Scheduled Export screen.
Table 7-5 Scheduled Imports and Scheduled Exports Columns
| Column | Description |
|---|---|
|
Select to |
A selected checked box indicates the import can be selected to run immediately or removed. |
|
Description |
Description of the import or export. |
|
Scheduled Run |
Date and time when the job will next run. |
|
Recipient |
Method of notification of job success or failure. |
|
Action Date |
Date and time is determined by the status. |
|
Job Status |
Status of the job. |
To remove or run a scheduled job, select the check box next to the job description.
To remove the schedule from the list, click Remove. You are asked to confirm the task removal. To remove the job, click Yes. To return to the previous screen, click No.
To run the import or export, click Run Immediately. The job status changes depending on the success of the action.
To edit the job schedule, click the Schedule link under the job description. The Job Schedule screen is displayed. Refer to "Scheduling a Job" to edit the job schedule.
To edit the notifications, click the Notifications link under the job description. The Notification screen is displayed. Refer to "Adding a Notification" to edit the notifications.
The parameter maintenance function enables you, if authorized, to create, manage, or remove parameter lists. The parameter values set to a parameter list override the current values that the store uses. You can edit, delete, or modify the parameters within a list or edit the values of specific parameters.
For more information on parameters, see the Oracle Retail POS Suite Configuration Guide.
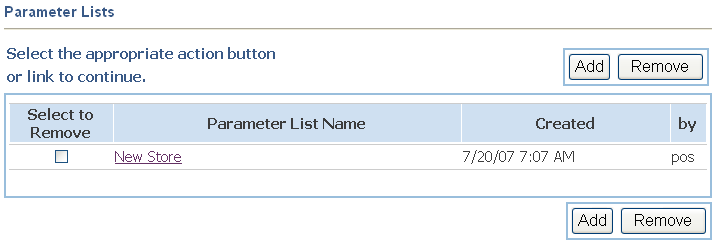
On the Parameter Lists screen, you can create a parameter list containing parameters to be applied to Oracle Retail Back Office or Point-of-Service, view an existing list of parameters, or remove a parameter list.
To create or view a parameter list:
Click the Administration tab.
Click the Parameter Maintenance subtab.
Click the Parameter Lists left navigation link. The Parameter Lists screen is displayed.
For each parameter list, the following information is displayed:
A selected checked box in the Select to Remove column indicates the list is to be removed
Parameter list name
When the list was created
User ID that created the list
You may remove, add, or edit a parameter list.
To remove the list, select the check box next to a parameter name and click Remove.
To create the list, click Add. The List Details screen is displayed. See "Adding or Changing Parameter List Details".
To view an existing list, click the link of the parameter name. The List Details screen is displayed. See "Adding or Changing Parameter List Details".
You can edit the parameters of a newly created or previously existing list on the List Details screen. You may add or change the list name and description, add parameters to the list, or remove parameters from a list.
To edit the list:
Enter or edit the list name and list description.
Add parameters to or remove parameters from the list.
To remove a parameter from a list, select the check box next to the parameter name and click Remove.
To add a parameter to a list, click Add. Follow the steps in "Adding Parameters to a List".
To save the list, click Save. To distribute the parameters to the registers, click Save and Distribute.
On the Select Parameter screen, you can add parameters to a new or existing list.
To add parameters to a list:
To add parameters to the list, click Add. The Select Parameter screen is displayed. For an example of the screen, see "Back Office Parameter Maintenance".
Select a group name from the menu and click Refresh. The screen displays the parameters for the chosen group.
To choose the parameters to add, select the check box next to the parameter name and click Update List. To add more parameters, select a new group and click Refresh to display new parameters.
Click Return to List. The List Details screen is displayed containing the newly added parameters.
Once you have saved a list and chosen to distribute it, the Select Recipient-Registers screen is displayed. You can distribute the list to all the registers or to specific registers.
To send the list to all registers:
Click All Registers.
Click Next. The Job Schedule screen is displayed. To follow the steps to schedule the parameter distribution, see "Scheduling a Job".
To send the list to specific registers:
Click Individual Registers.
Select a register number from the menu.
Click Add. The register number appears under "Registers included in distribution." To remove a register, select the check box next to the register number and click Remove.
Click Next. The Job Schedule screen is displayed. To follow the steps to schedule the parameter distribution, see "Scheduling a Job".
You can view parameters scheduled to be distributed to the registers.
To view parameters:
Click the Administration tab.
Select the Parameter Maintenance subtab.
Click the Distributions left navigation link. The Scheduled Exports screen is displayed. This screen shows a list of the export jobs that have been scheduled to run.
Edit any of the scheduled distributions. To edit the distribution schedules, see "Editing Scheduled Imports and Exports".
The distributions function enables you to work with the currently scheduled parameter distribution jobs.
|
Note: The parameter list that is distributed contains the parameters and their values that existed in the list on the date and time the distribution job was saved. If the data distribution includes any store groups, the stores included in a group are determined when the distribution job actually runs. |
Click Distributions. The Scheduled Exports screen is displayed. Only parameter distribution jobs that have been scheduled are shown. From this screen, you can set a job to run immediately, remove a job from the schedule, and change the run date and notifications. See "Editing Scheduled Imports and Exports" for more information.
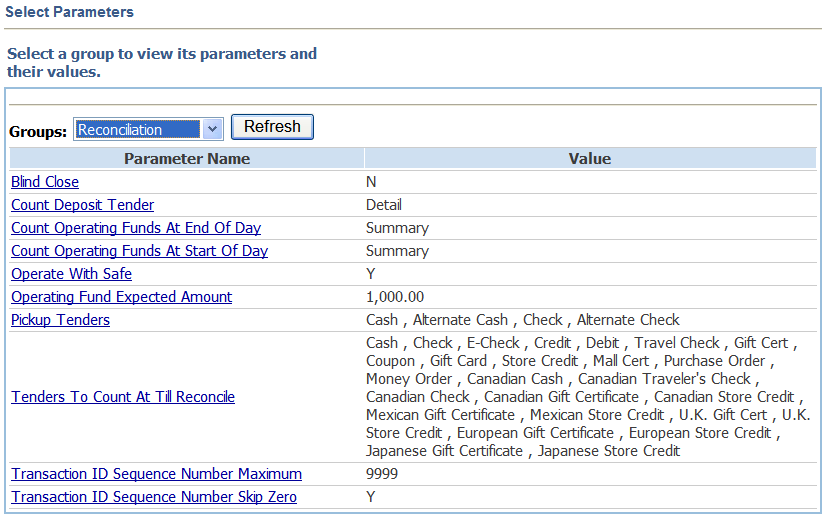
On the Select Parameters screen, you can view and change parameter values. You may set the parameters that affect both Oracle Retail Back Office and Point-of-Service. To set a parameter, change or enter a new value for that parameter. This consists of choosing a value for each parameter.
To set parameters:
Click the Administration tab.
Click the Back Office Parameter Maintenance subtab. The Select Parameters screen is displayed.
Select a group from the menu to view the parameters within that group.
Click the parameter name link of the parameter you wish to view. The Edit Parameter screen is displayed. See "Editing a Parameter".
Select another link to view the details of that parameter.
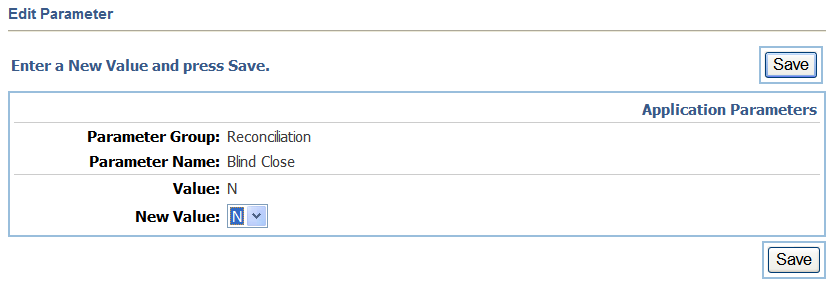
On the Edit Parameter screen, a new value can be selected for the parameter.
Enter or select a new value for the parameter. The edit screen displayed depends on the parameter:
If the parameter uses a value field, enter the new value. The minimum and maximum allowed values are displayed on the edit screen.
If the parameter uses one value chosen from a list of possible values, select the new value from the list.
If the parameter allows more than one value from a list, select a value from the list and click Add. Repeat this for each value you want to choose.
If the parameter uses a created list, enter the new values separated by commas.
Click Save. The Select Parameters screen is displayed.
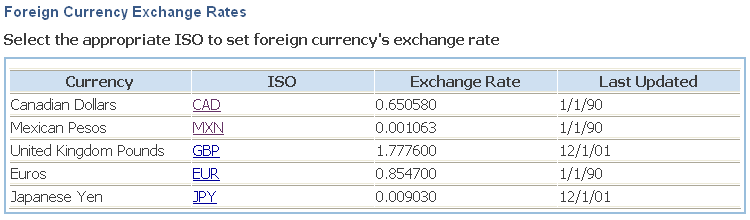
On the Foreign Currency Exchange Rates screen, each type of currency is listed with the currency name, ISO, exchange rate, and the date last updated. You may adjust exchange rates for foreign currency.
To adjust exchange rates:
Click the Administration tab.
Click the Exchange Rate Maintenance subtab. The Foreign Currency Exchange Rates screen is displayed.
To change an exchange rate, click the ISO link of the exchange rate. The Set Exchange Rate screen is displayed.
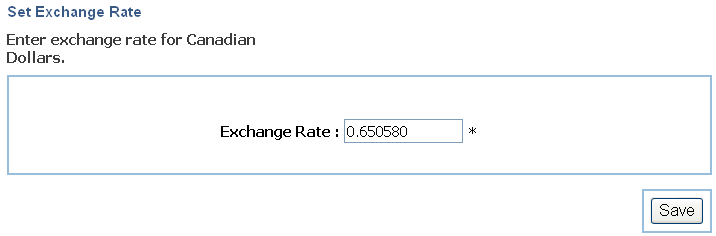
On the Set Exchange Rate screen, the exchange rate for the currency selected on the Foreign Currency Exchange Rate screen can be changed.
To set the exchange rate:
Enter a new exchange rate as a numerical value.
To save the new exchange rate, click Save. The new value and the current date are displayed on the Foreign Currency Exchange Rates screen.