| Oracle® Fusion Middleware Tutorial for Running and Building an Application with Oracle SOA Suite 11g Release 1 (11.1.1) Part Number E10275-02 |
|
|
View PDF |
| Oracle® Fusion Middleware Tutorial for Running and Building an Application with Oracle SOA Suite 11g Release 1 (11.1.1) Part Number E10275-02 |
|
|
View PDF |
This chapter describes how to create the WebLogic Fusion Order Demo application in Oracle JDeveloper for Fusion Order Demo. It also describes how to create the PartnerSupplierComposite during the creation of the application.
Before following the instructions in this chapter, perform all the procedures in Chapter 1.
This chapter contains the following sections
See Chapter 1, "Introduction to the SOA Sample Application," for an overview of the WebLogic Fusion Order Demo application.
The PartnerSupplierComposite composite contains a BPEL process, ExternalPartnerSupplier. In the OrderBookingComposite composite, the Scope_RetrieveQuotes scope of the OrderProcessor BPEL process uses this process to obtain a quote from an external partner warehouse. When you create the Scope_RetrieveQuotes scope and the ExternalPartnerSupplier Web service in Chapter 6, "Creating the Second Half of the OrderProcessor BPEL Process," you reference the ExternalPartnerSupplier BPEL process.
Figure 3-1 shows PartnerSupplierComposite in the SOA Composite Editor.
In this procedure, you create the WebLogic Fusion Order Demo application, the PartnerSupplierComposite project, and the ExternalPartnerSupplier BPEL process. It contains the following tasks:
Task 1: Create the WebLogicFusionOrderDemo Application and the PartnerSupplierComposite Composite
Task 6: Initiate a Test Instance for the PartnerSupplierComposite Composite
Note:
Oracle SOA Suite is not automatically installed with Oracle JDeveloper. Before you can create an SOA application and project, you must install the Oracle SOA Suite extension. For instructions on installing this extension for Oracle JDeveloper, see the Oracle Fusion Middleware Installation Guide for Oracle JDeveloper.To create the WebLogic Fusion Order Demo application:
Open the New Gallery by choosing File > New.
Click the Current Project Technologies tab.
From either the All Technologies tab or the Current Project Technologies tab, in the Categories tree, select General, and then Applications.
From the Items list, select SOA Application.
Click OK.
On the Name your application page, enter the following values:
| Element | Value |
|---|---|
| Application Name | WebLogicFusionOrderDemo |
| Directory | Specify directory location directory_path\CompositeServices, such as C:\fod\CompositeServices. Oracle JDeveloper creates this directory, which acts as a container for all the projects.
This tutorial refers to the application directory that you specified as |
| Application Package Prefix | Do not enter a value. |
Click Next.
On the Name your project page, enter the following values:
Click Next.
On the Configure SOA Settings page, from the Composite Template section, select Composite With BPEL.
Click Finish.
The Create BPEL Process dialog displays.
Now, continue with the creation of the ExternalPartnerSupplier BPEL process:
In the Create BPEL Process dialog, enter the following values:
| Element | Value |
|---|---|
| Name | ExternalPartnerSupplier |
| Namespace | http://www.partnersupplier.example.com/ns/warehouse |
| Template | Asynchronous BPEL Process |
| Expose as a SOAP service | Select this check box to create a BPEL process connected to an inbound SOAP service binding component. |
In the Input field, import the complete schema located in the DEMO_DOWNLOAD_HOME directory.
In the Input field, click the Browse Input Elements icon.
The Type Chooser dialog displays.
Click the Import Schema File icon.

The Import Schema File dialog displays.
Click the Browse Resources icon to the right of the URL field.
The SOA Resource Browser displays.
Select File System and in the Location section, search for Warehouse.xsd in DEMO_DOWNLOAD_HOME/CompositeServices/PartnerSupplierComposite/xsd and click OK.
In the Import Schema dialog, ensure the Warehouse.xsd now displays in the URL field and the Copy to Project option is selected, and then click OK.
The Localized Files dialog displays, prompting you to import the Warehouse.xsd schema file and any dependent files, which includes the ExternalPartnerSupplier.wsdl WSDL file.
Deselect option Maintain original directory structure for imported files and click OK to import the files.
The Type Chooser dialog displays.
Expand Project Schema Files > Warehouse.xsd and select WarehouseProcessRequest and then click OK.
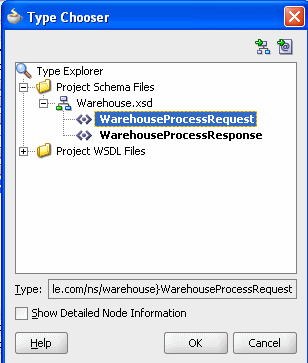
In the Create BPEL Process dialog, import the elements from the Warehouse.xsd file for the output:
In the Output field, click the Browse Output Elements icon.
The Type Chooser dialog displays.
Expand Project Schema Files > Warehouse.xsd and select WarehouseProcessResponse, and then click OK.
In the Create BPEL Process dialog, click OK.
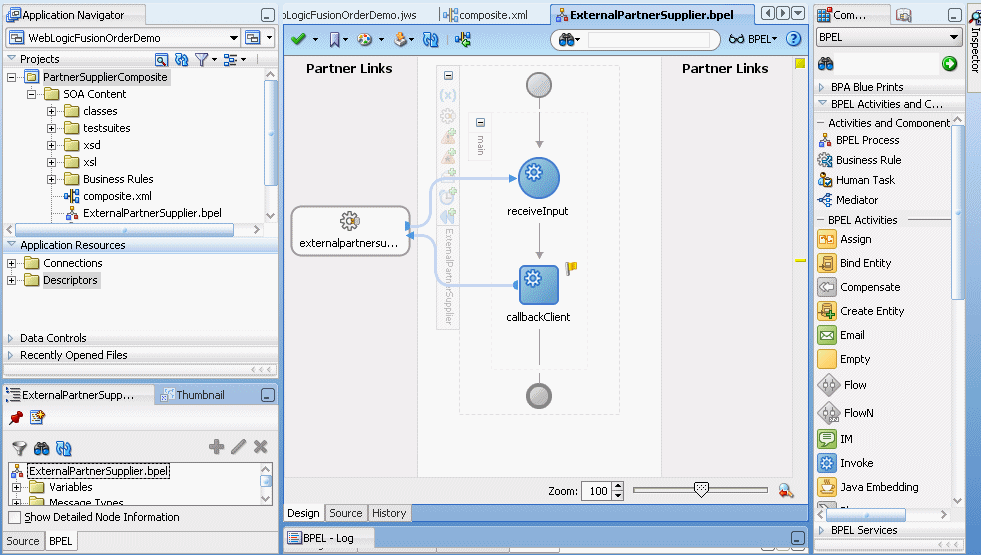
The designer displays three tabs:
| Tab | Description |
|---|---|
| WebLogicFusionOrderDemo.jws | This tab shows the contents of the application workspace. The Application Overview is the home for all files you can create in this application. If this tab does not display, from the Application menu, select Show Overview.
For an introduction to the Application Overview, click F1 on the tab to display the online help. |
| composite.xml | This tab displays the PartnerSupplierComposite composite in the SOA Composite Editor.
For an overview of the SOA Composite Editor, see Oracle Fusion Middleware Developer's Guide for Oracle SOA Suite. |
| ExternalPartnerSupplier.bpel | This tab displays the ExternalPartnerSupplier BPEL process in the BPEL Designer.
For an overview of the BPEL Designer, see Oracle Fusion Middleware Developer's Guide for Oracle SOA Suite. |
Notice, too, the PartnerSupplierComposite project displays in the Application Navigator.
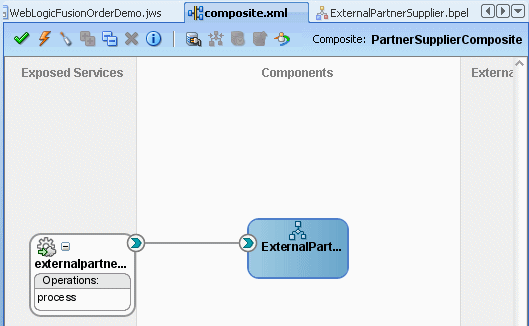
Click the composite.xml tab to view PartnerSupplierComposite composite. SOAP service binding component external_partnersupplier_client in the left swim lane provides the outside world with an entry point into the SOA composite application.
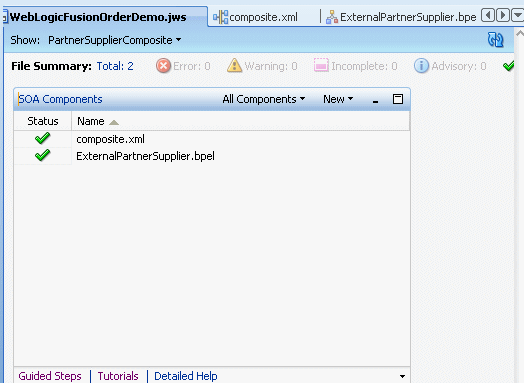
Click the WebLogicFusionOrderDemo.jws tab to view the contents of the WebLogicFusionOrderDemo application.
Select Save All from the File main menu to save your work.
Next, you create an assign activity to take the purchase amount and the order date and the current date as input variables to the ExternalPartnerSupplier service. An assign activity transfers data between variables, expressions, and other elements.
Click the ExternalPartnerSupplier tab.
Create the assign activity:
From the Component Palette, drag an Assign activity below the receiveInput receive activity.
Rename this activity by double-clicking the name underneath the icon. Do not double-click the activity icon itself.
In the edit field, change the name to AssignResponse.
Double-click the assign activity.
The Assign dialog displays.
Assign the purchase amount of the input to the OrderTotal variable for the ExternalPartnerSupplier service:
From the dropdown list, select Copy Operation:
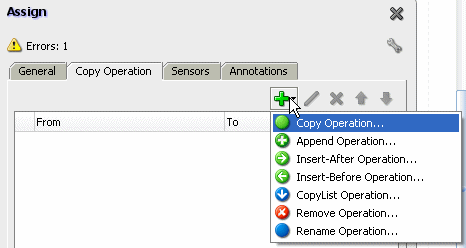
The Create Copy Operation dialog appears.
On the From side, leave the Type selection as Variable and expand Variables > inputVariable > payload > client: WarehouseProcessRequest and select client:orderTotal.
On the To side, leave the Type selection as Variable and expand Variables > outputVariable > payload > client: WarehouseProcessResponse and select client:orderTotal.

Click OK to close the Create Copy Operation dialog and return to the Assign dialog.
The Copy Operation tab in the Assign updates to show the operation you created.
Assign the current date to the output deliveryDate variable for the ExternalPartnerSupplier service:
From the dropdown list in the Assign dialog, select Copy Operation.
The Create Copy Operation dialog appears.
On the From side, from the Type list, select Expression.
Select the XPath Expression Builder icon.

The Expression Builder displays.
In the Functions section in the lower right, from the menu, select Date Functions, and then select current-date from the menu options.
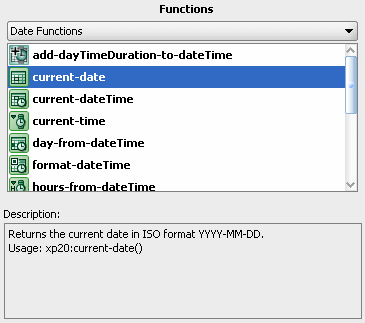
Click Insert Into Expression, and then click OK to return to the Create Copy Operation dialog.
On the To side, leave the Type selection as Variable and expand Variables > outputVariable > payload > client:WarehouseResponse and select client:deliveryDate.
Click OK to close the Create Copy Operation dialog and return to the Assign dialog.
The Copy Operation tab in the Assign dialog updates to show the two operations you created.
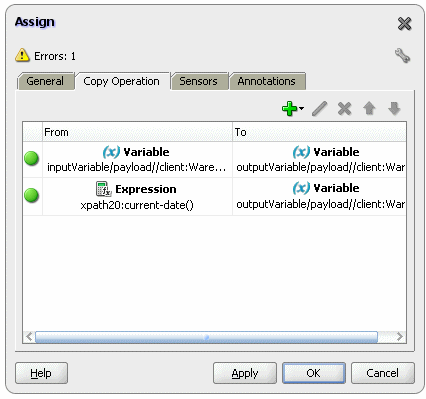
In the Assign dialog, click OK.
Select Save All from the File main menu to save your work.
Click X in the ExternalPartnerSupplier.bpel tab to close the process.
Click X in the composite.xml tab to close the composite.
The PartnerSupplierComposite composite and ExternalPartnerSupplier BPEL process are now complete.
To deploy the PartnerSupplierComposite composite:
In the Application Navigator, right-click PartnerSupplierComposite and select Deploy > PartnerSupplierComposite > to MyAppServerConnection.

The SOA Deployment Configuration Dialog displays.
Accept the default settings and click OK.
When prompted with the Authorization Request dialog, enter weblogic in the Username field and the password in the Password field.
In SOA - Log, a series of validations display, followed by:
BUILD SUCCESSFUL
Total time: nn seconds
In this task, you initiate a test instance of the PartnerSupplierComposite composite from the Test Web Service page in Fusion Middleware Control to verify the assign activity is working properly.
To initiate a test instance of the PartnerSupplierComposite composite:
Start Fusion Middleware Control. See Section 2.3.
From the SOA Infrastructure menu, select SOA Administration and select Common Properties.
On the Common Properties page, enter the following values to collect data for running instances:
| Element | Value |
|---|---|
| Audit Level | Development |
| Capture Composite Instance State | Click to enable. |
Click Apply to apply changes.
Access the Test Web Service page through the following options:
| From the SOA Infrastructure Menu... | From the SOA Folder in the Navigator... | From the SOA Composite Menu... |
|---|---|---|
|
|
Select Test Service > externalpartnersupplier_client_ep. |
The Test Web Service page for initiating an instance appears. This page provides many options for initiating an instance. At a minimum, you must specify the XML payload data to use in the Input Arguments section.
The WSDL file and endpoint URL are populated automatically based on the service you selected to test. The endpoint URL is derived from the WSDL and can be overridden to invoke that service at a different location. The port of the current service is displayed.
In the Inputs Arguments section, enter the input arguments for the Web service:
In the orderItemArray Size field, enter 1 and then click the Array Size icon.

Expand orderItems > orderItems in the tree, and enter values for the following fields:
- OrderTotal
- quantity
- productId
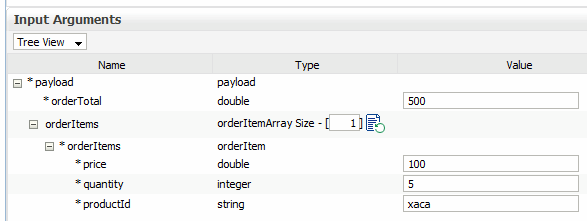
Click Test Web Service.
The test results appear in the Response tab upon completion.

Click Launch Message Flow Trace to access the flow trace of the instance.
In the Flow Trace window, in the Trace section, click the ExternalPartnerSupplier instance.
In the Flow Trace window for the instance, click the Flow tab.
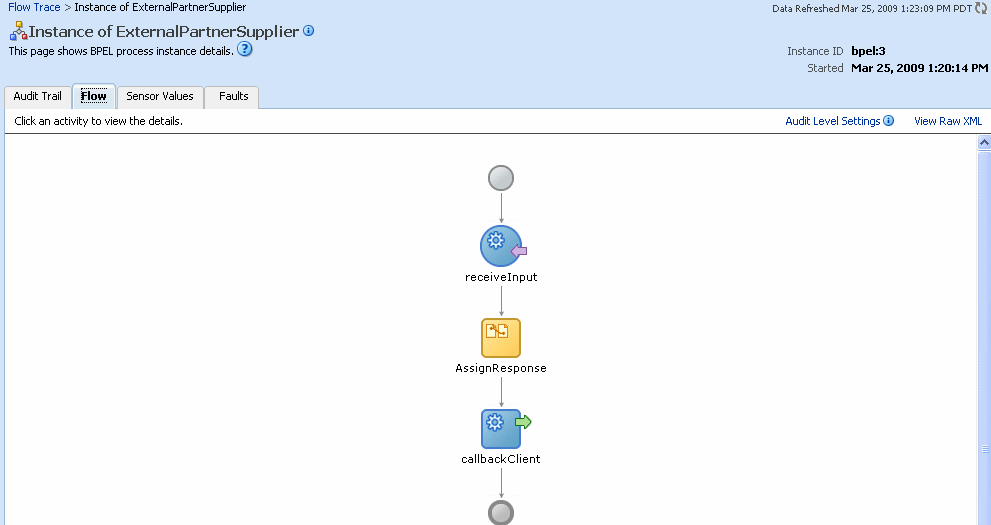
Click the AssignResponse activity to see the value you entered for OrderTotal being copied to the outputVariable.
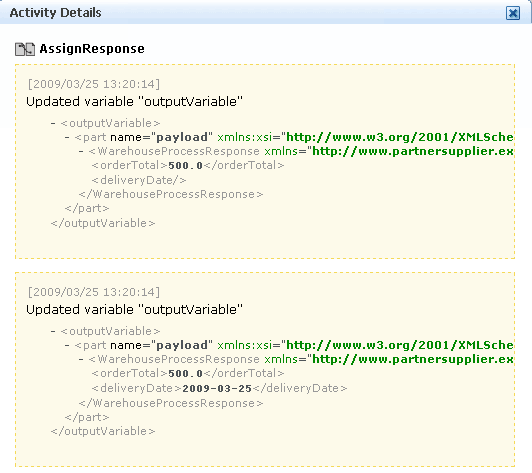
Click X or Close to the dismiss the Activity Details dialog.
Close the Flow Trace window.