


|
This chapter describes how to view and configure authentication and role mapping providers and security provider services.
In the Users, Groups, & Roles > Security Providers menu, you can view detailed information about how providers have been configured to interact with the WebLogic Portal Administration Console. This menu shows the access privileges for each provider you have configured to supply authentication and role-based authorization capabilities, including whether or not you can view, remove, or modify users, groups, and roles.
In the Configuration Settings > Service Administration menu, you can determine whether or not text entry of users and groups is allowed for security providers that do not allow read access, and you can prevent specific users or groups from being created or deleted. You can also configure user management and group management roles that determine runtime operations that can be performed by these roles using the UserProvider and GroupProvider APIs.
This chapter includes the following sections:
Use the WebLogic Portal Administration Console to view the access privileges for each provider you have configured to supply authentication and role-based authorization capabilities.
The authentication providers and role mappers you connect to WebLogic Server are configured in specific ways. For example, the WebLogic SQL Authenticator is typically configured to allow you to add and remove users and groups using the WebLogic Portal Administration Console, while a custom authenticator may be configured to provide only read access to users and groups.
Perform the following steps to view the configured security providers:
The Browse Security Providers tab shows the title and description for each category of provider, including authentication providers and role mappers, as shown in Figure 6-1.
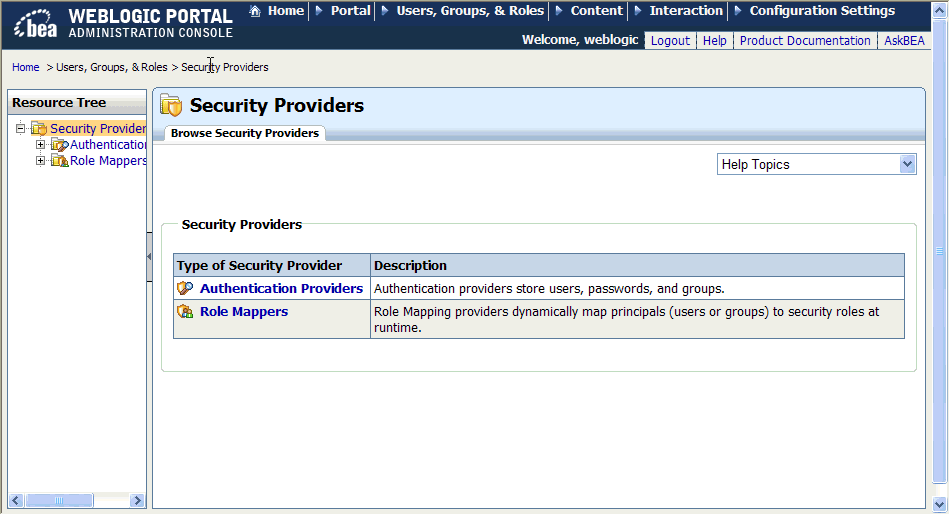
From this tab, you can choose a type of security provider, either Authentication Providers or Role Mappers, to view additional information.
Authentication providers store users, passwords, and groups, which can be viewed and managed directly in those providers. The providers are also configured with rules for how tools such as the WebLogic Portal Administration Console interact with them.
The WebLogic SQL Authenticator (the default authentication provider) and WebLogic LDAP Authenticator provide read and write access from the WebLogic Portal Administration Console (and the WebLogic Server Administration Console) by default.
The typical configuration for users and groups in supported external authentication providers is read-only access from the WebLogic Portal Administration Console (and the WebLogic Server Administration Console). To provide write access to external users and groups from the WebLogic Portal Administration Console, you must develop your custom authentication provider to allow write access. If you are using any custom authentication providers, develop them according to the guidelines in How to Develop a Custom Authentication Provider.
Perform the following steps to view the configured authentication providers:
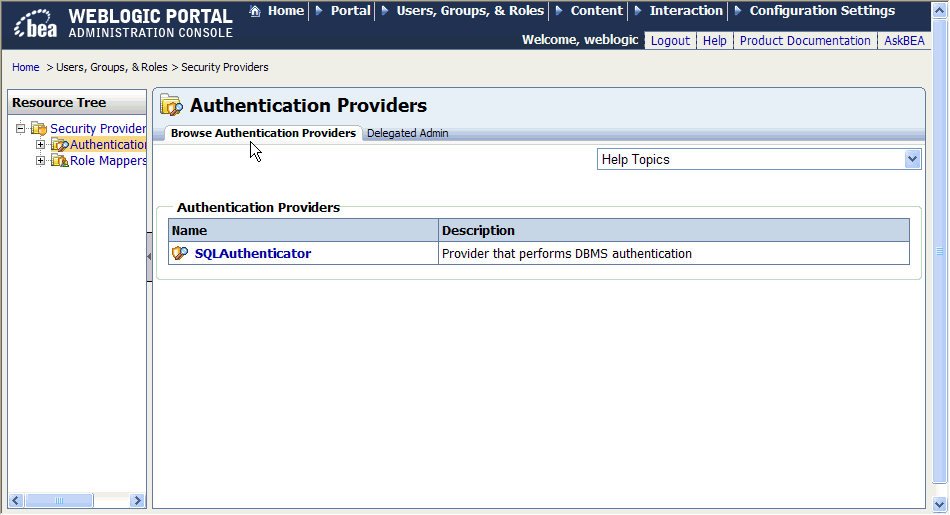
The Browse Authentication Providers tab shows the title and description for each authentication provider, as shown in Figure 6-2. At least one authentication provider, SQLAuthenticator, is present by default.
| Tip: | You can also build group hierarchy trees for authentication providers in the WebLogic Portal Administration Console. A tree view of groups provides a convenient visual mode for changing profile values, finding users within groups, and adding users and groups to delegated administration and visitor entitlement roles. For more information, see the User Management Guide. |
Perform the following steps to view the details for a configured authentication provider:
The Authentication Provider Details tab shows the name, description, and version of the authentication provider. It also shows which management interfaces are implemented for the provider.
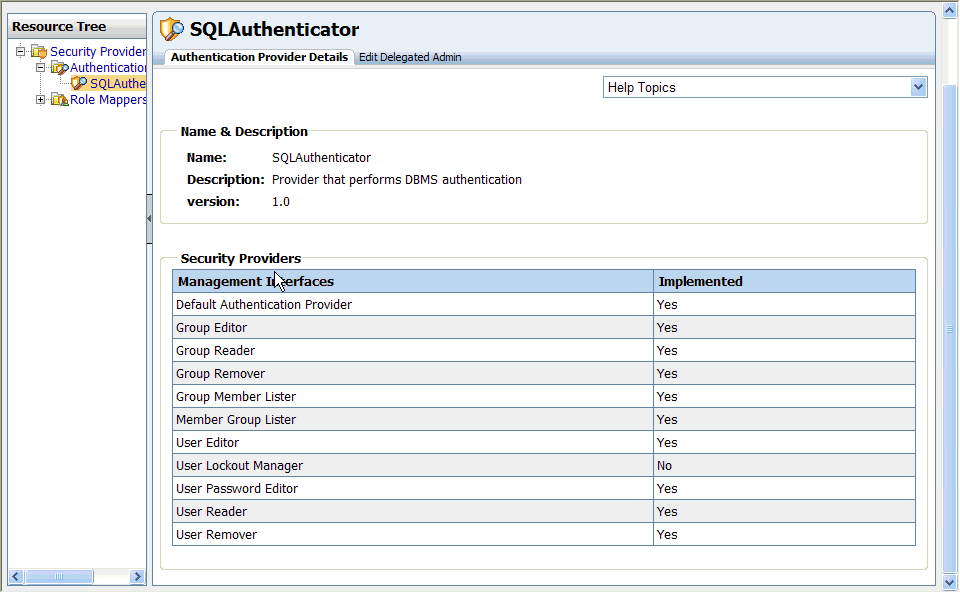
Descriptions of the available management interfaces are listed in Table 6-1.
User lockout settings include how many unsuccessful login attempts a user can make before being prevented from future login attempts. For information about how to modify user lockout settings in the WebLogic Server Administration Console, see the
Administration Console Online Help.
|
|
To provide write access to external users and groups from the WebLogic Portal Administration Console, the authentication provider must be configured to allow it. This is a development task. For more information, see Configuring WebLogic Security Providers.
If an authentication provider does not provide read access to users and groups with the WebLogic Portal Administration Console, you can still use text entry fields to type in the names of existing users and groups for selection. For example, if you want to change the user profile property values for a user stored in a provider that does not support read access, you can type the name of the user in the Users Management tree to select the user for property modifications. For information about allowing text entry, see Enabling Text Entry for Authentication Providers.
For information on determining if you need to develop a custom authentication provider, and how to develop one, see How to Develop a Custom Authentication Provider. If you want to add an authentication provider, see Choosing WebLogic and Custom Authentication Providers.
If you remove an authentication provider using the WebLogic Server Administration Console, be sure to also remove the provider from the WebLogic Portal Administration Console from the Service Administration > Authentication Hierarchy Service tree. For more information, see the User Management Guide.
A role mapping provider determines which security roles apply to operations performed on a resource.The default role mapping provider is the WebLogic XACML provider, XACMLRoleMapper, which uses the embedded LDAP server to store role policies.
| Note: | The WebLogic XACML role mapping provider is required for WebLogic Portal, and suitable for most needs. It is unlikely that you will need to configure a custom role mapping provider. |
Perform the following steps to view the configured role mappers:
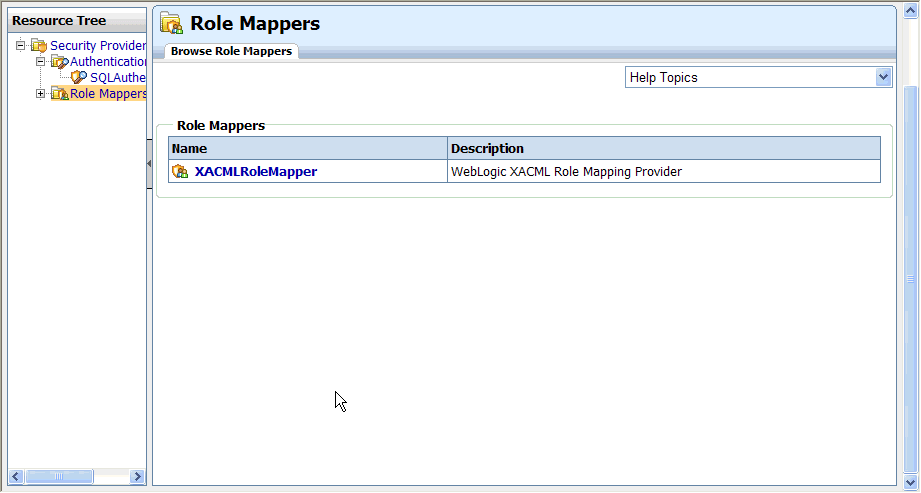
The Browse Role Mappers tab shows the title and description for each role mapper. The default role mapper, XACMLRoleMapper, is present by default, as shown in Figure 6-4.
Perform the following steps to view the details for a configured role mapper:
The Role Mapper Details tab shows the name, description, and version of the role mapper. It also shows which management interfaces are implemented for the role mapper.
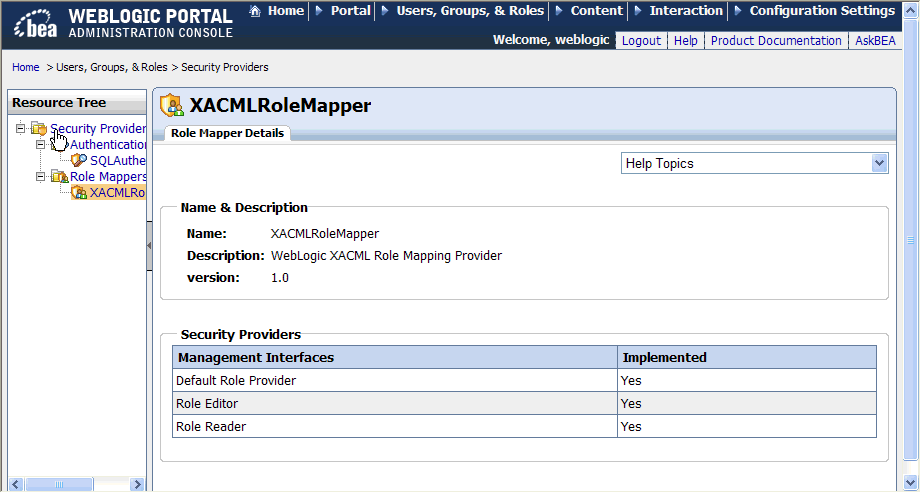
Descriptions of the available management interfaces are listed in Table 6-2.
Perform the following steps to view the configured authentication provider services:
The Authentication Security Provider Service window shows the name and description for each service that has been configured. The AllAtnProviders service configuration settings apply to all authentication provider services, unless the settings are overridden for an individual authentication provider service.
Perform the following steps to view detailed information about a configured authentication provider service:
AllAtnProviders service configuration settings apply to all authentication provider services; these settings can be overridden for an individual authentication provider service.Detailed information about the selected authentication provider service is displayed.
The Predicate Text Entry Enabled? check box determines whether delegated administrators can add user, group, and role names to role and security policies by entering their names in a text box. For more information, see Enabling Text Entry for Authentication Providers.
You can also see which roles have the capability to create, read, update, or delete groups and users using the GroupProvider and UserProvider APIs.
The Anonymous role includes any unauthenticated user. The Self role is the logged in authenticated user, and indicates whether that user can perform operations for themselves, such as adding themselves to a group or changing their password.
Table 6-3 describes the group management and user management capabilities.
You can also restrict groups and users with specified names from being created or deleted.
Table 6-4 describes group and user naming restrictions you can set.
From this window, you can add an authentication provider service to configure, as described next, or edit configuration settings, as described in Configuring Authentication Provider Services.
You can add an existing authentication provider service so that you can view and edit its configuration settings in the Service Administration menu.
Perform the following steps to add an authentication security provider service:
The service you have added appears in the list of services.
Updates to any of these settings require either enterprise application redeployment or server restart.
You can modify the following configuration settings for authentication provider services:
Some authentication providers may not allow read access to users and groups by external tools such as the WebLogic Portal Administration Console. If providers do not allow read access to users and groups, you can enable a text entry field that allows you to type in user and group names in the User Management, Groups Management, Delegated Administration, and Visitor Entitlements menus for those providers. By enabling text entry, you override the requirement that SSPI providers implement reader interfaces.
The text box, which appears in the tree section when text entry is enabled, allows you enter the names of known users and groups. You can assign profiles for those users or groups, and define delegated administration and visitor entitlements policies using those users and groups. When a user from a non-readable authentication provider logs in, the profile created for that user enables authorization checks to be performed for the user.
To enable text entry for an authentication security provider service:
This change requires either enterprise application redeployment or server restart.
When you add a group management role to an authentication provider service, you enable capabilities for manual runtime checks performed by API calls to group providers. This provides a low-level alternative to using visitor entitlements on groups. For each group management capability (create, read, update, and delete), you can specify which roles are allowed to perform the task.
| Note: | Use existing global or enterprise-application scoped roles. |
Perform the following steps to add role capabilities for the GroupProvider API:
The new role appears in the list of Group Management Roles. This change requires either enterprise application redeployment or server restart.
Group Management role capabilities are used for manual runtime checks performed by API calls to group providers. This provides a low-level alternative to using visitor entitlements on groups.
Perform the following steps to edit group management role capabilities for the GroupProvider API:
The updated role appears in the list of Group Management Roles. This change requires either enterprise application redeployment or server restart.
When you add a user management role to an authentication provider service, you enable capabilities for manual runtime checks performed by API calls to user providers. For each user management capability (create, read, update, and delete), you can specify which roles are allowed to perform the task.
| Note: | Use existing global or enterprise-application scoped roles. |
Perform the following steps to add user management role capabilities for the UserProvider API:
The new role appears in the list of User Management Roles. This change requires either enterprise application redeployment or server restart.
User Management role capabilities are used for manual runtime checks performed by API calls to group user.
Perform the following steps to edit user management role capabilities for the UserProvider API:
The updated role appears in the list of User Management Roles. This change requires either enterprise application redeployment or server restart.
For each authentication provider, you can specify group names that cannot be created or deleted.
Perform the following steps to set restrictions on group names:
The group name role appears in the list of Protected/Reserved Groups. This change requires either enterprise application redeployment or server restart.
Perform the following steps to edit the restrictions for group names that are in the list of Protected/Reserved Groups:
The new restrictions for this group name role appears in the list of Protected/Reserved Groups. This change requires either enterprise application redeployment or server restart.
For each authentication provider, you can specify user names that cannot be created or deleted.
Perform the following steps to set restrictions on user names:
The user name role appears in the list of Protected/Reserved Users. This change requires either enterprise application redeployment or server restart.
Perform the following steps to edit the restrictions for user names that are in the list of Protected/Reserved Users:
The new restriction for this user name appears in the list of Protected/Reserved Users. This change requires either enterprise application redeployment or server restart.
Perform the following steps to view the configured role provider services:
The Role Security Provider Service window shows the name and description for each service that has been configured. The AllRolePrividers service configuration settings apply to all role mapping provider services, unless the settings are overridden for an individual role provider service.
The default role mapping provider is the WebLogic XACML provider, XACMLRoleMapper, which uses the embedded LDAP server to store role policies.
| Note: | The WebLogic XACML role mapping provider is required for WebLogic Portal, and suitable for most needs. It is unlikely that you will need to configure a custom role mapping provider. |
Perform the following steps to view detailed information about a configured role provider service:
AllRoleProviders service configuration settings apply to all role provider services, unless the settings are overridden for an individual role provider service.The Predicate Text Entry Enabled? capability determines whether delegated administrators can add user, group, and role name predicates to role and security policies by entering their names in a text box. For more information, see Enabling Text Entry for a Role Mapping Providers.
You can add an existing role provider service so that you can view and edit the configuration settings in the Service Administration menu.
Perform the following steps to add a role security provider service:
The service you have added appears in the list of services.
Updates to any of these settings require either enterprise application redeployment or server restart.
The default role mapping provider is the WebLogic XACML role mapping provider, which uses the embedded LDAP server to store role policies. The WebLogic XACML role mapping provider is required for WebLogic Portal, and suitable for most needs. It is unlikely that you will need to configure a custom role mapping provider.
Some role providers may not allow read access to role policies by external tools such as the WebLogic Portal Administration Console. If providers do not allow read access to roles, you can enable a text entry field that allows you to type in role names in the Delegated Administration and Visitor Entitlements menus for those providers. By enabling text entry, you override the requirement that SSPI providers implement reader interfaces.
The text box, which appears in the menu tree when text entry is enabled, allows you enter the names of known roles. You can define delegated administration and visitor entitlements policies using these role names.
To enable text entry for a role security provider service:
This change requires either enterprise application redeployment or server restart.


|