

|
This tutorial provides step-by-step instructions to create a loan approval tracking system for a fictitious financial institution, Acme Financial System (AFS), using human interaction and system integration functionality available with Worklist.
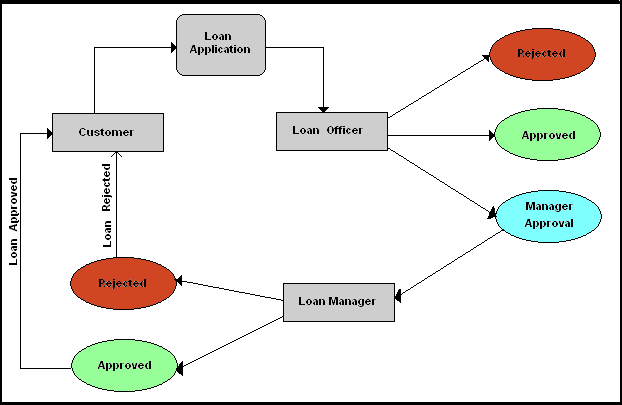
Figure 1-1 illustrates the loan approval tracking system scenario that you will create during the course of this tutorial.

The sequence of events is as follows:
This tutorial includes the following tasks:
In the tutorial, these tasks have been structured and categorized into five steps. These are:
The task details the steps required to set up the Worklist Design-Time environment for modeling the target task plan, and the Worklist run-time environment for running the application. This task also shows how to set up the users, and groups.
This task details how the loan processing task plan can be modeled to implement the business scenario and then be deployed on the Oracle WebLogic Integration server.
The Worklist User Portal provides different users to work on the task instances. This task details show how a loan processing task can be created and worked on to completion by many users through the Worklist User Portal (see Using Worklist User Portal).
In this section, the administrator uses the Worklist Console to look at the overall statistics of the loan processing task instances. In addition, the administrator reassigns some task instances because the assigned employee has left the company.
In this section, the loan processing requests come from an online system that triggers a business process, which creates the task instance.


|