Once you create a return type, you can add a complex type as a child of any element, in Query Map view. The complex child element must represent a physical data service. The parent element can have a one-to-many or one-to-one relationship with the child, depending on how you want the result data returned.
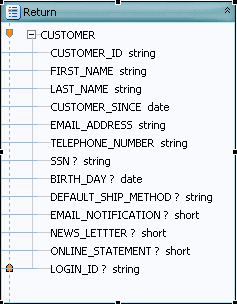
A Simple Return Type Before Adding a Child Element
To add a complex child element to a return type visually:
Open the logical data service in Studio.
Check Project Explorer. Be sure that your dataspace project has a physical data service for the complex child element you want to add. If it does not, add one
File > New > Physical Data Service
Click the Query Map tab.
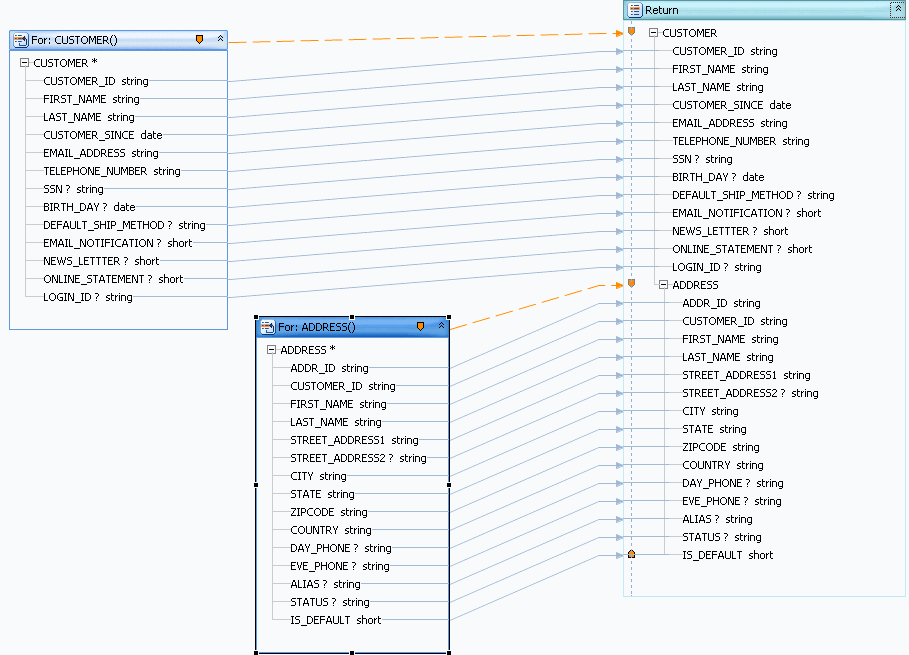
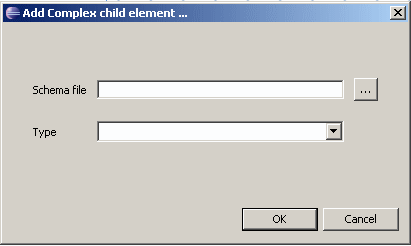
In the return type, right-click the new parent element, and choose Add Complex Child Element.
For the Schema File field, browse (...) to the schema of the physical data service that represents the complex child element.
For Type, choose a complex type from the schema, then click OK.
From Project Explorer, drag the primary read function of the physical data service to the Query Map.
Starting from the child element's For block, drag the zone icon to the child element in the return type.
Starting from the child element's For block, drag the parent type of the complex element to the return type.
This step maps all of the elements in the complex child to the return type.
Right-click the title bar of the return type, and choose Save and Associate XML Type.
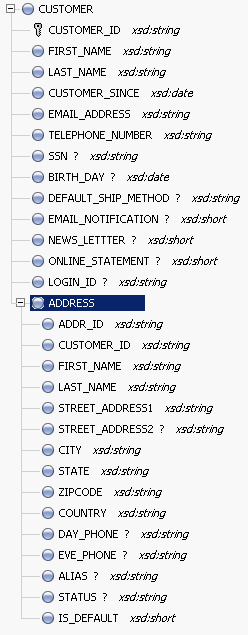
Click the Overview tab, and expand the schema to view the complex child in the return type.
You can also right-click the schema and choose Edit Schema to view the XML source.
Edit the XML Source
Adding the complex child element to the return type in the XML source accomplishes the same thing as adding it visually.
To add a complex child element to a return type in XML source:
Open the logical data service in Studio.
Check Project Explorer. Be sure that your dataspace project has a physical data service for the complex child element you want to add. If it does not, add it:
File > New > Physical Data Service
Click the Overview tab.
Right-click the return type schema in the center, and choose Edit Schema.
You see the schema for the logical data service, without the child element:
In Project Explorer, right-click the schema file of the physical data service that represents the child element, and choose Open With.
You see the schema of the child element.
Copy the complex type from the physical data service schema to the logical data service schema. Take only the complex type:
 to the child element in the return type.