Content starts here Setting Up the Inverse Functions Sample
This page last changed on Jun 30, 2008.

edocs Home > BEA AquaLogic Data Services Platform 3.0/3.2 Documentation > ALDSP 3.2 New Features Documentation

How To Set Up the Inverse Functions Sample

This topic describes how to import and configure the ALDSP inverse functions sample dataspace project.

Topic Map


Using Inverse Functions to Improve Query Performance

Requirements 

You can install and work with the inverse function sample on any system with ALDSP 3.2 (server 10.1) or ALDSP 3.0 or 3.01 (server 9.2) installed.

The inverse function sample is available as a ZIP file from:

It is recommended that the ZIP file be extracted into an ALDSP directory such as:

<ALDSP_HOME>/user_projects/workspaces/default/InverseFunctionSample
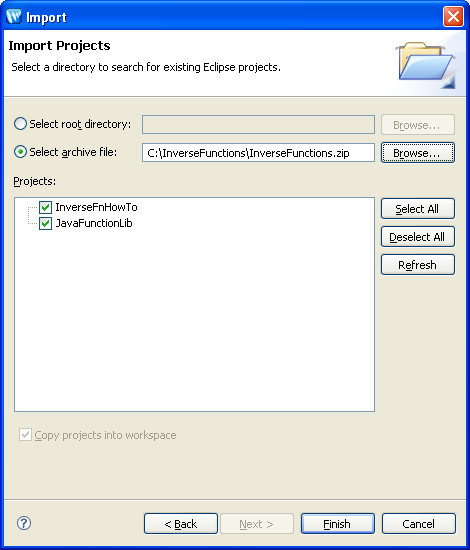
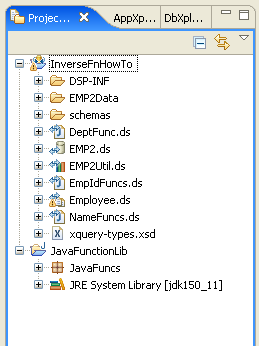
Importing the Dataspace Project

The inverse functions sample consists of two projects:

  • The inverse functions sample dataspace
  • A Java project that defines the functions used for transforming the data
    For more information about the inverse functions sample projects, see Exploring the Inverse Functions Sample.

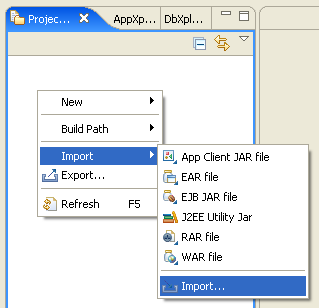
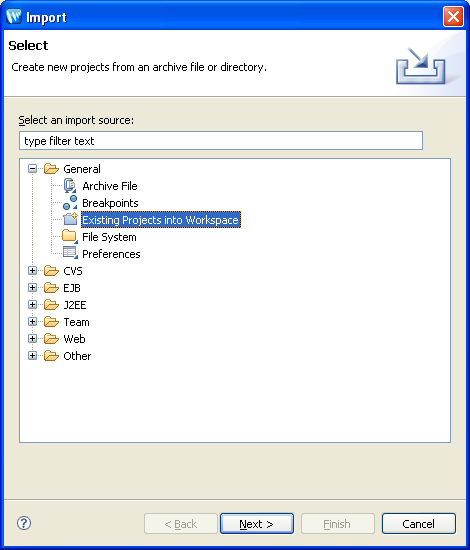
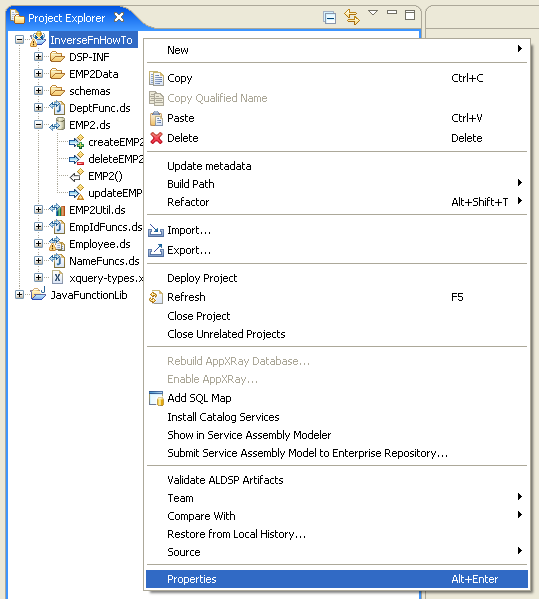
To import the dataspace project:
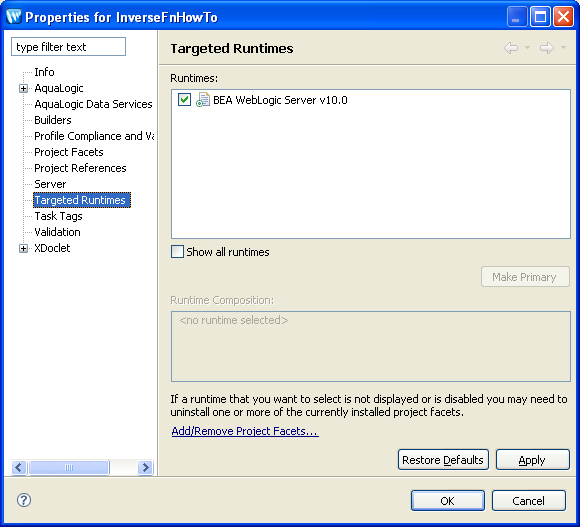
  1. Launch WorkSpace Studio.
  2. Right-click in the Project Explorer and choose Import > Import.

    Import Dialog

  3. Select General > Existing Projects into Workspace, and click Next.

    Import Menu

  4. Click the Select archive file button, and click Browse.
  5. Navigate to the InverseFunctions.zip file, select the file, and click Open.

    Importing the Projects

  6. Click Finish. Studio imports two projects: InverseFnHowTo and JavaFunctionLib.

    Inverse Function Projects

Assigning a Targeted Runtime

Before examining the inverse functions sample, you need to start an ALDSP-enabled server and assigned a targeted runtime server to the project.

To assign a targeted runtime:

  1. Start an ALDSP-enabled server.
  2. In the Project Explorer, right-click the InverseFnHowTo project and choose Properties.

    Choosing Properties

  3. Click Targeted Properties. The list of available servers appears.

    Selecting the Targeted Runtime

  4. Select a server and click OK. Studio assigns a runtime server to the project.

Related topics

Concepts
Reference
Document generated by Confluence on Jul 03, 2008 12:12