|
|
The following sections provide the information you need to install the ALES Security Service Modules:
Before you begin this installation procedure, make sure you do the following:
| Note: | If you start the installation process from the command line or from a script, you can specify the -log option to generate a verbose installation log. For instructions on how to generate a verbose log file during installation, see Generating a Verbose Installation Log. |
If you start the installation process from the command line or from a script, you can specify the -log option to generate a verbose installation log. The installation log lists messages about events during the installation process, including informational, warning, error, and fatal messages. This can be especially useful for silent installations.
| Note: | You may see some warning messages during in the installation log. However, unless there is a fatal error, the installation program will complete the installation successfully. The installation user interface will indicate the success or failure of the installation, and the installation log file will include an entry indicating that the installation was successful. |
To generate a verbose log file during installation, include the -log=/full_path_to_log_file option in the command line or script. For example:
ales220ssm_win32.exe -log=D:\logs\ales_install.log -log-priority=debugales220ssm_solaris32.bin -log=/opt/logs/ales_install.log -log-priority=debugales220ssm_rhas21_IA32.bin -log=/opt/logs/ales_install.log -log-priority=debugales220ssm_rhas3_IA32.bin -log=/opt/logs/ales_install.log -log-priority=debugjava -jar ales220ssm_aix32.jar -log=/opt/logs/ales_install.log -log-priority=debugThe path must be the full path to a file name. If the file does not exist, all folders in the path must exist before you execute the command or the installation program will not create the log file.
The procedure for starting the installation program varies depending the platform on which you install BEA AquaLogic Enterprise Security. Therefore, separate instructions are provide for each supported platform.
| Note: | In a production environment, BEA recommends that you install the Security Service Modules on machines other than the machine on which the Administration Server is installed. |
To start the installation program, refer to the appropriate section listed below:
| Note: | Do not install the software from a network drive. Download the software distribution to a local drive on your machine and install it from there. Also, on a Windows platform, the file system used must be NTFS, not FAT. To check the file system format, open Windows Explorer and right-click the hard drive on which you intend to do the installation and select Properties. |
To install the application in a Microsoft Windows environment:
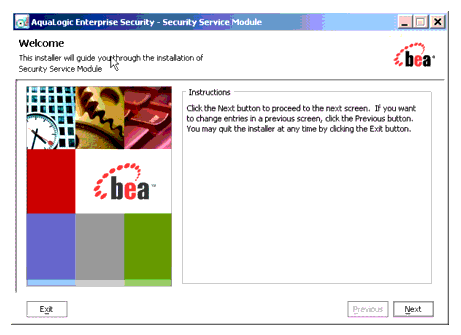
ales220ssm_win32.exe.The BEA Installer - Security Service Module window appears (see Figure 3-1).
If the installation program does not start automatically, open Windows Explorer and double-click the CD-ROM icon.
ales220ssm_win32.exe.The BEA Installer - Security Service Module window appears (see Figure 3-1).
To run graphical-mode installation, your console must support a Java-based GUI. If the installation program determines that your system cannot support a Java-based GUI, the installation program automatically starts console-mode installation.
chmod u+x ales220ssm_solaris32.bin: ales220ssm_solaris32.binThe BEA Installer - Security Service Module window appears (see Figure 3-1).
chmod a+x ales220ssm_solaris32.bin
ales220ssm_solaris32.binThe BEA Installer - Security Service Module window appears (see Figure 3-1).
To run graphical-mode installation, your console must support a Java-based GUI. If the installation program determines that your system cannot support a Java-based GUI, the installation program automatically starts console-mode installation.
DISPLAY variable if needed.
For Red Hat 2.1: chmod u+x ales220ssm_rhas21_IA32.bin
For Red Hat 3.0: chmod u+x ales220ssm_rhas3_IA32.bin
:
For Red Hat 2.1: ales220ssm_rhas21_IA32.bin
For Red Hat 3.0: ales220ssm_rhas3_IA32.bin
The BEA Installer - Security Service Module window appears (see Figure 3-1).
For Red Hat 2.1: chmod u+x ales220ssm_rhas21_IA32.bin
For Red Hat 3.0: chmod u+x ales220ssm_rhas3_IA32.bin
For Red Hat 2.1: ales220ssm_rhas21_IA32.bin
For Red Hat 3.0: ales220ssm_rhas3_IA32.bin
The BEA Installer window appears (see Figure 3-1).
To run graphical-mode installation, your console must support a Java-based GUI. If the installation program determines that your system cannot support a Java-based GUI, the installation program automatically starts console-mode installation.
ales220ssm_aix32.jar, from the BEA web site. Contact BEA Sales at
http://www.bea.com/framework.jsp?CNT=sales1.htm&FP=/content/about/contact/ to request a download.java -jar ales220ssm_aix32.jar
The installation program prompts you to enter specific information about your system and configuration as described in Table 3-1. To complete this procedure you need the following information:
| Note: | If this is the first AquaLogic Enterprise Security product you have installed on this machine, the Service Control Manager is also included as part of the installation (which requires additional inputs, such as the Service Control Manager directory). |
Specify the BEA Home directory that serves as the central support directory for all BEA products installed on the target system. If you already have a BEA Home directory on your system, you can select that directory (recommended) or create a new BEA Home directory. If you choose to create a new directory, the installer program automatically creates the directory for you. For details about the BEA Home directory, see BEA Home Directory.
|
|||||
Specify the directory in which you want to install the product software, and then click Next. You can accept the default product directory (for example,
C:\bea\ales22-ssm\wls-ssm) or you can create a new product directory.
For additional information and a description of the resulting directory structure, see Product Installation Directory.
|
|||||
Select the network interfaces to which to bind the Service Control Manager. This is the IP Address used to listen for requests to provision policy and configuration data.
|
|||||
Enterprise Domain Name—The enterprise domain name is used to link all of the AquaLogic Enterprise Security components.
SCM Port—Port used by the Service Control Manager to receive configuration and policy data from the Administration Server; may not be used by any other server.
|
|||||
ALES 2.2 includes a utility to help you upgrade from AquaLogic Enterprise Security 2.1. Note that no upgrade is available for Apache and Microsoft IIS Web Server SSM instances. If you have an existing installation of ALES 2.1, follow this upgrade procedure. For information about upgrading the Administration Server, see Upgrading from ALES 2.1 in Installing the Administration Server.
asidgrp group (or whatever group you used when installing ALES 2.1).upgrade script, which is located in BEA_HOME/ales22-ssm/upgrade. In response to the prompts, supply the location of the ALES 2.1 SSM instance to be upgraded and the destination of the ALES 2.2 SSM instance to be created. These locations may be the same.
You can run the SSM installation in silent mode. Silent installation mode allows you to run the installer once on one machine and then use the configuration of that machine to duplicate SSM installation on multiple machines. When you run the installation program in silent mode, the installation program reads the configuration information it needs from an XML file that you specify in the command that launches the installation program.
When you run the installation program not in silent mode, it creates an XML file, located at BEA_HOME/ales22-ssm/<ssm>/adm/silent_install_ssm.xml . You can edit this XML file and use it when you run the installation program in silent mode. You need to edit the silent_install_ssm.xml file to set the values described in Table 3-2. Each installation parameter is specified in the XML file as the value of a <data-value> element, as in the following example:
<data-value name="USER_INSTALL_DIR" value="C:\bea\ales22-admin" />
The values you set in the <data-value> elements correspond generally to the responses you enter when you run the installation program not in silent mode, which are described in Table 3-1.
To run the SSM installation in silent mode, use one of the following commands:
ales220ssm_win32.exe -mode=silent -silent_xml=<path_to_silent.xml>
ales220ssm_solaris32.bin -mode=silent -silent_xml=<path_to_silent.xml>
ales220ssm_rhas21_IA32.bin -mode=silent -silent_xml=<path_to_silent.xml>
ales220ssm_rhas3_IA32.bin -mode=silent -silent_xml=<path_to_silent.xml>
Now that you have installed the necessary software, you must enroll the Service Control Manager, create an instance of the Security Service Module and enroll the instance, and then start the services. For additional instructions, see Post Installation Tasks.


|