This section describes how to install BEA eLink Adapter for R/3 on UNIX systems. It covers the following topics:
Installing on a UNIX System
A UNIX user with non-administrative privileges should be created on the R/3 application server to provide a context in which to run both TUXEDO and BEA eLink Adapter for R/3. This user should be used to run TUXEDO and BEA eLink Adapter for R/3 only so that processes associated with TUXEDO and BEA eLink Adapter for R/3 can be identified easily.
BEA suggests that you use
Note:
BEA strongly recommends that you do not use the UNIX R/3 administration user (nnnadm, where nnn represents the R/3 system identifier) to run TUXEDO and BEA eLink Adapter for R/3.
After creating the Run the
Creating the conr3 User
conr3
for the user name. This document will refer to this UNIX user as conr3
. If your organization uses a different user name, then substitute your user name whenever you encounter a reference to conr3
in this document.
Logging In as con3
conr3
user name, log in as that user.
Running install.sh
install.sh
script to install the BEA eLink Adapter for R3 as follows:
If your system is not already configured to access data from a CD-ROM directory, you will need to create a mount directory (for example, Change directories to your CD-ROM directory, for example:
mkdir
/cdrom
) and mount the CD-ROM device (with the mount
command).
cd /cdrom
ls
to view the contents of the CD.
The CD should contain the following files and directories:
HPUX/ IBM/ install.sh readme.txt SUN5X/ WINNT/
Press Enter.
This invokes the installation script.
The UNIX system installation script provides a set of step-by-step instructions to help you quickly install the BEA eLink Adapter for R3. This script lets you specify your platform, operating system, and the directory where you want to install. The installation script prompts you through the entire installation process. You can cancel the installation at any time by pressing sh ./install.sh
CTRL-C
simultaneously.
1
).
Press Enter.
01) HP/HPUX1020 02) HP/HPUX1100 03)IBM/AIX414
04) IBM/AIX421 05)IBM/AIX43 06) SUN5X/SOL251
07) SUN5X/SOL26Install which platform's files? [01-7, q to quit, l for list]: 1
y
for "yes," or n
for
"no" or q
to "quit." Press Enter.
** You have chosen to install from HP/HPUX1020 **
BEA eLink Adapter for R/3 Release 1.4
This directory contains the BEA eLink Adapter for R/3 for
HP-UX 10.20 on 9000/800 series.
Is this correct? [y,n,q]: y
The following copyright information is displayed about the product you are about to install:
The following packages are available:
1 eLinkR3 BEA eLink Adapter for R/3
Select the package(s) you wish to install (or 'all' to install
all packages) (default: all) [?,??,q]: 1
BEA eLink Adapter for R/3 Release BEA eLink Adapter for R/3 Release 1.4
Copyright (c) 1999 BEA Systems, Inc.
All Rights Reserved.
Distributed under license by BEA Systems, Inc.
BEA and eLink are trademarks of BEA Systems, Inc.
Note:
It is recommended that you install BEA eLink Adapter for R3 under a directory named eLink
. The host machine where you install and the prefix path to the eLink
directory is up to you. For this example, we install on /usr/eLink/
.
Directory where eLink files are to be installed [?,q]: /usr/eLink
Creating /usr/eLink
Using /usr/eLink as the eLink base directory
Creating /usr/eLink/adapters
Creating /usr/eLink/adapters/sapr3
Determining if sufficient space is available ...
3180 blocks are required
8201216 blocks are available to /usr/eLink/adapters/sapr3
Using /usr/eLink/adapters/sapr3
as the eLink Adapter for R/3 install directory
Unloading /usr/cd/HP/HPUX1020/ELINKR3/ELINKR3.Z ...
bin/cr3alein
bin/cr3aleout
bin/cr3rfcin
bin/cr3tidmanager
config/cr3_queues.sh
config/cr3_tlog.sh
config/cr3aleout.sh
config/setenv.sh
config/cr3alein.env
config/cr3rfcin.env
config/cr3.ubb
config/cr3.fml
config/sideinfo
3180 blocks
... finished
Installation of BEA eLink Adapter for R/3 was successful
The following packages are available:
1 eLinkR3 BEA eLink Adapter for R/3
Select the package(s) you wish to install (or 'all' to install
all packages) (default: all) [?,??,q]: q
Please don't forget to fill out and send in your registration card
Table 2-1 describes the files and directories that are installed for BEA eLink Adpater for R3 on a UNIX system.
The BEA eLink Adapter for R3 product install program for the Windows NT platform is located in the winnt\setup.exe
file on the CD-ROM.
To install the product, insert the CD into the CD-ROM drive and double click on the winnt\setup.exe
file to launch the installation wizard.
When the installation program launches, follow the prompts shown in the windows as described.
Figure 2-1 Welcome to BEA eLink Adapter for R3 Setup Program
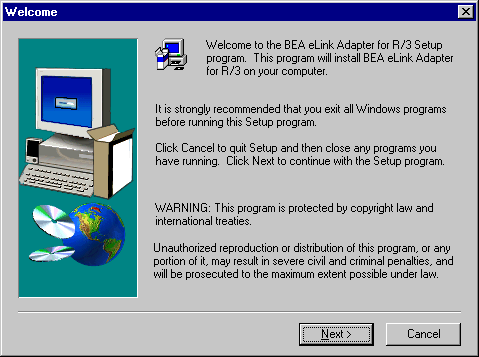
Figure 2-2 License Agreement
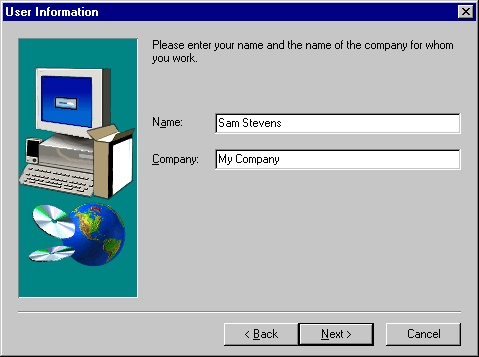
Figure 2-3 Provide User Information
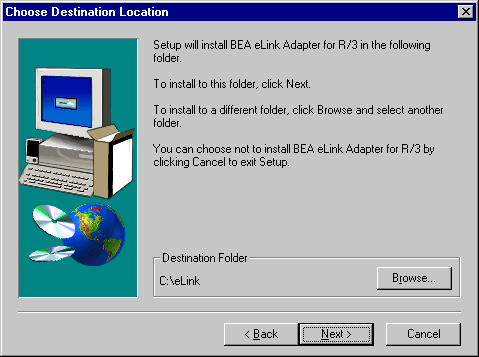
YourDrive
:\eLink\
as shown in Figure 2-4. To
accept the default, click Next to continue. Otherwise, use the file browser to
choose a different destination folder as explained below.
Figure 2-4 Choose Directory Location for Product Installation
If you want to install the BEA eLink product in a folder other than the default, click on the Browse button to get the file browser. Use the file browser to locate the directory in which you want to install the BEA eLink product and click OK to specify this new path name as the Destination Folder.
Note:
It is recommended that you install BEA eLink Adapter for R3 under a directory named eLink
. The host machine where you install and the prefix path to the eLink
directory is up to you. For this example, we install on C:\eLink\
.
Figure 2-5 File Browser for Choosing an Install Location
If you do change the Destination Folder to something other than the default, you should now see the new path name reflected on the Choose Destination Location window.
Figure 2-6 Select a Program Folder
Figure 2-7 Current Settings
Table 2-2 describes the files and folders that are installed for BEA eLink Adpater for R3 on a Windows NT system.