

|
|
|
|
|
|
Example of JAM Integrated with the WebLogic Process Integrator
The BEA WebLogic Java Adapter for Mainframe (JAM) software includes three sample workflows designed to illustrate the way JAM works with WebLogic Process Integrator and WebLogic XML/Non-XML Translator. This section describes these workflow templates and gives you step-by-step instructions for running the example.
Action List
To use this example of JAM working with WebLogic Process Integrator, complete the following tasks.
Prerequisites
Before you can run the JAM/WebLogic Process Integrator scenarios, make sure the following tasks have been completed:
Note: The instructions presented in this section assume that you have a good working knowledge of BEA WebLogic Process Integrator, BEA WebLogic Server, and BEA XML/Non-XML Translator. You should have successfully installed WebLogic Process Integrator and run a sample workflow prior to running these samples.
Running the WebLogic Process Integrator/JAM Example
This example simulates storage and retrieval of employee records in a mainframe database initiated by workflow processing. The data is entered from a worklist form and translated to XML. The data is then translated to COBOL copybook format and stored in the data base. The employee record can then be retrieved from the database into the workflow. Examples of COBOL mainframe applications (dpldemoc.cbl, dpldemor.cbl, dpldemou.cbl, and dpldemod.cbl) can be extracted from the sample.jar file in the sample directory located in the <JAM Installation>\examples directory.
Files for the WebLogic Process Integrator/JAM Example
Table 3-1 describes the files used in the examples. These files are located in the samples.jar in the JAM installation directory.
How to Run the WebLogic Process Integrator/JAM Example
Follow the steps below to run the WebLogic Process Integrator/JAM example. For specific instructions on performing the tasks in WebLogic Process Integrator, WebLogic XML/Non-XML Translator, and WebLogic Server, please refer to the documentation that accompanies those applications.
Step 1: Setting up the Mainframe
Step 2: Configure and Run WebLogic Process Integrator using WebLogic Server
Step 3: Create the Templates and Import the Template Definitions
This example provides three workflow templates for you to work with. The templates are listed and described in Table 3-2
Table 3-2 Provided Workflow Templates
To create the template and import the template definition for JAM create:
Step 4: Open and Activate the Template
To enable each workflow template, open and activate the template using the following steps:
Figure 3-1 Workflow for JAM create
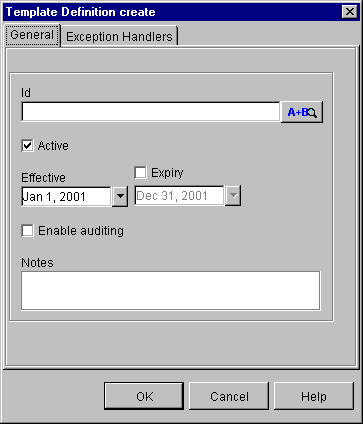
Figure 3-2 Template Definition create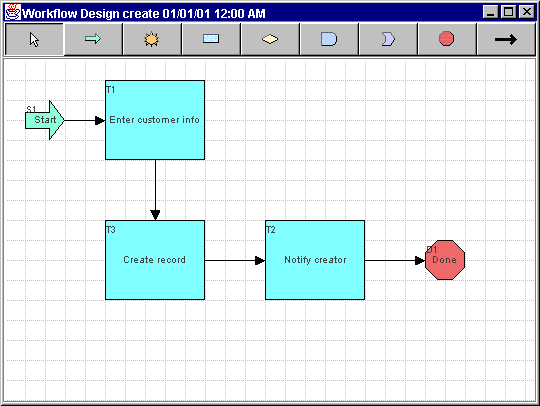
Step 5: Executing the Workflow
This section provides step-by-step instructions for executing workflows to create an employee record and to read an employee record.
Execute the JAM create Workflow
The JAM create workflow creates an employee record. To start the workflow from the Weblogic Process Integrator Worklist, complete the following steps:
Figure 3-3 JAM create Worklist
Figure 3-4 Data Entry Form
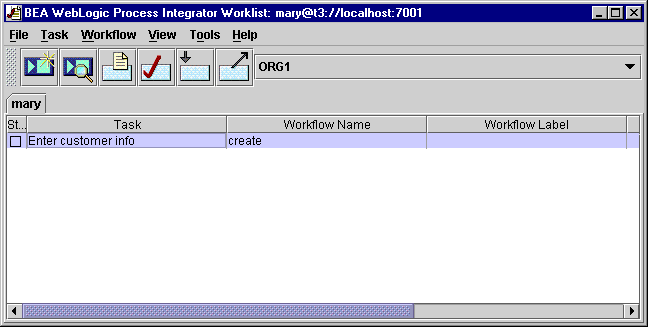
Figure 3-5 Notify Creator Task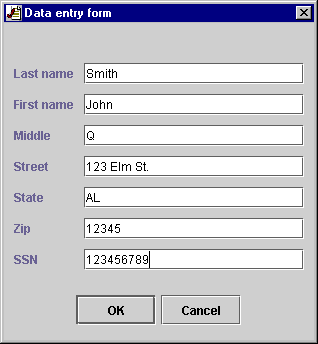
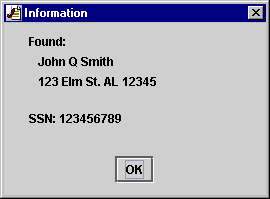
Figure 3-6 Information Dialog Window

Execute the JAM read and JAM readString Workflow
The JAM read and JAM readString workflows read and display an employee record for the mainframe database. The JAM readString workflow is functionally the same as the JAM read workflow. The difference is that the JAM readString workflow uses String variables internally to contain the XML used for data translation.
To execute these workflows from the WebLogic Process Integrator Worklist, complete the following steps:
Figure 3-7 JAM read or JAM readString Workflow
Figure 3-8 JAM read or JAM readString Worklist
Figure 3-9 Data Entry Form
Figure 3-10 Notify Creator Task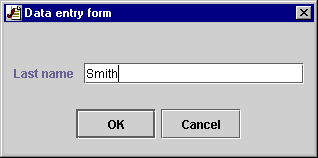
Figure 3-11 Information Dialog Window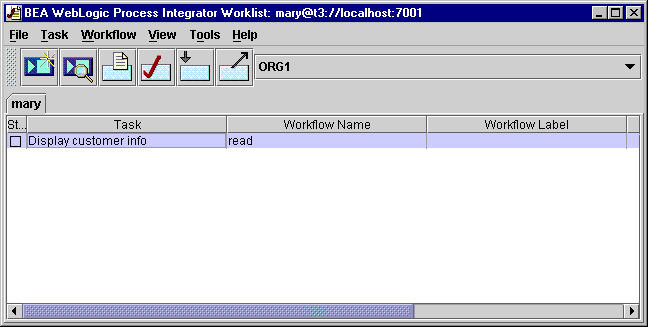

|

|
|
|
|
Copyright © 2001 BEA Systems, Inc. All rights reserved.
|