The Editor pane provides the area in which the majority of editing of Kodo objects occurs. Each edited object is represented on a tabbed pane. Each edited object has a text and icon representation on its tab. The tab will change to reflect changes by adding (*) to the tab name.
Each tab can be saved independently using the File menu on the main menu bar if it has been changed. You can also close the active editor by selecting close from the menu bar.
We'll use the Visualization Editor to illustrate how to use editors in Kodo Development Workbench. We will map our tutorial class to an existing schema, allowing our application to run without any schema changes.
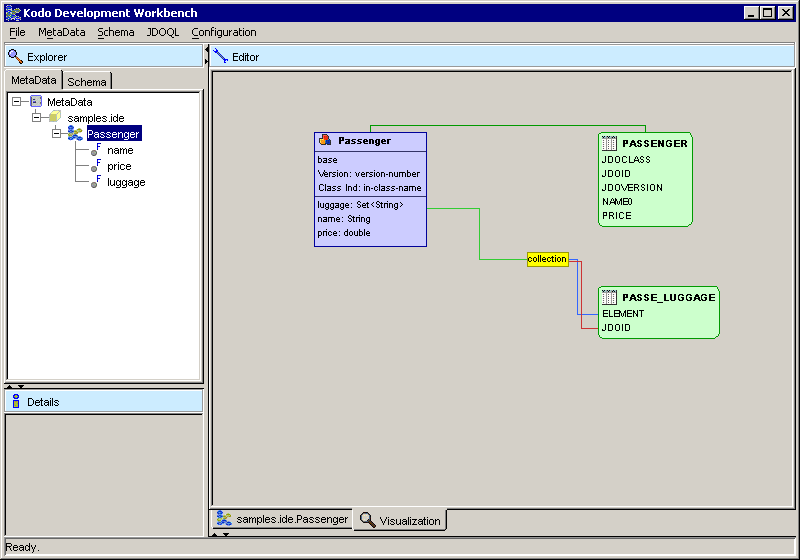
We'll now use Visualization editor, a special editor to view the interaction of classes, mappings and schema. Right-click on the Passenger node and then select Visualize Mapping.
We can see the mapping information that Kodo would assume at runtime that the actual schema looked like. Note that Kodo currently expects the initial auto-generated tables names we had before. We will now update this to match our pre-created schema.
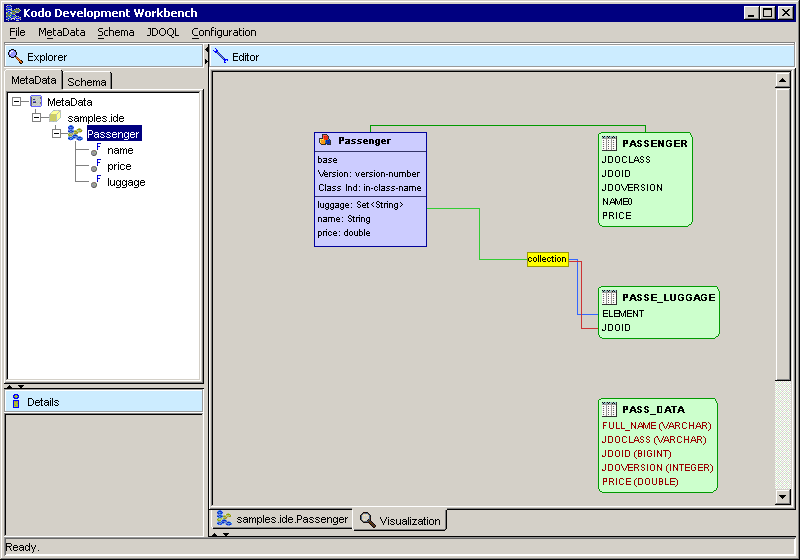
Right click on an empty area of the visualization component and select Add / Import Tables. Select the import all option, and select ok. We now can see the Workbench schema on our graph.
We will now relink the class and fields to these new tables. Go back to the Visualization editor and re-select the Passenger class node. Select the class mapping by selecting the class name on that node. You'll see a variety of colored buttons now presented to you. Select the green table button. By moving our cursor back over the graph, we can see a dashed line indicating we are attempting to link the class to a new table. Select the PASS_DATA table.
You can see the old unused table has now disappeared and that Passenger is now linked to the PASS_DATA table. The simple fields such as price have now been mapped to the PASS_DATA table. However, we still need to map the name field to an existing column.
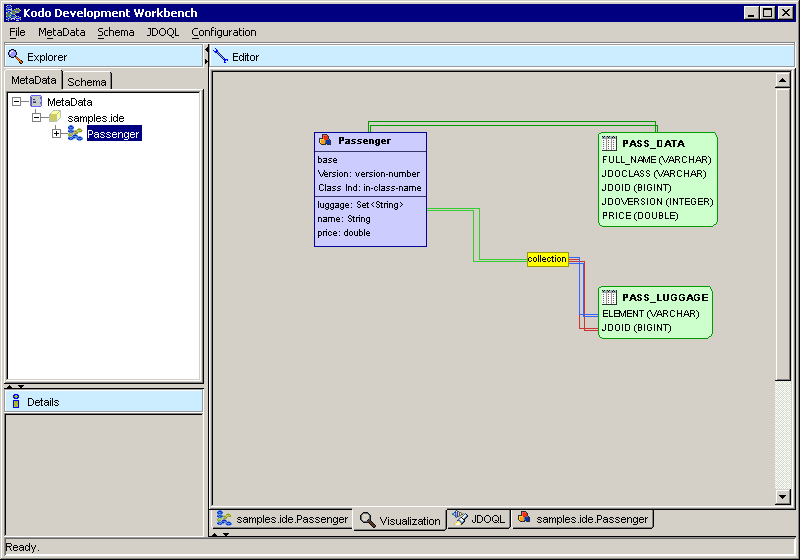
Select the name field on the class node. You can now see a different set of attributes to use in mapping the field in the Details pane. Select the blue column button. You can then select a column in PASS_DATA. Select FULL_NAME. Once you have done so, you can now see that the name column has been linked to a valid column, and its old column removed.
Similarly, select the yellow box marked collection. This yellow box indicates that the luggage field mapping stores the data in another table, using the collection field mapping. By selecting the node, one can see the field name in the detail pane, and the green line back to the owning class is now bold. Select again the green table button. This time we'll select PASS_LUGGAGE.
Congratulations, you have now mapped our class to two new tables. We will now save our changes so we can see the new mapping in use. Note that the visualization editor is now ready to be saved (marked with "*"). Save the editor and we're now done editing our mappings.
The Visualize section of the MetaData Actions section will contain more details on how the Visualizer works.
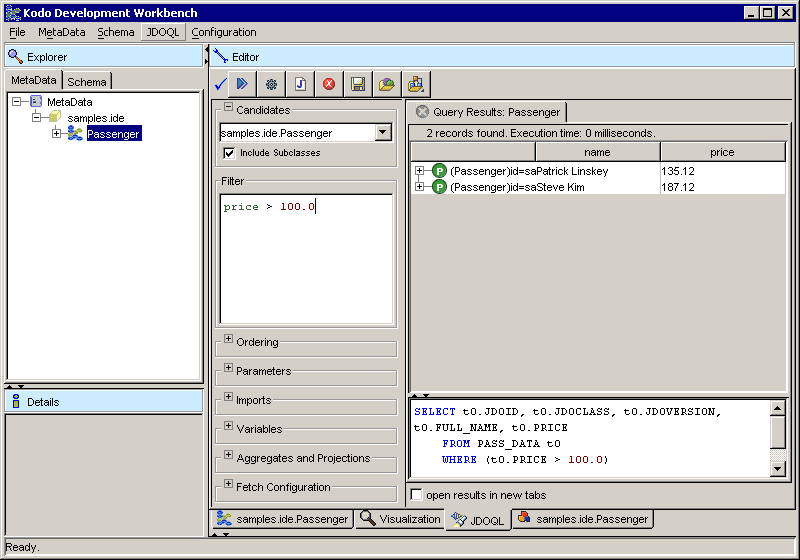
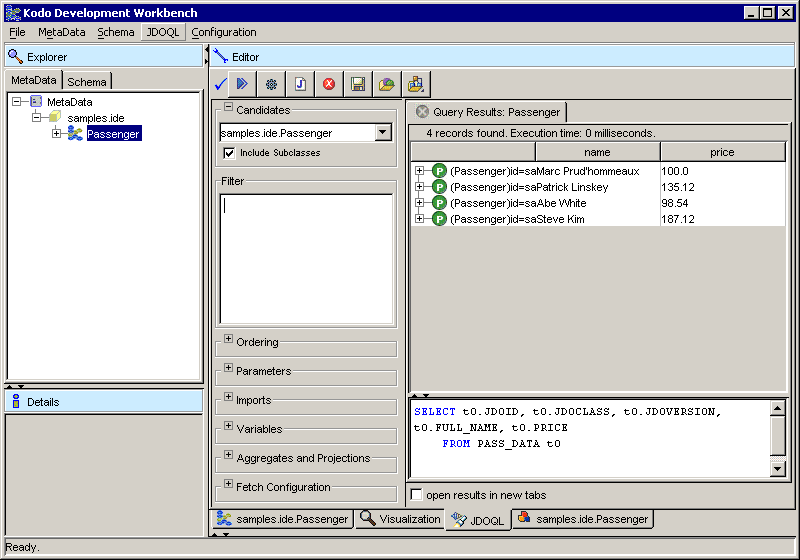
The JDOQL Editor in the workbench can be used to experiment with the JDOQL language and browse the results from the database. The editor has full support for all aspects of the JDOQL language, including variables and parameters, as well as aggregates and projections. For a complete description of all the components of the JDOQL Editor, see Chapter 8, JDOQL Editor.
Now that we have completed mapping the classes to the schema in the tutorial, we can experiment with querying against the existing data in the database. First, select the query editor by selecting "JDOQL Editor" from the "JDOQL" editor. Next, enter the candidate class, which, in which case, is samples.ide.Passenger. Finally, select "Execute Query" from the "JDOQL" menu, and the borwser on the right side of the panel should reveal the results from the query, as well as the SQL that was used to execute the query. If you receive any errors, it may be because the mappings were not set up correctly; you should review that all the mappings were defined exactly as specified in the tutorial.
Once you have successfully executed an empty query, you can experiment with executing various different filters. The JDOQL filter editor has syntax highlighting, so that invalid components of the filter (such as a misspelled field) will show up in red. Furthermore, it is possible to "complete" partial field names by entering the first part of a field and hitting the TAB key. If there are any ambiguous matches, then a popup menu will appear allowing you to select which candidate should be used.