| Download Docs | Site Map | Glossary | |
|
|
|||
| bea.com | products | dev2dev | support | askBEA |
|
|
|
||||||||
| e-docs > Liquid Data for WebLogic > Administration Guide > Using the WLS Administration Console |
|
Administration Guide
|
Using the WLS Administration Console
This topic describes how to use the WebLogic Server Administration Console, which includes tabs for configuring BEA Liquid Data for WebLogicTM. It includes the following sections:
Using the Administration Console to Manage Liquid Data
You can configure, manage, and monitor Liquid Data through the BEA WebLogic Server Administration Console. When Liquid Data is installed, it is deployed as an application in an instance of WebLogic Server. When you start the Liquid Data Server, the hosting WebLogic server is automatically started. Upon installation, Liquid Data becomes a managed resource known to the WLS JMX management framework. You will use the tabs on the Liquid Data node in the Administration Console to ad and configure Liquid Data data sources.
Starting the Administration Console
To start the Administration Console:
http://hostname:port/console
For example, to start the Administration Console for a local instance of WebLogic Server (running on your own machine), type the following URL in a Web browser address field:
http://localhost:7001/console/
If you started the Administration Server using Secure Socket Layer (SSL), you must add s after http, as follows:
https://hostname:port/console
If you have your browser configured to send HTTP requests to a proxy server, then you may need to configure your browser so that it does not send Administration Server HTTP requests to the proxy. If the Administration Server is on the same machine as the browser, then ensure that requests sent to localhost or 127.0.0.1 are not sent to the proxy.
The Administration Console is accessible via a URL in the following form:
http://localhost:7001/console/
Overview of the Administration Console
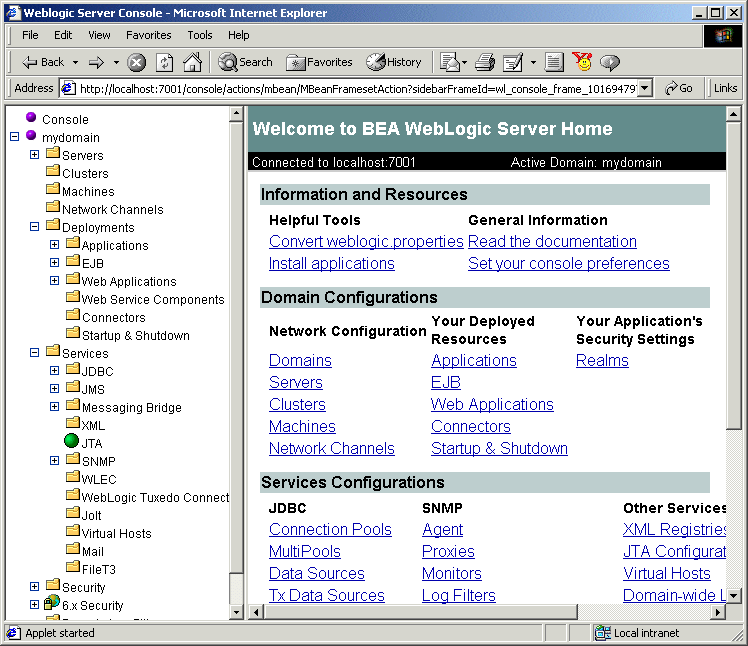
When you start the Administration Console, a server home page is shown in the main display area on the right, as shown in Figure 4-1. You can use the topic links on the home page initially to navigate to top level resource nodes, or use the navigation tree in the left pane. The left pane in the Administration Console contains a hierarchical tree — the domain tree — for navigating to tables of data, configuration pages and monitoring pages, or accessing logs. By selecting (that is, left-clicking) an item in the domain tree, you can display a table of data for resources of a particular type (such as WebLogic Servers) or configuration and monitoring pages for a selected resource.
You can expand and collapse nodes in the tree by clicking on the + and - signs next to the nodes as follows:
To manage Liquid Data you will need to access and use console pages for standard WebLogic Server resources as well as console pages specific to Liquid Data resources.
For a detailed overview on using the Administration Console, see Starting and Using the Administration Console in the BEA WebLogic Server Administration Guide.
Figure 4-1 Home Page of the WebLogic Server Administration Console
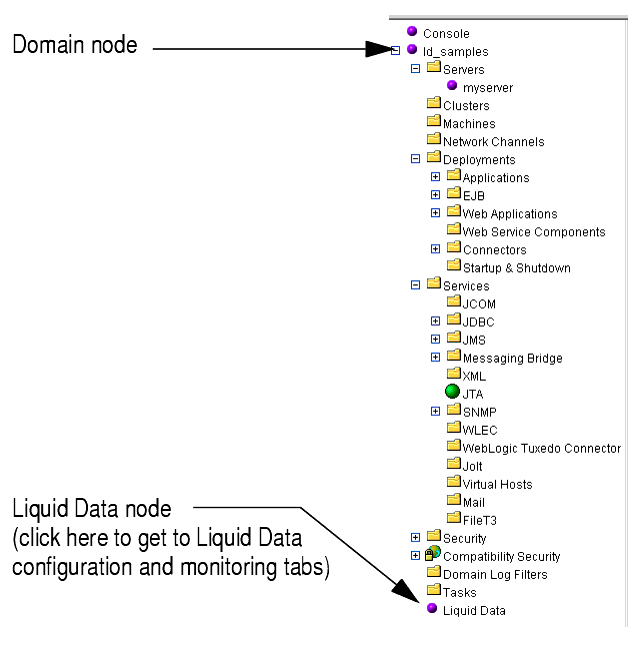
Finding the Liquid Data Node in the Navigation Tree
The Liquid Data node is under the domain node is under the domain node at the Administration Console navigation tree. In the figure below, the navigation tree for the Liquid Data Samples server is shown. The domain name for the Samples is ld_samples.
To access the Liquid Data data source configuration and monitoring tabs, click the Liquid Data node in the navigation tree.
Figure 4-2 Liquid Data Resources Shown in WLS Administration Console Navigation Tree

|

|

|