|
Building Queries and Data Views
|
Creating a Parameterized Data View
You can use the following simple example to create a stored query and then turn it into a parameterized data view that retrieves customer order information based on a unique customer ID.
Note: To follow along with the creation of this example data view, you should have the Liquid Data sample server installed and running and be familiar with the sample. If not, please see the Liquid Data Getting Started guide.
- Open the Data View Builder, drag the relational database source pb-bb onto the Liquid Data desktop. Set your target schema to customerOrders.xsd. Map elements to your target schema as shown in Figure 6-2.
Figure 6-2 Creating a Parameterized Query in the Data View Builder
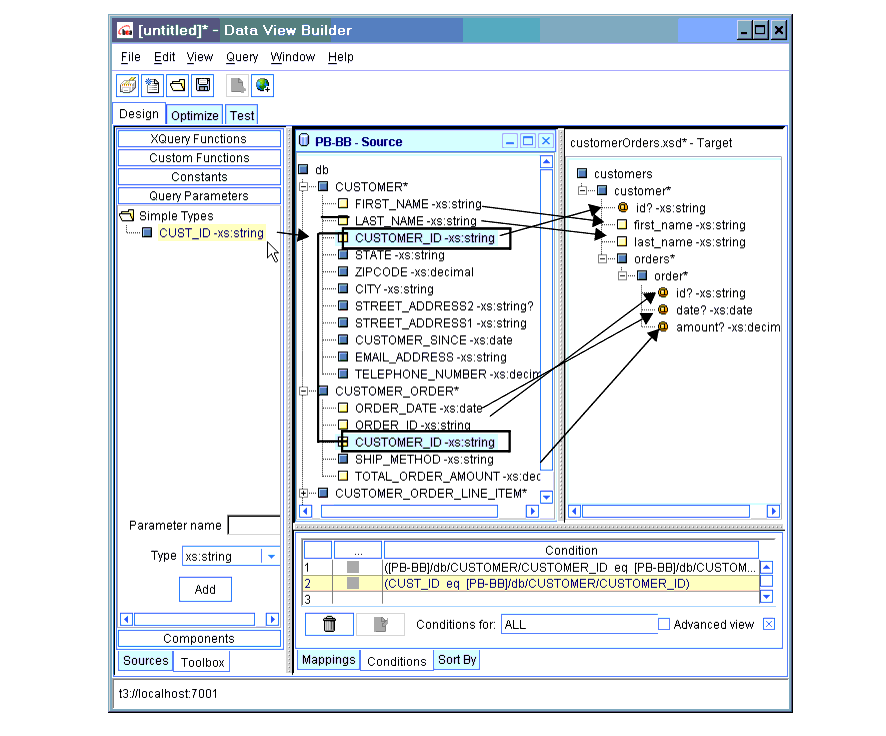
- From the Liquid Data Toolbox tab, choose Query Parameter. Create a single query parameter, CUST_ID and using the pulldown Type menu. Assign it a type string of xs:string.
- Drag cust_id to the CUSTOMER_ID field of the CUSTOMER table in the PB_BB data source (also shown in Figure 6-2).
- Drag CUSTOMER_ID in the Customer table to CUSTOMER_ID in the Customer Order table to create a join.
- In Test mode supply CUSTOMER_1 as a value for CUST_ID and run the query.
Note: Values are case-sensitive.
The Data View Builder will display an XML report containing information on the orders made by this particular customer.
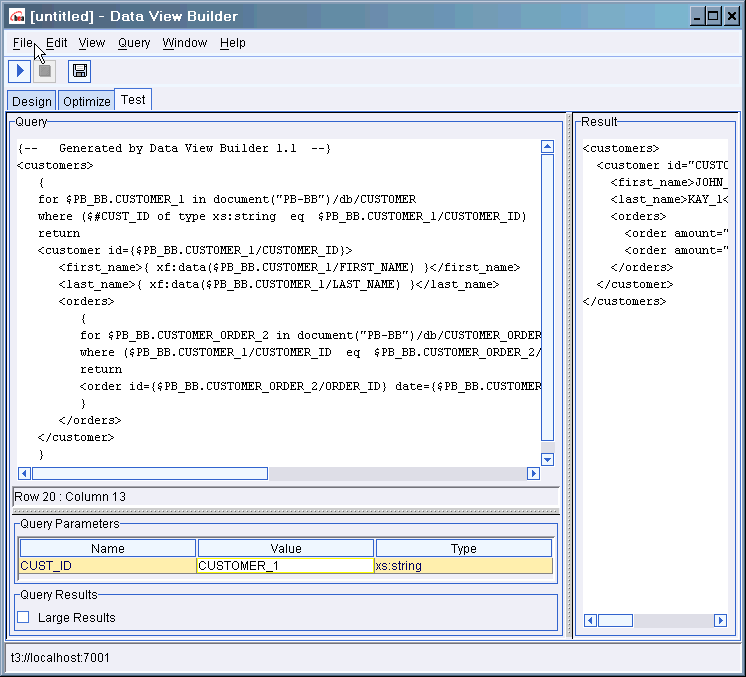
- Using the File -> Save Query menu command in the Data View Builder, save your query (shown in Figure 6-3) under the name param_dv to the Repository folder. It will automatically be placed in the ld_repository/stored_query folder and the extension .xq appended.
Figure 6-3 Saving the Query
- Now you can use the Liquid Data Administration Console to create your data view from your newly saved query.
- Start the Administration Console.
- Click the Liquid Data node.
- Select the Repository tab.
- Go to stored_queries.
- Choose the query param-dv.xq
- Select the Data View Data Source option.
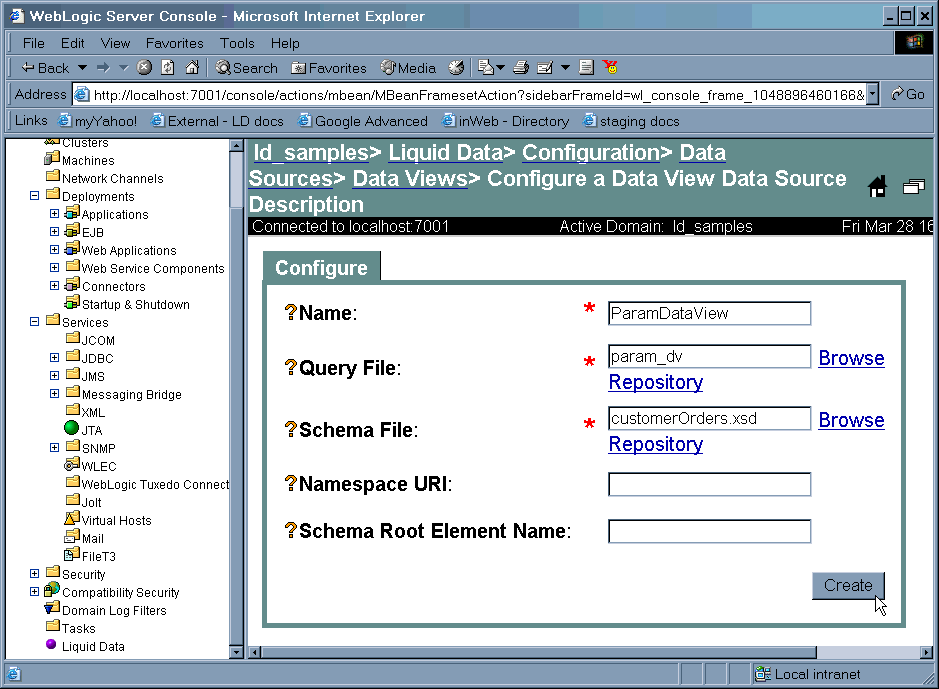
- Enter information as shown in Figure 6-4.
- Click Create.
Your new data view should appear in the Administration Console list of available data views.
Figure 6-4 Creating the Data View in the Administration Console
See "Creating Data Views from Stored Queries" in the Liquid Data Administration Guide for information on how to generate data views from stored queries.
- Return to the Data View Builder. Select File -> Connect. When you click on Data Views, your newly created data view should appear.
Figure 6-5 Data View on the Liquid Data Desktop
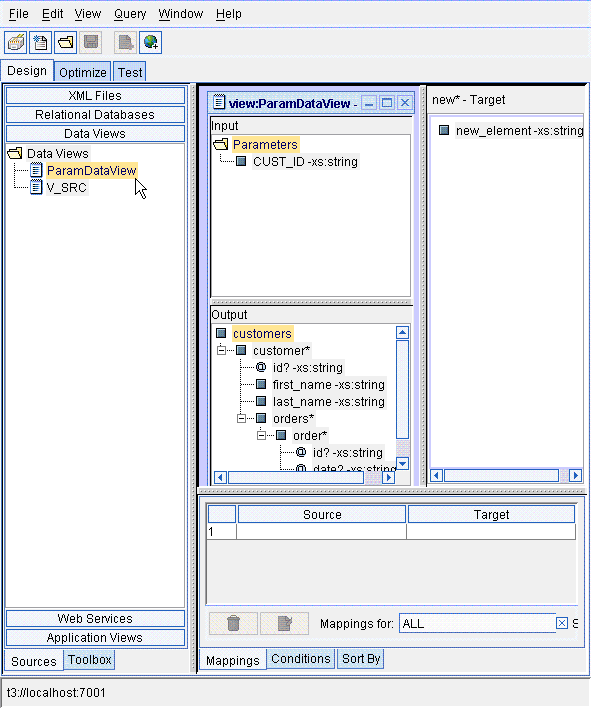
- Drag the data view onto the Liquid Data desktop as you would any other data source (Figure 6-5).
- Add a valid target schema. In this case, you can use the File menu Set Selected Source as Target Schema command. (The generated schema is shown in Figure 6-6.)
You may see a message asking if it is OK to close the existing target schema since that will remove all its mappings in the Data View Builder. Click Yes.
Figure 6-6 Setting Input and Associating Columns With Target Schema
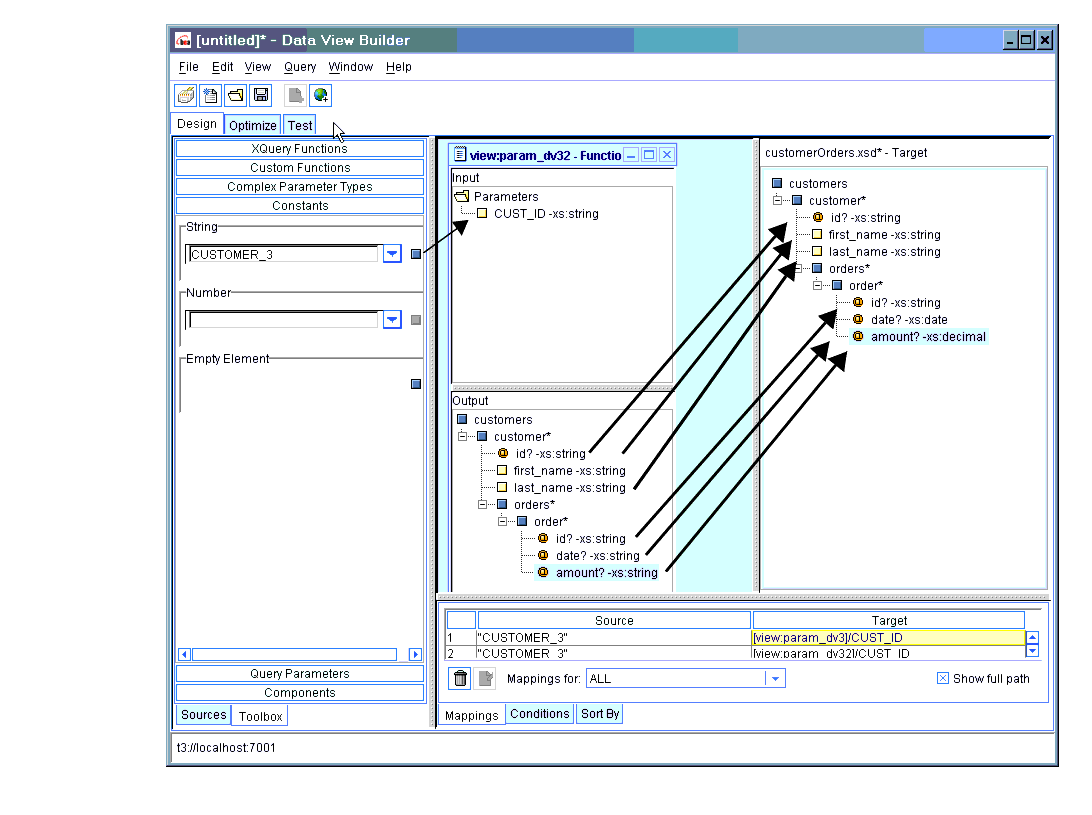
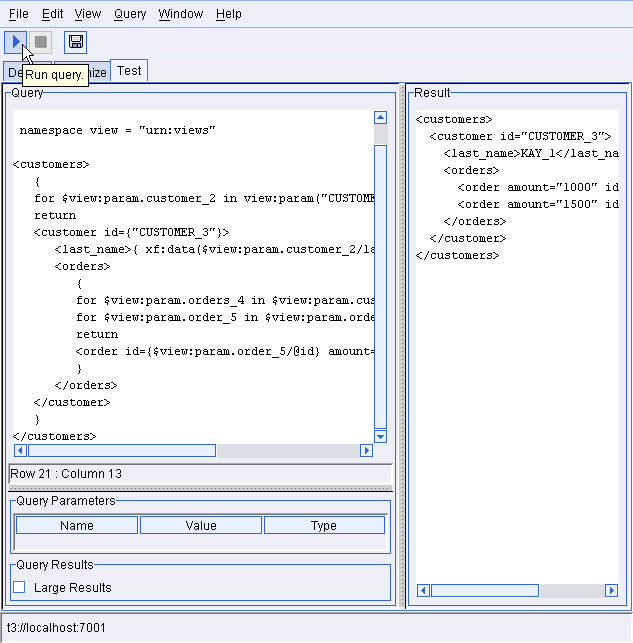
- Using the Data View Builder toolbox create a string constant called CUSTOMER_3 and drag it into the data view input CUST_ID (see Figure 6-6).
You could have provided an input parameter from a built-in XQuery function, custom function, an input from a web service, or another source.
- Map all the elements in your target schema.
- Test, then run your new query.
Figure 6-7 XQuery and Generated XML Report 