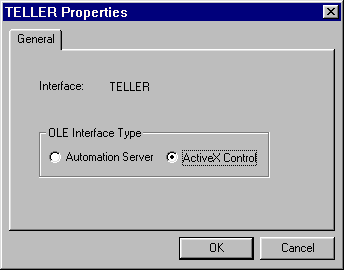
You can view the properties of modules and interface objects on your local workstation. For interface objects, you can re-set the OLE Interface Type from the properties window on the selected interface. Resetting the interface type (for example, form OLE automation server to ActiveX control) re-registers the interface.
To view the properties on a local module:
Or
Choose Properties from the popup menu (right mouse click to get popup menu).
(The keyboard shortcut to view properties on an object is Alt V P.)
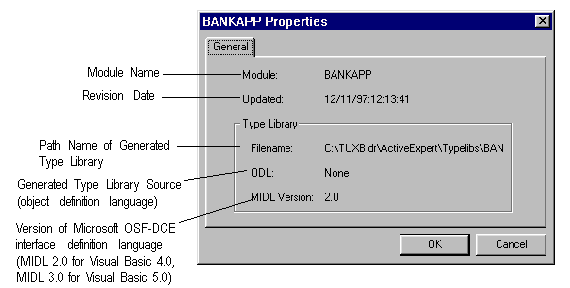
This brings up a read-only properties window on the selected module.
The properties window on a module indicates the module name and the full path name of the type library and type library source generated for a module.
Figure 3-6 Properties Window on a Module
See also help on the Properties Window.
To check or change the OLE interface type after you have registered an object on your workstation:
Or
Choose Properties from the popup menu on the object (right mouse click to get popup menu).
This brings up the properties window on the selected interface object.
The interface object properties window provides both a view of the interface object attributes and a place to set them. The Automation Server radio button indicates that the given interface object supports automation without visual capabilities. Objects with this type of automation interface are created using the Visual Basic Figure 3-7 Properties Window on Interface Object
CreateObject
statement, or similar statements in other client tools. The ActiveX Control radio button indicates an ActiveX control, where an object is created by dragging the control onto the client form. Note that toggling the value of an OLE Interface Type radio button re-registers the selected interface object as an OLE interface of the new type. A confirmation window appears before the re-registration is done.
See also help on the Properties Window.