[Top] [Prev]

Installing BEA TUXEDO Builder

The following chapter takes you through the step-by-step procedures to install the BEA TUXEDO Builder 2.0 products. This chapter consists of the following sections:

After you have properly installed the Builder products, refer to the section "Starting the BEA TUXEDO Builder Applications," to start your newly installed products.

For information on any of these products, see the BEA TUXEDO Builder Release Notes.


System Requirements

To run the BEA TUXEDO Builder software, your system must have the following:


Windows Installation

The BEA TUXEDO Builder product setup/install program for the Windows platform is located in the win32/setup.exe file on the CD-ROM.

To install the Builder products, insert the CD into the CD-ROM drive and double click on the win32/setup.exe file to launch the Builder products installation.

When the installation program launches, follow the prompts shown in the windows as described in the following steps.

Step 1. View Installation Initialization

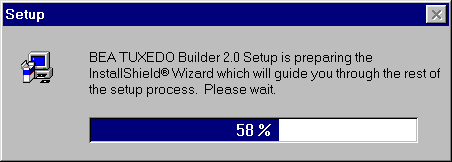
When the installation starts, the preparation information is shown.

Figure 1 Preparing Install Window
Step 2. View Welcome Windows

When the install preparation process has completed, the Welcome splash screen is displayed.

Figure 2 Welcome Splash Screen
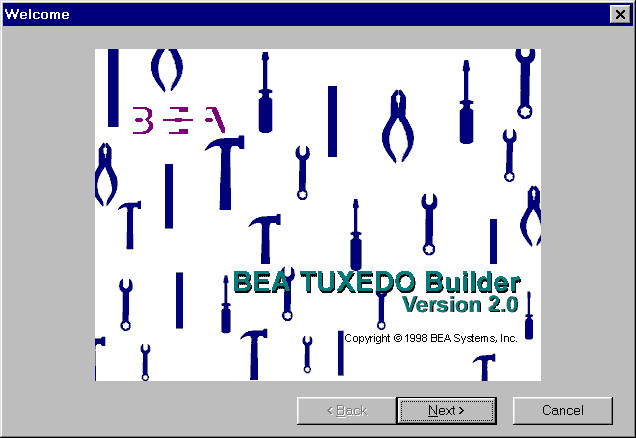
Click Next to display the Welcome information.

Figure 3 Welcome Information Window
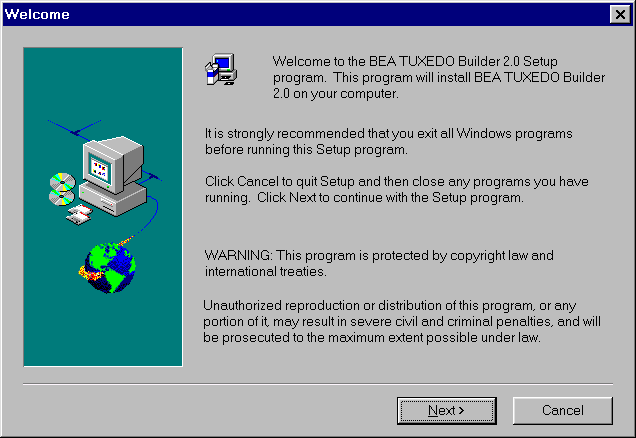
Click Next to proceed.

Step 3. Read Installation Requirements

After the welcome, the pre-installation notes file is displayed. This file describes which components need to be installed together and specifies the environment required to successfully install the BEA TUXEDO Builder products.

Figure 4 Pre-installation Notes Window
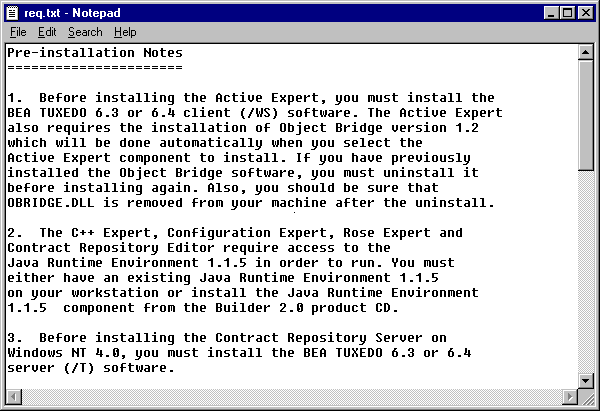
To proceed with the installation, exit the Notepad.

Step 4. Accept the License Agreement

When you close the Notepad, the license agreement is displayed.

Figure 5 License Agreement Window
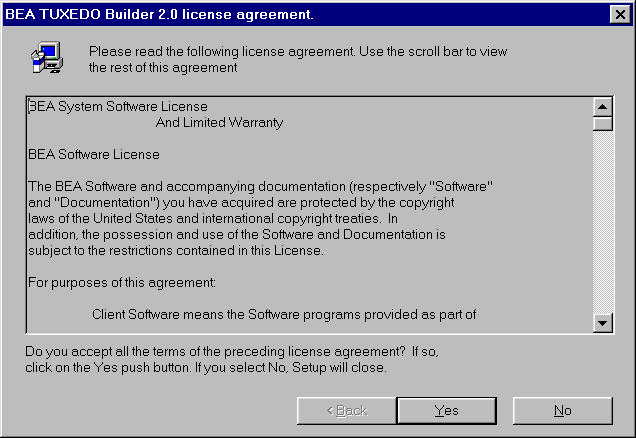
In order to proceed with the installation, you must accept the license agreement. Click Yes to accept (or click No to cancel the installation process.)

Step 5. Provide User Information

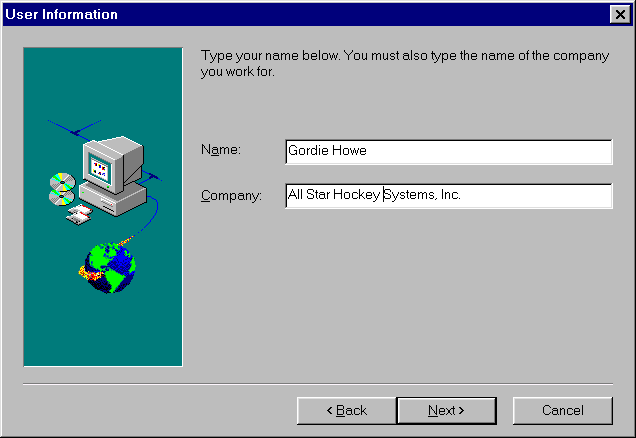
After you accept the license agreement, the User Information window is displayed. Provide the requested information, and click Next to continue.

Figure 6 User Information Window
When the Registration Confirmation window is displayed, verify that the information shown is correct.

Figure 7 Registration Confirmation Window
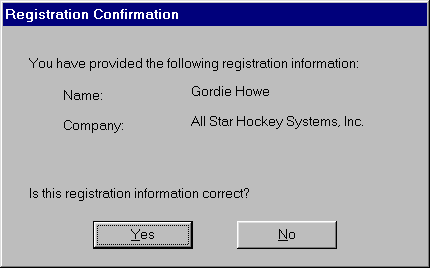
If the information shown is correct, click Yes to proceed (or click No to redisplay the previous screen).

Step 6. Select the BEA Builder Products to Install

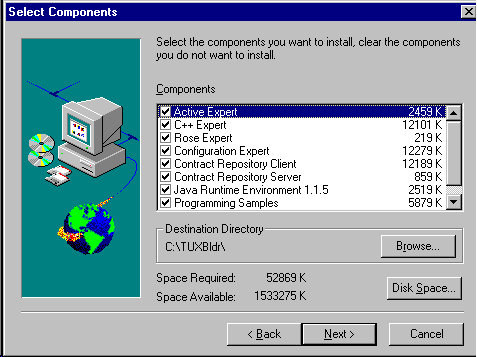
The Select Components dialog displays a list of components to be installed.

Figure 8 Select Components Window

Select the components you want to install by clicking on them. (A check mark in the box next to a product indicates that it is selected to be installed.)

Note: Since the Contract Repository Server is not supported on Windows 95 platforms, Windows 95 installations do not include the Contract Repository Server in the list of components.

For information on dependencies and requirements for each of these components, refer to "Step 3. Read Installation Requirements."

Destination Directory

The path shown for the Destination Directory on the Select Components window is the location where the Builder products will be installed. The default Destination Directory is YourDrive:\TUXBldr\ as shown in Figure 8.

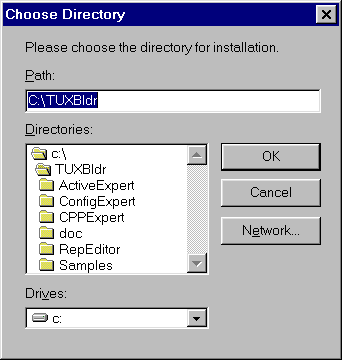
If you want to install the Builder components in a directory other than the default, click on the Browse button to get the file browser, as shown in Figure 9. Use the file browser to locate the directory in which you want to install the Builder products and click OK to specify this new path name as the Destination Directory.

Figure 9 Choose Directory Window

If you do change the Destination Directory to something other than the default, you should see the new path name reflected on the Select Components window.

Disk Space

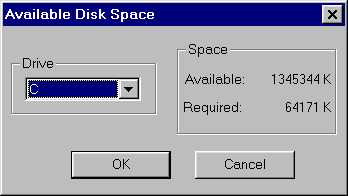
The Select Components window also provides information about the disk space required for the currently selected Builder components. (Note that the required disk space changes based on the components you have selected.) To check the available disk space on another drive, click on Disk Space to get the disk browser. Use the drop-down menu to show available disk space on other disk drives. To reset the drive used in the Destination Directory path name, choose a new drive and click OK.

If you do change the disk drive, you should see the new drive name reflected as the first part of the Destination Directory on the Select Components window. (In Figure 8 the C: drive is specified.)

Step 7. Provide License Information

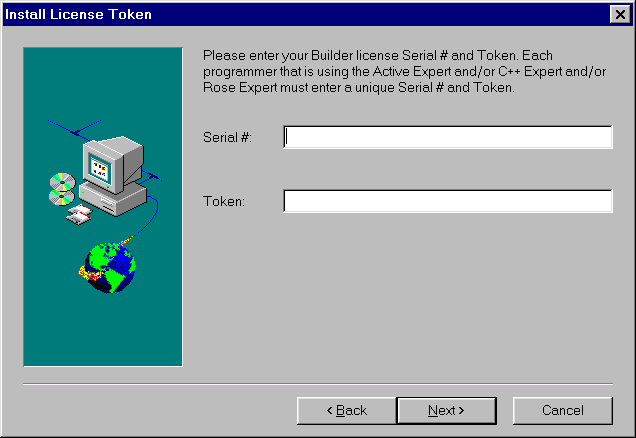
If the C++ Expert, Rose Expert, or Active Expert is selected, the Install License Token window is displayed. Provide the requested information and then click Next to continue.

Figure 10 Install License Token Window

The installation program checks for the following items.

License Validation

If the license is not valid, the following error message is displayed.

If you get this message, click OK to acknowledge. The Install License Token window continues to be displayed for you to provide a valid serial number and token.

Expired License

If the license has expired, the following error message is displayed.

If you get this message, click OK to acknowledge. The Install License Token window continues to be displayed for you to provide a valid serial number and token.

Step 8. Check the Selected Component Requirement

Active Expert

In order to run the Active Expert, you must have TUXEDO /WS version 6.3 or 6.4 and the Visual Edge Object Bridge version 1.2 installed.

TUXEDO /WS

If you select the Active Expert, the installation program checks if the system has TUXEDO /WS version 6.3 or 6.4 and the Object Bridge version 1.2.

If the TUXEDO /WS version found is not the correct version, the following error message is displayed.

Click Yes to continue the Builder installation without installing the Active Expert. Click No to cancel the Builder installation until you have installed a supported version of the TUXEDO /WS.
Object Bridge

In order to run the Active Expert, you must have the Object Bridge installed. If the Object Bridge is not installed, the following error message is displayed.

Click Yes to run the Object Bridge installation and continue with the Builder installation. Click No if you do not want to install the Object Bridge-if you click No, the following error message is displayed.

Click Yes to continue the Builder installation of other components without installing the Object Bridge or the Active Expert.

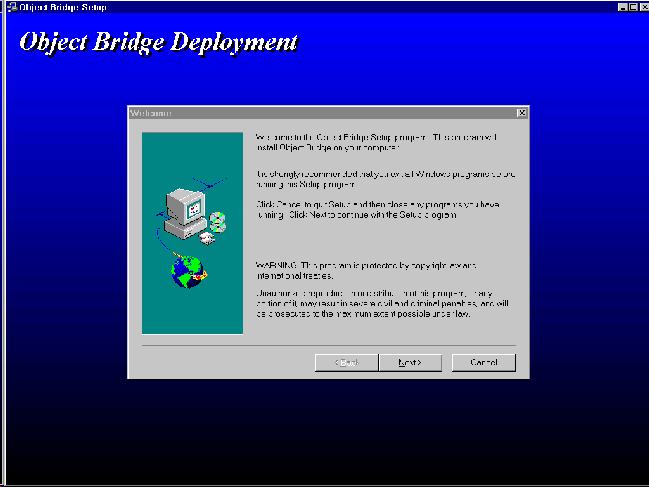
When the Object Bridge installation begins, the following screen displays. The TUXEDO Builder installation proceeds after the Object Bridge installation finishes.

Figure 11 Object Bridge Deployment Window

If Object Bridge is found on your system, the following message is displayed. (The installation program is checking to make sure that you have Object Bridge version 1.2, which is required by the BEA TUXEDO Builder software.)

Click Yes to cancel the Builder installation until you uninstall the current Object Bridge. Click No if you want to use the existing Object Bridge for the Active Expert and continue with the Builder installation.

C++ Expert or Configuration Expert or Contract Repository Client

In order to run the C++ Expert, the Configuration Expert, or the Contract Repository Client, the Java Runtime Environment 1.1.5 (JRE 1.1.5) and Jolt client 1.1 must be present.

Note: The following installation procedure is based on the use of the JRE 1.1.5. If you have the Java Development Kit (JDK version 1.1.5) installed on your system, you can use it, instead of the JRE 1.1.5.

The installation checks if the system has Jolt client 1.1. If Jolt client 1.1 is found on the system, the installation does not install the zipped Jolt client 1.1 classes shipped with Builder.

If you do not have an existing Java Runtime Environment 1.1.5, be sure to select the Java Runtime Environment 1.1.5 along with the C++ Expert, the Configuration Expert or the Contract Repository Client in the Select Components window (see Figure 8).

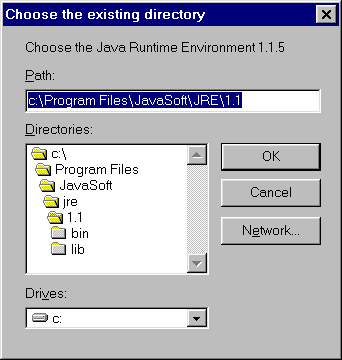
If you have an existing Java Runtime Environment 1.1.5 that you want to use, select only the C++ Expert, the Configuration Expert, or the Contract Repository Client. If you select the C++ Expert, the Configuration Expert, or the Contract Repository Client but do not select an existing JRE 1.1.5, you are prompted to specify the base path of your JRE 1.1.5.

Use the displayed file browser to locate the existing JRE 1.1.5 and click OK.

At this point, the installation program attempts to find the directory < Your_Directory>\bin. If the directory cannot be found, the following error message is displayed.

Click Yes to continue with the Builder installation without installing the C++ Expert, the Configuration Expert, or the Contract Repository Client. Click No if you want to cancel the installation until you have installed JRE 1.1.5.

Rose Expert

In order to run the Rose Expert, you must have Rational Rose installed.

If you select Rose Expert, the installation program checks to see if the system already has Rational Rose. If Rational Rose is not installed, the following screen appears:

In order to run the Rose Expert, the Java Runtime Environment 1.1.5 (JRE 1.1.5) and Jolt client 1.1 must be present.

Note: The following installation procedure is based on the use of the JRE 1.1.5. If you have the Java Development Kit (JDK version 1.1.5) installed on your system, you can use it, instead of the JRE 1.1.5.

The installation checks if the system has Jolt client 1.1. If Jolt client 1.1 is found on the system, the installation does not install the zipped Jolt client 1.1 classes shipped with Builder.

If you do not have an existing Java Runtime Environment 1.1.5, be sure to select the Java Runtime Environment 1.1.5 along with the Rose Expert in the Select Components window (see Figure 8).

If you have an existing Java Runtime Environment 1.1.5 that you want to use, select only the Rose Expert. When you select the Rose Expert but do not select the JRE 1.1.5, you are prompted to specify the base path of your JRE 1.1.5.

Use the displayed file browser to locate the existing JRE 1.1.5 and click OK. (Make sure that the directory you specify includes a \bin directory.)

At this point, the installation program attempts to find the directory < Your_Directory>\bin. If the directory cannot be found, the following error message is displayed.

Click Yes to continue with the Builder installation without installing the Rose Expert. Click No if you want to cancel the installation until you have installed JRE 1.1.5.

Contract Repository Server

The Contract Repository Server option is displayed only on Windows NT 4.0 platforms because the Windows 95 workstation cannot act as a server.

If you select the Contract Repository Server, the installation program checks to make sure TUXEDO version 6.3 or 6.4 is present and the required server components are in place.

If the TUXEDO server components cannot be found, the following error message is displayed.

Click Yes to continue the Builder installation without installing the Contract Repository servers. Click No if you want to cancel the installation until you have installed the TUXEDO system.

If the installation finds TUXEDO 6.3 or 6.4, the Contract Repository server program, and the associated files, are installed underneath the TUXEDO directory.

The installation also checks if the Jolt server 1.1 is present on the system. If Jolt server 1.1 is found, the installation will not install the Jolt 1.1 server shipped with Builder.

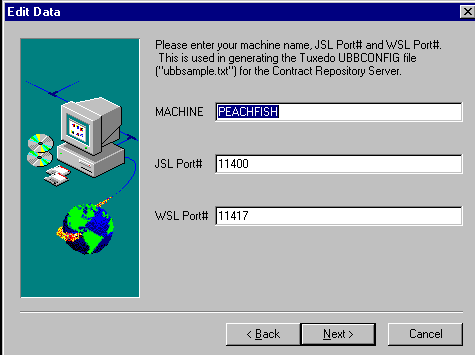
The installation program also collects the information you enter in the Edit Data window (see Figure 12) and uses it in generating the sample TUXEDO UBBCONFIG file (ubbsample.txt) for the Contract Repository Server.

Note: You can get the ubbsample.txt file from the location YourDrive:\TUXBldr\RepServer.

Figure 12 Edit Data Window

Provide the machine name, JSL and WSL port numbers in the Edit Data window and click Next to proceed.

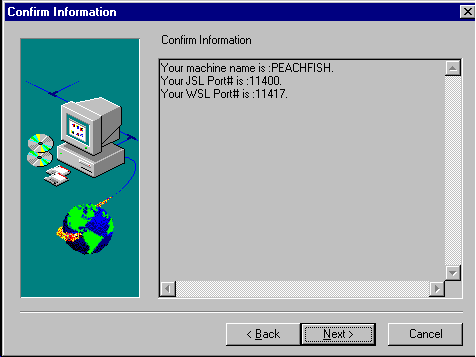
The Confirm Information window displays the information you have provided for the machine name, JSL and WSL port numbers.

Figure 13 Confirm Information Window
If the machine name, JSL and WSL port numbers are correct, click Next to proceed. Otherwise, click Back to display previous window where you can re-enter the information.

Programming Samples

If you choose to install the Programming Samples, you need to install at least one of the following components: Active Expert, C+ Expert, Rose Expert (or already have it on your system).

If you select to install the Programming Samples but none of the Builder components are already present on your system or have not been selected to be installed, the following window is displayed.

Click Yes to continue with the Builder installation without installing the Programming Samples. Click No to cancel the installation and begin again by installing Active Expert, C+ Expert, Rose Expert along with the Programming Samples.

Online Help and Documentation

We recommend that you install the Online Help and Documentation with the Active Expert, C+ Expert, Rose Expert, Configuration Expert, Contract Repository Client applications. If you select any of these applications but do not select Online Help and Documentation, the following message is displayed.

If you get this message, click OK to acknowledge. (Then if needed, you can click on Back on the Install License Token window to redisplay the previous screen and modify your choices on the Select Components window shown in Figure 8.)

You also have the option of installing the Online Help and Documentation without any Builder GUI products. For information on how to access the documentation without using context-sensitive GUI help, refer to the Release Notes (item 1. under "Miscellaneous Notes" for Online Help and Documentation).

If you choose to install the Online Help and Documentation with the Active Expert, C++ Expert, Rose Expert, and/or the Contract Repository Client, keep in mind that the context-sensitive online help system associated with the product graphical user interfaces (GUIs) requires Netscape Navigator 4.0 or above.

Note: The Online Help system was tested with Netscape Navigator 4.05.

The installation checks to ensure that your system has one of the required versions of Netscape Navigator installed. If an appropriate Netscape Navigator is not found, the following message is displayed.

Click Yes to begin the installation of Netscape Navigator 4.05 or click No to proceed with the Builder installation without installing the Netscape Navigator. (If you do not have the appropriate browser, but install the Online Help and Documentation anyway, you will at least have access to the PDF versions of the documentation when the installation process is complete.)

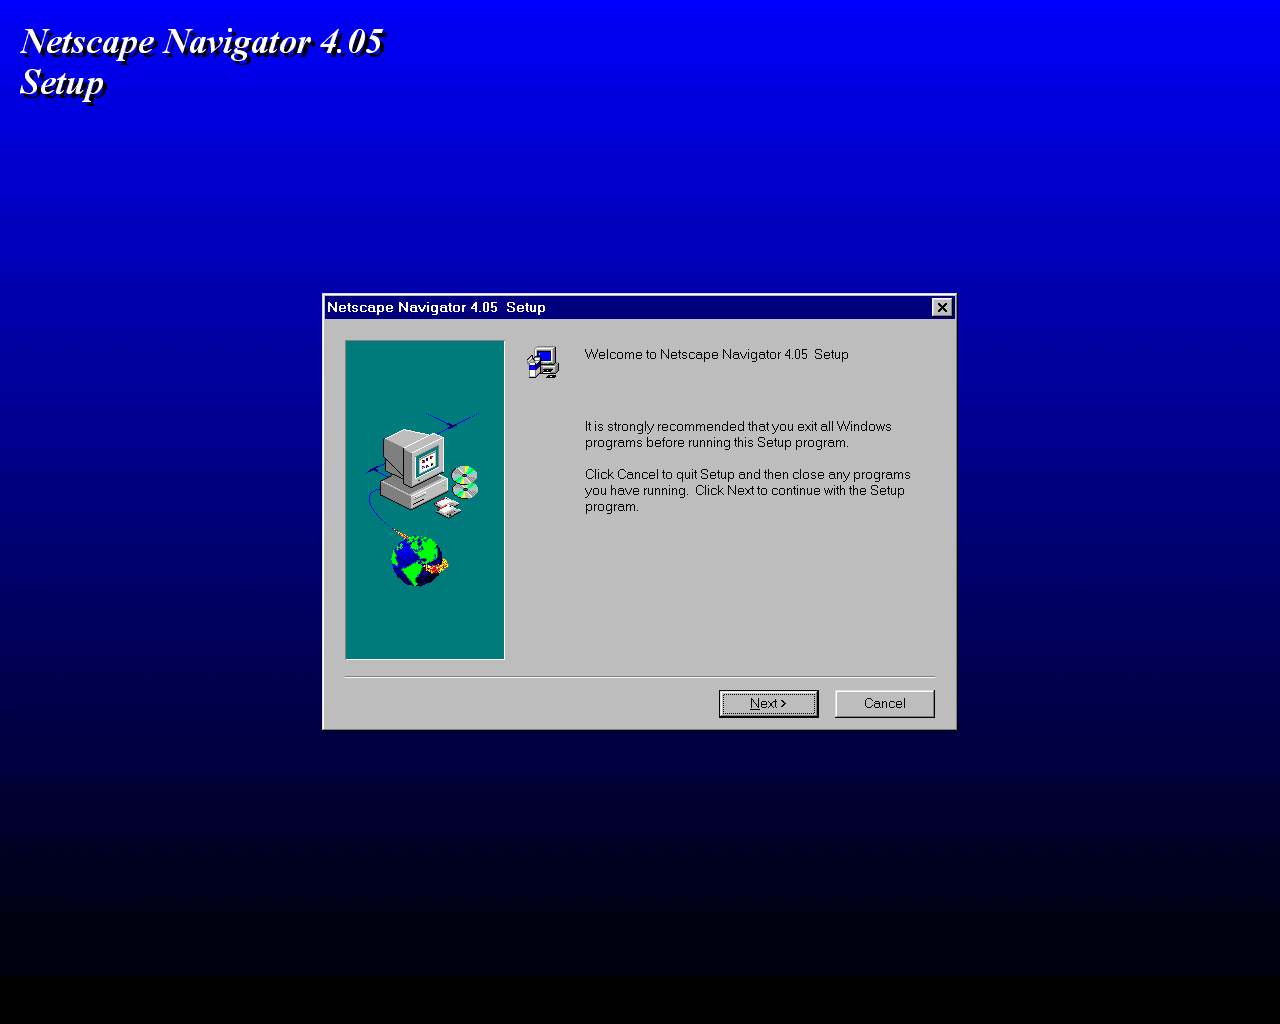
At the start of the Netscape Navigator installation, the Netscape Navigator 4.05 Setup window is displayed. To install the Netscape Navigator, follow the instructions on the Netscape Navigator 4.05 Setup window.

The Builder installation proceeds after the Netscape Navigator 4.05 Setup is complete.

Figure 14 Netscape Navigator Setup Window

JAVA Runtime Environment 1.1.5 Installation

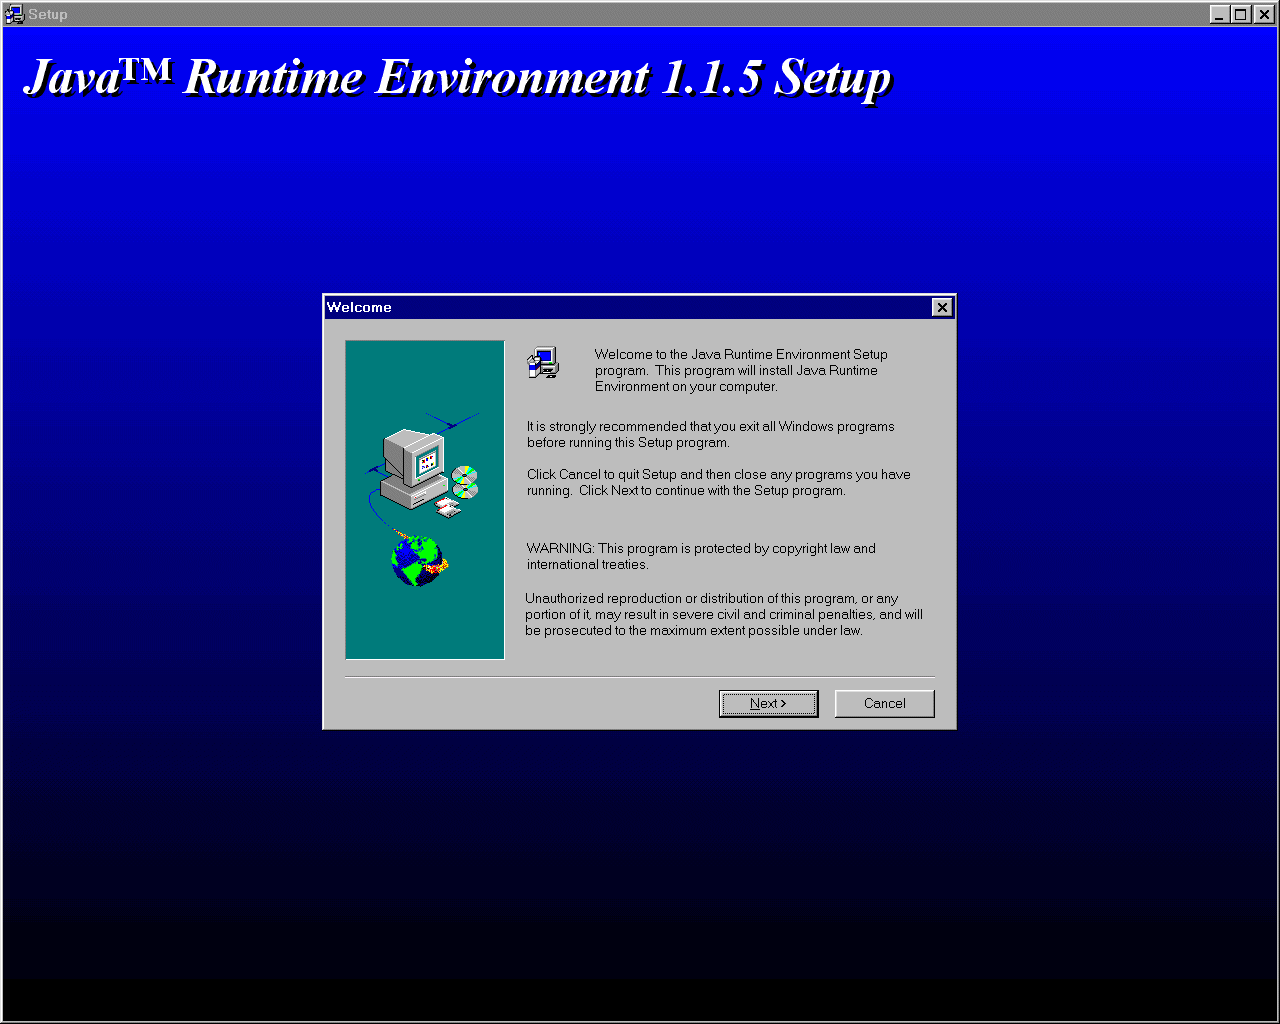
If you select the Java Runtime Environment 1.1.5 from the installation options, the following screen is displayed.

Figure 15 Java Runtime Environment Installation Window

In order to proceed with the installation, you must accept the license agreement.

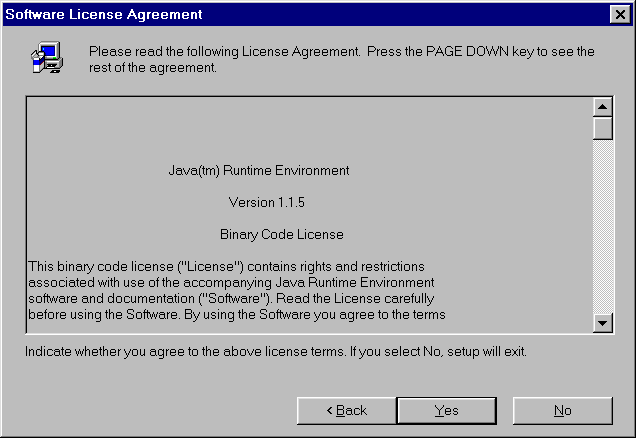
The following licensing agreement window appears:

Figure 16 Java Runtime Environment Licensing Agreement

Click Yes to accept. (Otherwise, click No to cancel the installation.)

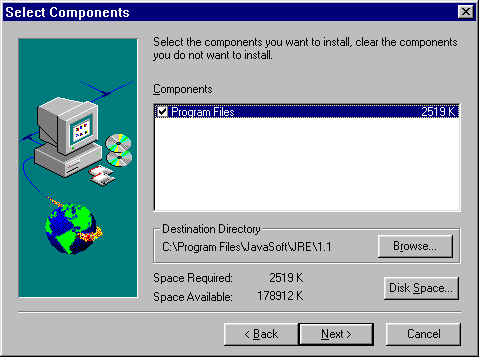
Select the components you want to install, and the directory where you want the files to be located. If you want to set the destination directory to somewhere other than the default destination directory, select the new directory now.

Figure 17 Java Runtime Environment Components Window

Select the component you want to install. (A check mark in the box next to a product indicates that it is selected to be installed.) The default component selected is Program Files.

Click Next to select the chosen components (Otherwise, click Cancel to cancel the installation.). The installation program will begin copying files to the specified directory.

Finish the Select Components Task

After you have selected the BEA TUXEDO Builder products you want to install and verified that you have the components required for a successful installation, you must select your TUXEDO Builder program folder.

Step 9. Select the BEA TUXEDO Builder Program Folder

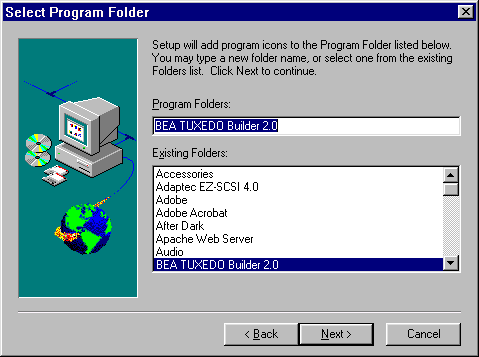
The BEA TUXEDO Builder program folder window gives you the option to specify the name and location of the folder that will contain the newly installed BEA Builder products. (The default program folder is BEA TUXEDO Builder 2.0.)

Figure 18 Select Program Folder Window

When the appropriate folder is selected, click Next to proceed.

Step 10. Start Copying Files

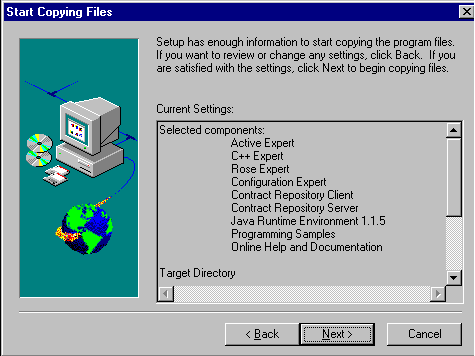
Just before the selected components are actually installed, the Start Copying Files window is displayed. This window shows a summary of the components selected and installation options chosen.

Figure 19 Start Copying Files Window

If the displayed summary is correct, click Next to proceed with the installation.

Before the setup program starts copying the mfc42.dll to the Windows system directory, the installation checks to see if this file is already present on the system. If an existing mfc42.dll is found on the system, the date is compared with that of the mfc42.dll on the CD-ROM.

Note: The figure shows the message displayed if the file found on your system is older than the one to be installed. A different message is displayed if the file found is newer than the one to be installed.

Click Yes to create a backup copy of the existing file and install the mfc42.dll from the CD-ROM. Click No to use the mfc42.dll that is already on your system.

If you choose to install the Contract Repository Server before the setup program starts copying the irepostitory file, the installation checks to see if this file is already present under misc in your TUXEDO directory. If an existing irepository file is found, the following message is displayed.

Click Yes to create a backup copy of the existing file and install the irepository file from the CD-ROM. Click No to use the file that is already on your system.

Note: We recommend that you make a backup copy when installation the TUXEDO Builder 2.0 product over TUXEDO Builder 1.0. This is in case you want to convert your TUXDO Builder 1.0 Contract Repository to the TUXEDO 2.0 release.

Step 11. Monitor the Copy Process

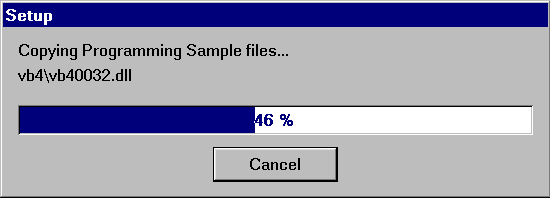
While the files are being copied to the target system, a Setup status window is displayed to keep you informed of the progress of the installation.

While the copy is in progress, you have an option to cancel the installation.

Figure 20 The Setup Status Window

If you selected to install the Configuration Expert, the installation script asks you whether you want to collect data for the Configuration Expert. This default Configuration Data file is called the ConfigExpert.dat. For each machine added, a set of default template resource managers is added.

The following screen appears.

Figure 21 The Configuration Expert Setup Window

Click Yes to collect information about the machines that are located on your system. Click No if you want to set up this information at another time using the Configuration Data Editor. If you click on Yes, an information dialog appears. Click OK to bring up the Configuration Data Editor as shown in Figure 22.

Figure 22 Configuration Data Editor Main Window
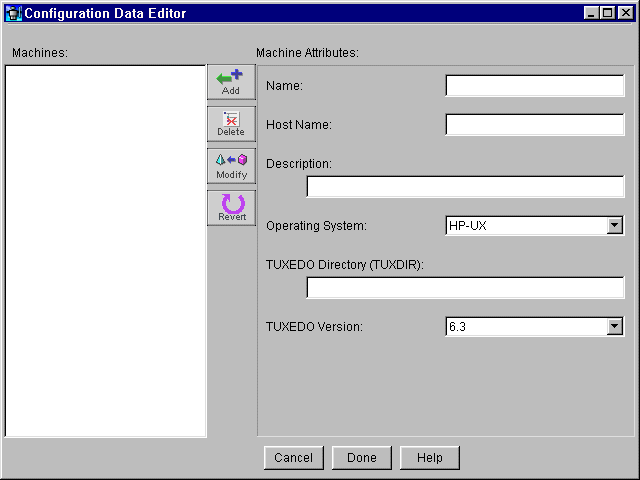
The machines available in the Configuration Data file appear in the left panel, and the attributes that you want to modify appear in the fields in the right portion of the main window screen.

During installation, there are no machines listed in the left panel, so you can fill in the fields on the right panel, and click on the Add toolbar button or you can choose not to add by clicking Cancel.

On Windows 95, a DOS command prompt window appears behind the Configuration Data Editor main window. After clicking on the Done or Cancel button, you need to close the DOS command prompt window to proceed with your Builder installation.

Step 12. Append the Jolt License

If you select the Contract Repository Server to install, and you do not have a Jolt license, you must append the contents of the lic-builder.txt file to lic.txt. The following window appears.

Figure 23 Jolt Append Window

Click OK to acknowledge you have a Jolt LICENSE.

Step 13. Acknowledge Successful Installation

After the files have been successfully copied to the destination directories, the Setup Complete window is displayed.

Figure 24 Setup Complete Window
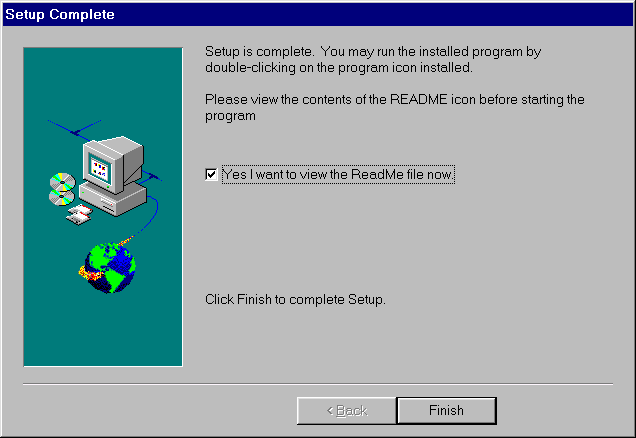
Before you can begin work with Builder products, you need to perform the post-installation tasks in the ReadMe file.

To view the ReadMe file at this time, select the check box Yes I want to view the ReadMe file now, and click Finish.

If this is unchecked, you can view the ReadMe file in the Builder install directory at a later time.

Active Expert Run-Time Installation

When deploying a client application written using the Active Expert, certain run-time components must be installed on the client. A separate Active Expert run-time installation program called axsetup.exe is provided for this purpose. You can find the file axsetup.exe in the ActiveExpert directory. (You can also get this file from the Builder CD.)

Run the axsetup.exe file in the same way as any setup program. Note that axsetup.exe does not need to be run every time a new client application is installed.


UNIX Installation

This section includes the following topics:

Your CD-ROM contains all of the necessary files for installing and running the TUXEDO Builder Contract Repository (including the Jolt 1.1 component). The CD-ROM contains an installation script for UNIX systems and a separate GUI-based installer for Windows NT users. To install the Contract Repository (including the Jolt 1.1 component), follow the instructions for your respective platform.
Note: For installation of these products you need CD-ROM access and approximately 16 Megabytes (MB) of disk storage if you select "all" for UNIX installation.

Before You Begin

Note: These requirements are for the server and all options only. If you choose a different option other than server and all, you can install the Builder products anywhere.

Before installing:

Installation Directory Structure

The following listing shows the UNIX installation directory structure.

Listing 1 TUXEDO Builder UNIX Installation Directory Structure
.:
hp          install.sh  sun5x       win32
./hp:
hp1010  hp1020  hp11
./hp/hp1010:
6.3  6.4
./hp/hp1010/6.3:
bldr    readme
./hp/hp1010/6.3/bldr:
bldrall.Z  bldrsvr.Z  copyright  pkginfo    space      suminfo
./hp/hp1010/6.4:
bldr    readme
./hp/hp1010/6.4/bldr:
bldrall.Z  bldrsvr.Z  copyright  pkginfo    space      suminfo
./hp/hp1020:
6.3  6.4
./hp/hp1020/6.3:
bldr    readme
./hp/hp1020/6.3/bldr:
bldrall.Z  bldrcpp.Z  bldredi.Z  copyright  space
bldrcon.Z  bldrdoc.Z  bldrsvr.Z  pkginfo    suminfo
./hp/hp1020/6.4:
bldr    readme
./hp/hp1020/6.4/bldr:
bldrall.Z  bldrcpp.Z  bldredi.Z  copyright  space
bldrcon.Z  bldrdoc.Z  bldrsvr.Z  pkginfo    suminfo
./hp/hp11:
6.4
./hp/hp11/6.4:
bldr    readme
./hp/hp11/6.4/bldr:
bldrall.Z  bldrcpp.Z  bldredi.Z  copyright  space
bldrcon.Z  bldrdoc.Z  bldrsvr.Z  pkginfo    suminfo
./sun5x:
sol251  sol26
./sun5x/sol251:
6.3  6.4
./sun5x/sol251/6.3:
bldr    readme
./sun5x/sol251/6.3/bldr:
bldrall.Z  bldrcpp.Z  bldredi.Z  copyright  space
bldrcon.Z  bldrdoc.Z  bldrsvr.Z  pkginfo    suminfo
./sun5x/sol251/6.4:
bldr    readme
./sun5x/sol251/6.4/bldr:
bldrall.Z  bldrcpp.Z  bldredi.Z  copyright  space
bldrcon.Z  bldrdoc.Z  bldrsvr.Z  pkginfo    suminfo
./sun5x/sol26:
6.4
./sun5x/sol26/6.4:
bldr    readme
./sun5x/sol26/6.4/bldr:
bldrall.Z  bldrcpp.Z  bldredi.Z  copyright  space
bldrcon.Z  bldrdoc.Z  bldrsvr.Z  pkginfo    suminfo

UNIX System Installation Instructions

The BEA TUXEDO Builder installation shell script allows you to install all components necessary for the Contract Repository system (including the necessary Jolt 1.1 components).

When installing, ensure that all necessary hardware and software has been installed. See the "Supported Platforms" section in the BEA TUXEDO Builder Release Notes for information about the hardware and software requirements.

  1. Log in as a user who has write permission in the TUXEDO directory.

    (Only applicable if you are installing using the server or all option.)

  2. Insert the CD-ROM in the CD-ROM drive. If you are running on Solaris and the daemon /usr/sbin/vold is running, the CD-ROM should be automatically mounted in the /cdrom directory. Type:

    cd /cdrom 

    If you are not running on Solaris or vold is not running, consult your UNIX administration documentation to mount the CD-ROM.

  3. Type ls

    The directory contents should look similar to the following sample. If not, verify that you are installing the correct CD-ROM.

    hp          install.sh  sun5x       win32

    Type

    sh ./install.sh

  4. Press Enter.

    This invokes the installation script. The step-by-step install screens are described in the following section.

Example of UNIX System Installation

The UNIX system installation script provides a set of step-by-step instructions to help you quickly install your product. This script lets you specify your platform, operating system, and other installation details. The installation script prompts you through the entire installation process. You can cancel the installation at any time by pressing CTRL-C simultaneously.

  1. Type the number that corresponds to the name of the operating system you are using (for example, if using Sparc Solaris 2.5.1 with BEA TUXEDO 6.4, type 7). Press Enter.

    01) hp/hp1010/6.3    02) hp/hp1010/6.4    03) hp/hp1020/6.3    
    04) hp/hp1020/6.4    05) hp/hp11/6.4      06) sun5x/sol251/6.3 
    07) sun5x/sol251/6.4 08) sun5x/sol26/6.4  
    Install which platform's files? [01-8, q to quit, l for list]:

    Note: In this example, we chose 7) sun5x/sol251/6.4

  2. You are prompted to confirm your choice. If correct, type y for "yes," or n for "no," or q to "quit." Press Enter.

    ** You have chosen to install from sun5x/sol251/6.4 **

    BEA Builder Release 2.0
    This directory contains the BEA Builder System for
    Solaris 2.5.1 on SPARC
    Is this correct? [y,n,q]: y

  3. Type y for "yes" to install the package. Press Enter.

    To terminate the installation at any time
    press the interrupt key,
    typically <del>, <break>, or <ctrl+c>.

    The following packages are available:

    1 bldr BEA Builder Repository Server

    Select the package(s) you wish to install (or 'all' to install
    all packages) (default: all) [?,??,q]: 1

    BEA Builder Repository Server
    (sparc) Release 2.0
    Copyright (c) 1998 BEA Systems, Inc.
    Portions * Copyright 1986-1997 RSA Data Security, Inc.
    All Rights Reserved.
    Distributed under license by BEA Systems, Inc.
    TUXEDO is a registered trademark.
    BEA Jolt is a trademark of BEA Systems, Inc.

  4. Type the number of the installation option you prefer. The Jolt 1.1 JSH and JSL components are installed in an existing TUXEDO directory. You must install TUXEDO prior to this installation.

    Note: The following example is shown choosing the all option. If you select another option, you may not be asked some of the questions shown in the example.

    For HP10.10/6.3 and 6.4, you will only be able to install options 1 and 2.

    The following installation options are available:
      1     all          Install the full BEA Builder System
      2     server       Install server only
      3     cpp          Install CPPExpert only
      4     config       Install ConfigExpert only
      5     editor       Install Editor only
      6     doc          Install documentation only
    Select an option (default: all) [?,??,q]: 1
    Note that the server will be installed into an existing
    TUXEDO directory.  You MUST have previously installed TUXEDO
    version 6.3 or 6.4 to attempt this installation.
    Base directory of existing TUXEDO installation [?,q]:
    /home/kwiseman/tux/6.4
    Determining if sufficient space is available ...
    30330 blocks are required
    1423072 blocks are available to /home/kwiseman/tux/6.4
     

    Using /home/kwiseman/tux/6.4 as the TUXEDO base directory
    Please specify the location of the Java Runtime Environment or
    the JDK
    Enter a pathname (default: /usr/jrehome) [?,q]: /home/zhang/jdk/jdk1.1.5
    Using /home/zhang/jdk/jdk1.1.5 as the location.
    Please specify the location of Netscape
    NETSCAPEDIR (default: /usr/netscape) [?,q]: 
    Using /usr/netscape as the location
    Please enter your Builder License Serial # and Token:
    Serial number [?,q]: 1234567890
    License token [?,q]: 1234567890123456
    Unloading /net/build/bldr/b20v8/CDIMAGE/sun5x/sol251/6.4/bldr/bldrall.Z
    ...
    bin/IREPSVR
    bin/repimport
    bin/jmigrate
    bin/bldr_upgrade
    bin/JSL
    bin/JSH
    udataobj/irep.f32
    udataobj/jrep.f16
    udataobj/jwsladmin.f32
    udataobj/lic-builder.txt
    udataobj/irepository
    udataobj/irep.env
    udataobj/ubbirep
    udataobj/bldr/client/samples/CPPExpert/NoDB/BANKAPP/AccountFactory.cpp
    ...
    61000 blocks
    ... finished
    NOTE: If you don't already have a JOLT license, APPEND the contents of 
    '/home/kwiseman/tux/6.4/udataobj/lic-builder.txt' 
    to:
    '/home/kwiseman/tux/6.4/udataobj/lic.txt'.
    Config Expert: processsing...
    Would you like to run the Config Expert to enter machine information now?  You can always run it after installation by executing the command
    /home/kwiseman/tux/6.4/udataobj/bldr/client/ConfigExpert/bin/ConfigEditor

  5. For more information on entering machine information, see "Configuration Data Editor Main Window," or see BEA TUXEDO Builder Configuration Online Help Version 2.0.

    Do you want to run ConfigEditor now? [y,n]: n
    Config Expert: done.
    CR Editor: processsing...
    CR Editor: done.
    CPP Expert: processsing...
    CPP Expert: done.

  6. The script continues with the installation process until the status message, Installation of BEA Builder was successful displays.

    Changing file permissions...
    ... finished
    Installation of BEA Builder was successful

  7. The script returns to the installation prompt. Type q to quit.

    The following packages are available:
      1	bldr		BEA Builder
    Select the package(s) you wish to install (or 'all' to install
    all packages) (default: all) [?,??,q]:

The installation is now complete. For information on post-installation issues, see the post-installation notes in the BEA TUXEDO Builder Release Notes.

Configuring the Contract Repository Servers

This section explains how to configure the Contract Repository Servers. The following topics are included:

Configuring the Jolt Servers

The Jolt servers are:

The system administrator's responsibilities for the server components include:

Security and Encryption

Authentication and key exchange data that are transmitted between Jolt clients and the JSL/JSH are encrypted using DES (56-bit) encryption. All subsequent exchanges are encrypted using RC4 encryption. International packages use 40-bit key.

Programs using the 56/128-bit encryption cannot be used outside the United States without proper approval from the United States government. Customers with intranets extending beyond the United States cannot use this mode of encryption if any internal clients are outside of the United States.

The 128-bit version generates a 128-bit RC4 session encryption key at logon time, and this session key is transmitted over the network in a message protected by 56-bit DES encryption. The temporary session key is then used to encrypt the session's data. The overall security level achieved is equivalent to 56-bit DES encryption, even though the data encryption is using a 128-bit key.

Configuring the Jolt Server Listener

The Jolt Server Listener (JSL) is a TUXEDO server responsible for distributing connection requests from the system to the JSH. TUXEDO must be running on the host machine where the JSL and IREPSVR is located.

To configure the JSL, you must modify the UBBCONFIG file. For information regarding TUXEDO configuration, refer to the BEA TUXEDO Administrator's Guide. Listing 2 shows relevant portions of the UBBCONFIG file.

Listing 2 UBBCONFIG File
*MACHINES
MACH1 LMID=SITE1
MAXWSCLIENTS=40
*GROUPS
JSLGRP GRPNO=95 LMID=SITE1
*SERVERS
JSL SRVGRP=JSLGRP SRVID=30 CLOPT= " -- -n // machinename: port# -d
/dev/tcp -m2 -M4 -x10"

Change the following sections of the UBBCONFIG file.

Table 1 UBBCONFIG File Sections

Section Parameters to be specified

*MACHINES

MAXWSCLIENTS

*GROUPS

LMID, GRPNO

*SERVERS

SRVGRP, SRVID, CLOPT

The parameters shown in Table 1 are the only parameters that should be designated for the server groups and servers. You do not need to specify any other parameters.

Note: Ensure that Resource Managers are not assigned as a DEFAULT value for all groups in the *GROUPS section of your UBBCONFIG file. This will assign a Resource Manager to the JSL and you will receive an error during tmboot. In the *SERVERS section, DEFAULT values for RESTART, MAXGEN, etc., are acceptable defaults for the JSL.

*MACHINES Section

The MAXWSCLIENTS parameter is required in the *MACHINES section of the configuration file and applies to specific machines. The Jolt server and /WS use MAXWSCLIENTS in the same way. MAXWSCLIENTS communicates the number of accesser slots to reserve for the Jolt and /WS clients to the TUXEDO application. For example, if 200 slots are configured for MAXWSCLIENTS, this number configures the TUXEDO application for the total number of remote clients used by Jolt and the /WS.

Specify MAXWSCLIENTS in the configuration file. If it is not specified, the default is 0.

Listing 3 shows the *MACHINES section of a UBBCONFIG file for a machine called SERVERMACHINE.

Listing 3 UBBCONFIG File
"
SERVERMACHINE" LMID=SITE1
TUXDIR="/home/tuxedo"
APPDIR="/home/tuxedo/apps/bankapp"
ENVFILE="/home/tuxedo/apps/bankapp/envfile"
TLOGDEVICE="/home/tuxedo/apps/bankapp/TLOG"
CLOPT="-e tmusrevt.out -o tmusrevt.out -A --
-f /usr/tuxedo/bankapp/tmusrevt.dat"
SEQUENCE=11

Required FML Field Tables. The ENVFILE specifies environment variables for the TUXEDO system. Jolt requires that the following files be referenced in the environment:

As shown in Listing 4, the required files are defined in the FIELDTBLS variable. The FLDTBLDIR variable specifies the directories in which to search for these files. The jrep.f16, jwsladmin.f32, and irep.f32 files are found in the udataobj directory.

Listing 4 FIELDTBLS Variable in the envfile File
FIELDTBLS=Usysflds,bank.flds,credit.flds,event.flds,jrep.f16,jwsladmin.f32,irep.f32
FLDTBLDIR=/home/tuxedo/udataobj:/home/tuxedo/apps/bankapp
VIEWDIR=/home/tuxedo/apps/bankapp
VIEWFILES=aud.V

If ENVFILE="/home/tuxedo/apps/bankapp/envfile" is included in the definition of the UBBCONFIG file (shown in Listing 3), the FIELDTBLS and FLDTBLDIR definitions are taken from the envfile file and not from your environment variable settings.

If you remove the ENVFILE="envfile" definition, the FIELDTBLS and FLDTBLDIR definitions are taken from your environment variable settings. The FIELDTBLS and FLDTBLDIR definitions must be set to the appropriate value prior to booting the TUXEDO application.

*GROUPS Section

A *GROUPS entry is required for the group that includes the Jolt Server Listener (JSL). The group name is selected by the application.

  1. Specify the same identifiers given as the value of the LMID parameter in the *MACHINES section.

  2. Specify the value of the GRPNO between 1 and 30,000 in the *GROUPS section.

*SERVERS Section

Clients connect to the Jolt applications through the JSL. Services are accessed through the Jolt Server Handler (JSH). The JSL supports multiple clients and acts as a single point of contact for all the clients to connect to the application at the network address that is specified on the JSL command line. The JSL schedules work for handler processes. A handler process acts as a substitute for clients on remote workstations within the administrative domain of the application. The handler uses a multiplexing scheme to support the multiple clients concurrently.

The network address specified for the JSL designates a TCP/IP address for both the JSL and any JSH processes associated with that JSL. The port number identified by the network address specifies the port number on which the JSL accepts new client connections. Each JSH associated with the JSL uses consecutive port numbers at the same TCP/IP address. For example, if the initial port number is 8000 and there are a maximum of three JSH processes, the JSH processes use ports 8001, 8002, and 8003.

Note: Port numbers used by the JSHs are sequentially incremented by one numeric digit after the JSL port number. If JSL is using port number 8000, its JSHs use 8001, and so on. Misconfiguration of the subsequent JSL results in a port number collision.

Each handler uses a multiplexing scheme on its designated port to support multiple clients concurrently on one port.

TUXEDO parameters including RESTART, RQADDR, and REPLYQ can be used with the JSL. See the BEA TUXEDO Administrator's Guide for additional information regarding run-time parameters. Enter the following parameters:

  1. To identify the SRVGRP parameter, type the previously defined group name value from the *GROUPS section.

  2. To indicate the SRVID, type a number between 1 and 30,000 that identifies the server within its group.

  3. Verify that the syntax for the CLOPT parameter is as follows:

    CLOPT= "-- -n //
    machinename:
    port# -d /dev/tcp -m2 -M4 -x10"

    Note: The CLOPT parameters may vary. Refer to Table 2 for pertinent command-line information.

  4. If necessary, type the optional parameters:

Starting the Jolt Servers

Using the command tmloadcf, create a binary TUXCONFIG file from the UBB configuration file. Type tmboot -y to start all administrative and server processes. See the BEA TUXEDO Administrator's Guide for information on tmloadcf and tmboot.

Note that TUXEDO monitors the JSL and restarts it in the event of a failure. When TUXEDO restarts the listener process, the following occurs:

Shutting Down the Jolt Servers

All shutdown requests to the servers are initiated by the TUXEDO command, tmshutdown -y. During shutdown:

Configuring the Repository Server

The Contract Repository contains TUXEDO service definitions that allow the clients to access TUXEDO services. The Contract Repository files included with the installation contain service definitions used internally by TUXEDO Builder.

To configure the Contract Repository, modify the application UBBCONFIG file. The UBBCONFIG file is an ASCII version of the TUXEDO configuration file. Create a new UBBCONFIG file for each application. See the TUXEDO Reference Manual for information regarding the syntax of the entries for the file. Listing 5 shows relevant portions of the UBBCONFIG file.

Listing 5 Sample of UBBCONFIG File
*GROUPS
JREPGRP GRPNO=94 LMID=SITE1
*SERVERS
IREPSVR SRVGRP=JREPGRP SRVID=98
RESTART=Y GRACE=0 CLOPT="-A -- -W -N -P /app/irepository"

Note: For UNIX systems, use the slash (/) when setting the path to the irepository file. For NT systems, use the backslash (\) and specify the drive name (e.g., c:\app\repository).

Change the following sections of the UBBCONFIG file.

Table 3 UBBCONFIG File

Section Parameters to be specified

*GROUPS

LMID, GRPNO

*SERVERS

SRVGRP, SRVID

*GROUPS Section

A *GROUPS entry is required for the group that includes the Contract Repository. The group name parameter is a name selected by the application.

  1. Specify the same identifiers given as the value of the LMID parameter in the *MACHINES section.

  2. Specify the value of the GRPNO between 1 and 30,000 in the *GROUPS section.

*SERVERS Section

The Contract Repository server, IREPSVR, contains services for accessing and editing the Repository. Multiple IREPSVR instances share repository information through a shared file. Include IREPSVR in the *SERVERS section of the UBBCONFIG file.

  1. Indicate a new server identification (e.g., 98) with the SRVID parameter.

  2. Specify the -w flag for one IREPSVR to ensure that you can edit the Repository. The Repository is read-only without this flag.

    Warning: You must start only one writable IREPSVR (i.e., only one IREPSVR with the -w flag). Multiple writable IREPSVRs are not supported.

  3. Use the -N flag to notify the server to advertise the new set of services. If the -N flag is not specified, the environment does not work.

  4. Type the -P flag to specify the location of the repository file. An error message displays in the TUXEDO ULOG file if the argument for the -P flag is not entered.

  5. Use tmloadcf to create the configuration file and tmboot to boot the system. See the BEA TUXEDO Administrator's Guide for information on tmloadcf and tmboot.

Repository File

A default Repository file, irepository, is provided during installation. This file includes bankapp services that you can modify, test, and delete using the Contract Repository Editor. It also contains service interfaces for the Contract Repository itself, but these are not visible through the Editor.

Start with the irepository file provided with the installation, even if you are not going to test the bankapp application. Delete the bankapp packages or services that are not needed.

The path name of the file must match the argument of the -P option.

Warning: Do not modify the Contract Repository files manually or you will not be able to use the Contract Repository Editor. Although the irepository file can be modified and read with any text editor, the system does not have integrity checks to ensure that the file is in the proper format. Any manual changes to the irepository file may not be detected until runtime.


Starting the BEA TUXEDO Builder Applications

The following sections describe how to start each of the BEA TUXEDO Builder applications once you have installed the Builder software.

Starting the Active Expert Application Builder

To start the Active Expert Application Builder, choose Start->Programs->BEA TUXEDO Builder->Active Expert from the Start menu on the Windows Desktop Taskbar.

If you accepted the default location path at installation, the Active Expert Application Builder executable is installed in:

YourDrive:\TUXBldr\ActiveExpert\appbldr.exe (for Windows 95 or NT)

If you have set up a shortcut to the Active Expert, simply double-click on the Application Builder icon on your desktop.

Note: To get an Active Expert icon on your desktop, create a Windows shortcut to the Active Expert Application Builder. For instructions on creating a shortcut to an application, refer to your Windows documentation.

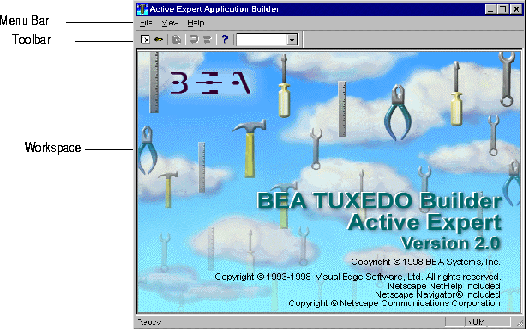
Figure 25 Active Expert Application Builder at Start-up

For information on working with the Active Expert, refer to the online help in the Active Expert application.

Starting the C++ Expert

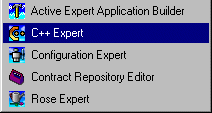
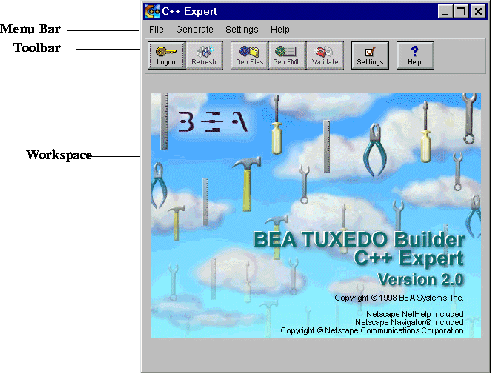
On Intel/Windows platforms, choose Start->Programs->BEA TUXEDO Builder->C++ Expert from the Start menu on the Windows Desktop Taskbar to start the C++ Expert.

Or if you have set up a shortcut to the C++ Expert, simply double-click on the icon on your desktop.

On UNIX platforms, follow these steps to start the C++ Expert:

  1. In a UNIX Bourne shell, change directories (cd) to the following location:

    <Builder_Install_dir>/client/CPPExpert/

  2. Enter the following at the command line prompt:

    sh ./CPPExpert.sh

    Warning: If the C++ Expert was previously installed and a reinstallation or a fresh installation is done, the settings.ce file present in the home directory of the logged-in user should be removed before starting the C++ Expert. This ensures that any old installation settings are reset to the new ones. The C++ Expert automatically creates the settings.ce file containing the current installation's settings in the logged-in user's home directory during startup.
    Figure 26 C++ Expert at Start-up

For information on working with the C++ Expert, refer to the online help in the C++ Expert application.

Starting the Rose Expert

Unlike the other Builder products, the Rose Expert is a plug in so you cannot start it from within the Builder directories.

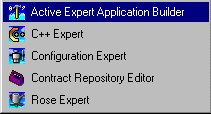
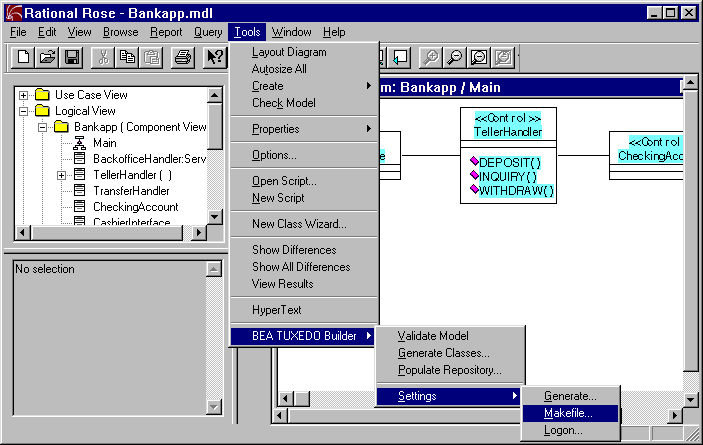
To use the Rose Expert, start your Rational Rose Application and choose the option Tools->BEA TUXEDO Builder from the Rational Rose menu bar. For some options, there are prerequisite tasks. (For example, to Generate Classes you must have created a component package in the current model.)

Figure 27 shows how to get to the Rose Expert from the Rational Rose Tools menu.

Figure 27 Getting to the BEA Rose Expert Menu Options

For information on working with the Rose Expert, refer to the online help in the Rose Expert application. (To get Help on the Rose Expert, choose Help->BEA TUXEDO Builder from the Rational Rose menus.)

Starting the Configuration Expert

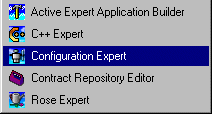
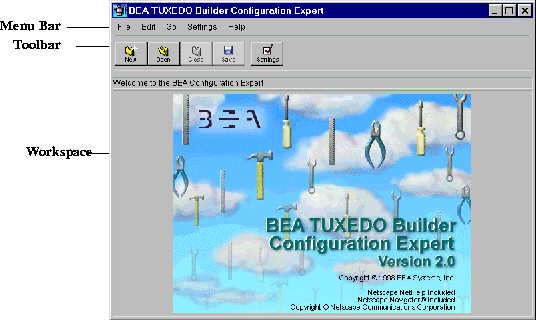
On Intel/Windows platforms, choose Start->Programs->BEA TUXEDO Builder->Configuration Expert from the Start menu on the Windows Desktop Taskbar to start the Configuration Expert.

Or if you have set up a shortcut to the Configuration Expert, simply double-click on the icon on your desktop.

On UNIX platforms, follow these steps to start the Configuration Expert:

  1. In a UNIX Bourne shell, change directories (cd) to the following location:

    <Builder_Install_dir>/client/ConfigExpert/bin/

  2. Enter the following at the command line prompt:

    sh ./ConfigExpert
    Figure 28 Configuration Expert at Start-up

For information on working with the Configuration Expert, refer to the online help in the Configuration Expert application.

You can also start the Configuration Data Editor from the ConfigExpert directories.

The Configuration Data Editor is an auxiliary maintenance application for adding or deleting machines from the Configuration Data file, which is used by the Configuration Expert.

For information on working with the Configuration Data Editor, refer to the online help in the Configuration Expert application (Help->Tasks->Adding New Machines with the Editor) or to the online help in the Configuration Data Editor itself.

Starting the Contract Repository Editor

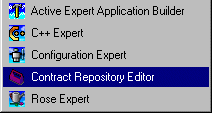
On Intel/Windows platforms, choose Start->Programs->BEA TUXEDO Builder->Contract Repository Editor from the Start menu on the Windows Desktop Taskbar to start the Contract Repository Editor.

If you have set up a shortcut to the Contract Repository Editor, simply double-click on the icon on your desktop.

On UNIX platforms, follow these steps to start the Contract Repository Editor:

  1. In a UNIX Bourne shell, change directories (cd) to the following location:

    <Builder_Install_dir>/client/RepEditor/

  2. Enter the following at the command line prompt:

    sh ./CRep.sh
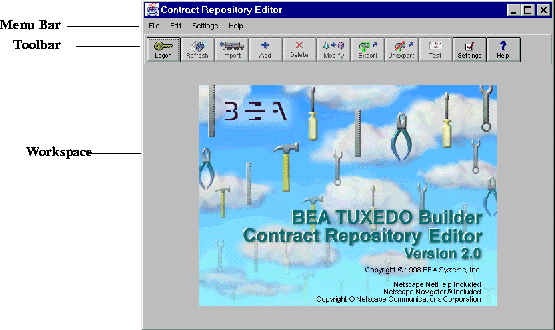
    Figure 29 Contract Repository at Start-up

For information on working with the Contract Repository Editor, refer to the online help in the Contract Repository Editor application.


[Top] [Prev]