

|
|
|
|
|
|
This chapter explains how to install Jolt software and online documentation.
This chapter includes the following sections:
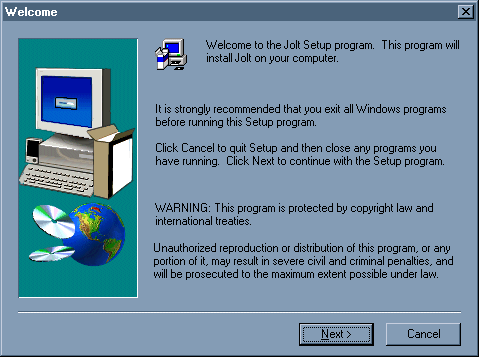
The installation (setup.exe
) is launched automatically when you insert the Jolt Installation CD and provides a set of step-by-step installation windows to help you quickly install your Jolt product. These windows are self-explanatory.
You can cancel the installation at any time. (If your system detects the presence of a previous Jolt installation, you are given the option of aborting the current installation or overwriting the existing one.)
Refer to Table 1-7 for additional information on the directory structure.
Microsoft Windows NT Installation Instructions
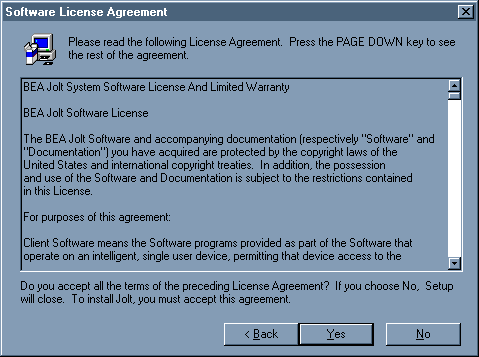
To continue with the Jolt installation, you must accept the terms of the license agreement. If you accept the terms, click the Yes button to continue with the installation. If you do not accept the terms, click the No button and the installation stops.
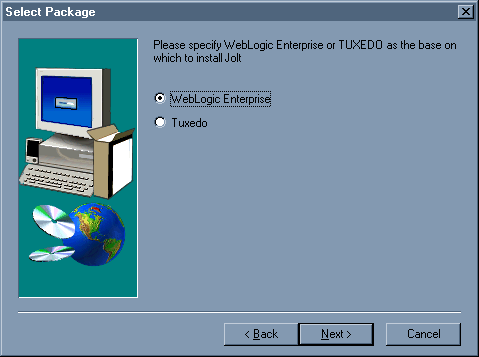
Click either the TUXEDO or WebLogic Enterprise radio button to select the base on which to install Jolt.
In the Select Components window, select the module(s) you want to install. (You can choose to install any or all components.) The sample window shown in Figure 2-4 displays TUXEDO components. If you install on WLE, the server component listed would show "Jolt Server for WLE" instead of "Jolt Server for Tuxedo."
Note: Selection in this window works as a toggle. To make your selection, click in the check box to the left of the text representing your choice. The window displays a checkmark to the left of your selection. To deselect a component, click on the checkmark to the left of your choice and the checkmark is removed.
Table 2-1 displays what Jolt installs with each selected component.
You can check the available and required disk space on a particular drive either in the Space Available section at the bottom of the Select Component window, or by clicking on Disk Space in the same window. The Space Required number is approximately equal to the space required by the total number of components you select plus a core component (uninstall files).
The Destination Folder displays the directory where the Jolt components are installed. To change the directory, click the Browse button and type the directory path. You have another opportunity to specify the Destination Folder when you select the Jolt components for installation (Step 5).
Note: Typically, the destination path is the TUXEDO or WLE directory.
Click the Next button to continue with the installation.
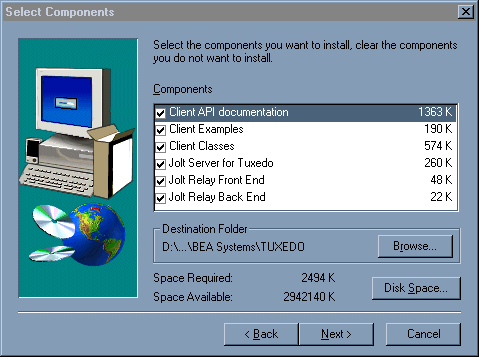
Table 2-1 describes what gets installed with each component.
Component... |
Installs... |
|---|---|
Click on the Next button.
If you click the Yes button, in addition to the client class .jar
files, you also get client classes in .zip
file format and all Jolt client classes in the <classes/bea/jolt
> directory.
If you click the No button, you get only Jolt client class .jar
files.
If you click the Yes button, the Insert License Disk window (Figure 2-8) displays.
If you click the No button, a warning reminds you that your license has not been installed. For further information on licensing, see the "Licensing Your Jolt Software" section later in this chapter.
Type the designated path or click the Browse button to change the drive, then click the OK button.
Click on Finish. Jolt is installed.
Figure 2-5 The Server Destination Window
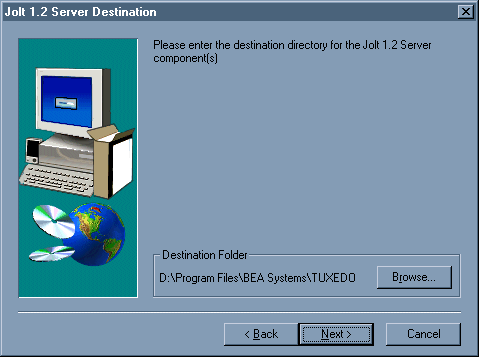
Figure 2-6 Jolt 1.1 Applications
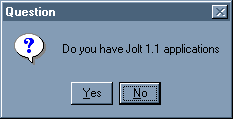
Figure 2-7 Install License Window
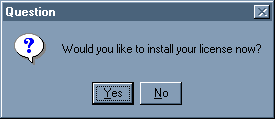
Figure 2-8 Insert License Disk Window
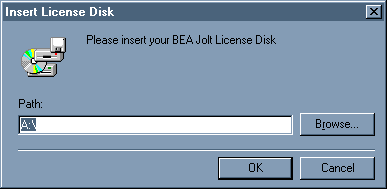
Figure 2-9 Install Jolt Relay Window
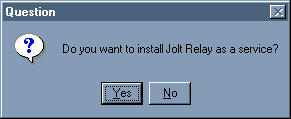
Figure 2-10 The Enter Information Window
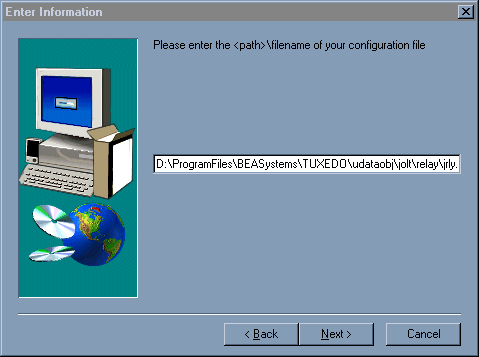
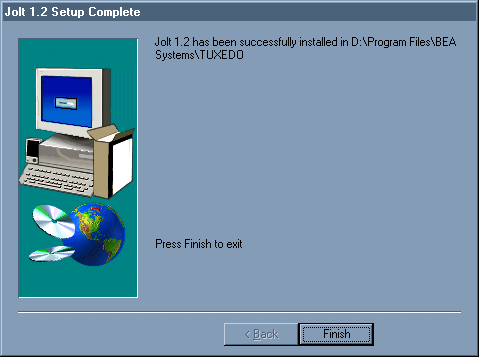
Figure 2-11 Setup Complete Window
The Jolt installation shell script for UNIX and Linux systems includes all components necessary for installing the Jolt system: the Jolt Repository, the Jolt Server, the Jolt Relay front-end and back-end, and the Jolt Class Library. Refer to Table 1-6 for an example of the Jolt directory structure.
Before you install Jolt, make sure that TUXEDO 6.4 or 6.5 or WebLogic Enterprise (WLE) 4.2 has been installed. (If your system detects the presence of a previous Jolt installation, you are given the option of aborting the current installation or overwriting the existing one.)
cd /cdrom/jolt/unix
If you are not running on Solaris or vold is not running, consult your UNIX administration documentation to mount the CD-ROM.
The directory contents should look similar to the following sample. If not, verify that you are installing the correct CD-ROM.
hp/ ibm/
install.sh
seq/ sgi/ sun5x/ uw/
This invokes the Jolt installation script. The step-by-step install screens are described in the following section.
The UNIX system installation script provides a set of step-by-step instructions to help you quickly install your Jolt product. This script lets you specify your platform, operating system, and other installation details. The installation script prompts you through the entire installation process. You can cancel the installation at any time by pressing CTRL-C simultaneously.
Note: The script used to show the UNIX installation is taken from Jolt 1.2 for TUXEDO 6.4/6.5 or WLE 4.2.
The following installation options are available:
1 Tuxedo Install Jolt for Tuxedo
2 WLE Install Jolt for WLE
Select an option (default: Tuxedo) [?,??,q]: 1
Install which platform's files? [01-17, q to quit, l for list]: 15
BEA Jolt Release 1.2
This directory contains the BEA Jolt System for
SunOS 5.6 (Solaris 2.6) on SPARC
Is this correct? [y,n,q]: y
To terminate the installation at any time press the interrupt key, typically <del>, <break>, or <ctrl+c>.
The following packages are available:
1 jolt BEA Jolt
Select the package(s) you wish to install (or 'all' to install all packages) (default: all) [?,??,q]: 1
BEA Jolt (sparc) Release 1.2
Copyright (c) 1997-1999 BEA Systems, Inc.
Portions * Copyright 1986-1997 RSA Data Security, Inc.
All Rights Reserved.
TUXEDO, Jolt, and WebLogic are registered trademarks of BEA Systems, Inc.
BEA WebLogic Enterprise is a trademark of BEA Systems, Inc.
The following installation options are available:
Select an option (default: all) [?,??,q]: 1
Note that the jolt server will be installed into an existing TUXEDO or WLE directory. You MUST have previously installed TUXEDO version 6.4 or 6.5 or WLE 4.2 to attempt this installation.
Base directory of existing TUXEDO installation [?,q]: /usr/jolt/T6.4u
Determining if sufficient space is available ...
3068 blocks are required
1045034 blocks are available to /usr/jolt/T6.4u
Using /usr/jolt/T6.4u as the TUXEDO base directory
Unloading /cdrom/cdrom0/unix/sun5x/sol26/Tux6.4_6.5/jolt/joltclt.Z ...
udataobj/jolt/jolt.jar
udataobj/jolt/joltasp.jar
udataobj/jolt/joltjse.jar
udataobj/jolt/JoltBeanDev.jar
udataobj/jolt/JoltBeanDevAwt.jar
udataobj/jolt/JoltBeanDevSwing.jar
udataobj/jolt/JoltBeanDevSwing11.jar
udataobj/jolt/JoltBeanRt.jar
udataobj/jolt/JoltBeanRtAwt.jar
udataobj/jolt/JoltBeanRtSwing.jar
udataobj/jolt/JoltBeanRtSwing11.jar
udataobj/jolt/RE.html
udataobj/jolt/examples/asp/bankapp/templates/deposit.temp
udataobj/jolt/examples/asp/bankapp/templates/inquiry.temp
udataobj/jolt/examples/asp/bankapp/templates/transfer.temp
udataobj/jolt/examples/asp/bankapp/templates/withdrawal.temp
udataobj/jolt/examples/asp/bankapp/templates/error.temp
udataobj/jolt/examples/asp/bankapp/templates/nosession.temp
udataobj/jolt/examples/asp/bankapp/templates/syserror.temp
udataobj/jolt/examples/asp/bankapp/bankapp.properties
udataobj/jolt/examples/asp/bankapp/depositForm.htm
udataobj/jolt/examples/asp/bankapp/inquiryForm.htm
udataobj/jolt/examples/asp/bankapp/transferForm.htm
udataobj/jolt/examples/asp/bankapp/withdrawalForm.htm
udataobj/jolt/examples/asp/bankapp/tellerForm.asp
udataobj/jolt/examples/asp/bankapp/tlr.asp
udataobj/jolt/examples/asp/bankapp/web_templates.inc
udataobj/jolt/examples/asp/bankapp/web_admin.inc
......
udataobj/jolt/classes/bea/jolt/ServiceException.class
udataobj/jolt/classes/bea/jolt/Session.class
udataobj/jolt/classes/bea/jolt/SessionException.class
udataobj/jolt/classes/bea/jolt/SessionState.class
udataobj/jolt/classes/bea/jolt/Transaction.class
udataobj/jolt/classes/bea/jolt/TransactionException.class
udataobj/jolt/classes/bea/jolt/UrlHdlr.class
udataobj/jolt/classes/bea/jolt/UrlInfo.class
udataobj/jolt/jolt.zip
910 blocks
... finished
Unloading /cdrom/cdrom0/unix/sun5x/sol26/Tux6.4_6.5/jolt/joltrad.Z ...
bin/JRAD
locale/CATNAMES
locale/C/JRAD_CAT
locale/C/JRAD.text
140 blocks
... finished
Unloading /cdrom/cdrom0/unix/sun5x/sol26/Tux6.4_6.5/jolt/joltsvr.Z ...
bin/JREPSVR
bin/JSL
bin/JSH
lib/libjconv.so
include/jotypes.h
locale/CATNAMES
locale/C/JOLT_CAT
locale/C/JOLT.text
udataobj/jrep.f32
udataobj/jwsladmin.f32
udataobj/jolt/repository/jrepository
760 blocks
... finished
Please don't forget to manually append the contents of the license file
from the enclosed floppy to '/usr/jolt/T6.4u/udataobj/lic.txt'.
Refer to the BEA Jolt manual for details on how to do this.
Changing file permissions...
... finished
Installation of BEA Jolt was successful
The following packages are available:
1 jolt BEA Jolt
Select the package(s) you wish to install (or 'all' to install
all packages) (default: all) [?,??,q]: q
To install Jolt on the OS 390 System: (Refer to Table 1-8 for an example of the Jolt directory structure.)
Note: If you don't install Jolt on an OS 390 machine in this manner, the installation code is unreadable from the OS 390 machine.
To Install Jolt on the OS 400 System: (Refer to Table 1-8 for an example of the Jolt directory structure.)
If installing from NT or UNIX, follow Steps 3 and 4.
The open OS 400<machine-name>
Account-name
Password
For example, the file for user 'rtl' on the OS 400 machine named 'lc400b.beasys.com' with a password of 'rtl123' would contain the three following lines.
open lc400b.beasys.com
rtl
rtl123
This file is used to automatically execute the pre-installation procedures necessary for installing Jolt through FTP. Once the pre-installation steps are completed, you can remove the file.
Machine: lc400b.beasys.com
Login: rtl
Password: rtl123
For more information on the.netrc file, consult the UNIX System Manual Page for FTP.
Usage:
preinst.bat < CD-drive> tmplib tuxdir tuxlib < filename> version
where <CD-drive> is the letter that represents the CDROM device on the machine where Jolt is loaded. For example D:tmpl is the library on the OS400 where the Jolt save files will be copied from the CDROM.
tuxdir
is the IFS file system on the OS400 where TUXEDO is already installed and where the Jolt files will be installed.
tuxlib
is the TUXEDO library on the OS400 where the save files will be restored.
< filename>
is the full path to a file that contains FTP account and password information for the OS 400 machine where Jolt will be installed.
version
is the Jolt version (either 'us' or 'intl') to be installed.
NOTE: If you have problems with the preinst.bat from the CD, copy it to your C: drive and repeat the previous instructions.
Usage: preinst.sh mount-point tmplib tuxdir tuxlib machine version where:
CD-drive
is the file system on which the Jolt CDROM is mounted, for example /cdrom .
tmplib
is the library on the OS 400 where the Jolt save files will be copied to from the CDROM.
tuxdir
is the IFS file system on the OS 400 where TUXEDO is already installed and where the Jolt files will be installed.
tuxlib
is the TUXEDO library on the OS 400 where the save files will be restored.
machine-name
is the name of the OS 400 machine on which Jolt is to be installed.
version
is the Jolt version (either 'us' or 'intl') to be installed.
addlible TUXLIB
If the version is US then call:
joltinstus parm('TMPLIB''TUXLIB''TUXDIR''all|clt|doc|svr|rad ')
If the version is International, call:
joltinstin parm('TMPLIB' 'TUXLIB''TUXDIR''all|clt|doc|svr|rad')
where:
all is used to install all Jolt packages,
clt is used to install Jolt client only,
doc is used to install Jolt doc only,
svr is used to install Jolt server only,
rad is used to install Jolt rad only.
Note: all , clt , doc , svr , or rad must be lowercase.
During installation, a number of "restoring X to Y" messages are displayed, for example, "Restoring service programs to TUXLIB ". The installation process may take several minutes.
For information on obtaining a license, contact your Jolt sales representative.
Before you develop your TUXEDO application:
sf32801 product 5716ss1
mf12328 product 5716999
Use the "go ptf " option 5 to view the current PTFs. If necessary, these PTFs can be downloaded from IBM support over the ECS line.
At present, IBM ships Client Access for both Windows 95 and NT. Client Access allows, among other things, IFS directories to be mapped as network drives on your PC. Since TUXEDO writes ULOG files in IFS, this is a convenient way to view them from your PC.
Tips for running the Web-based Administration Console on the OS 400:
The Administration Console is new to Release 6.4 and it allows the administration of TUXEDO applications from any Web browser (for example, Netscape or Internet Explorer).
You can accomplish this by running a command-line script using SBMDBJOB . For example, the command-line script used to start tuxwsvr would look like:
//BCHJOB JOB(WEBSERVER) JOBD(TUXADM/JOBD)
addlible TUXLIB
cd /home/tuxadm/web
call setenv env
call tuxwsvr ('-l//lc400b.beasys.com:3184' '-iwinput.ini')
The JOB parameter, for example, sets the name of the job such that it appears on a WRKACTJOB screen. A customized Job Description is needed here also so that the job can be run in batch. The default Job Description QDFTJOBD for interactive sessions cannot be used here. To create a new one, use WRKJOBD and copy QDFTJOBD to TUXADM/JOBD , then change TUXADM/JOBD by adding a USER name.
This is done by putting all necessary environment settings in an env file and calling setenv on it. Other application-specific variables, for example APPDIR , can be set here as well.
This INI file tells the server where to look for HTML pages and Java images. For example:
CGI /cgi-bin <TUXDIR>/bin
HTML /java/images <TUXDIR>/web/gui/java/bea/tuxadm/images
JAVA /java <TUXDIR>/web/gui/java
HTML /docs <TUXDIR>/docs
HTML / <TUXDIR>/udataobj/webgui
CGI /cgi-bin /qopensys/tuxr64/bin
HTML/java/images/qopensys/tuxr64/web/gui/java/bea/tuxadm/images
JAVA /java /qopensys/tuxr64/web/gui/java
HTML /docs /qopensys/tuxr64/docs
HTML /qopensys/tuxr64/udataobj/webgui
This INI file must be created. It is not generated during installation on the OS400. For detailed information on its creation, consult the wlisten manual page in Section 1 of the TUXEDO Reference Manual.
An example is provided below:
TUXDIR=/qopensys/tuxr64
NADDR=0x00020c71c604a68d
CODEBASE=/java
DOCBASE=http://lc400b:3184/docs
To start the Administration Console on the OS 400:
Open the following URL:
http://<
machine_name>:<
port>/cgi-bin/tuxadm/TUXDIR=<TUXDIR>&INIFILE=<inifile>
where:
For additional information on the Administration Console setup, consult the TUXEDO Installation Guide.
The licensing scheme used by Jolt depends on the version of TUXEDO used with Jolt. You need the following information to install your license:
Licensing Jolt for TUXEDO 6.4 and 6.5
Jolt for TUXEDO 6.4 and 6.5 uses a digitally signed license file to enable a license. This file is provided on a floppy disk shipped with your Jolt software.
The UNIX installation program (install.sh
) does not install the license automatically; see the "UNIX Licensing Instructions" in the following section.
The NT installation program (setup.exe
) prompts you for the location of the Jolt license file. When you provide the necessary information, the installation program installs the license file for you. If you do not install the license file during installation, follow the steps in the "NT Licensing Instructions" section.
UNIX Licensing Instructions
cd $TUXDIR/udataobj
cp lic.txt lic.txt.bak
cat /dev/diskette/joltlic.txt >> lic.txt
cd %TUXDIR%\udataobj
copy lic.txt lic.txt.bak
copy lic.txt + a:\joltlic.txt
A text editor can be used to copy and paste the contents of the Jolt license file into the TUXEDO license file.
Note: The digital signature is 64 characters long. Every character must match exactly or the license is not valid.
Accompanying your Jolt software is an online, HTML-based, documentation set to assist you with using Jolt. The Jolt product CD-ROM contains the HTML version of the BEA Jolt Installation and Configuration Guide and the BEA Jolt Developer's Guide.

|
|
|
Copyright © 1999 BEA Systems, Inc. All rights reserved.
|