

|
|
|
|
|
|
WebLogic Collaborate Installation on UNIX Systems
This section provides the information needed to install and uninstall WebLogic Collaborate on a UNIX platform. Specifically, it includes the following topics:
Installation Prerequisites
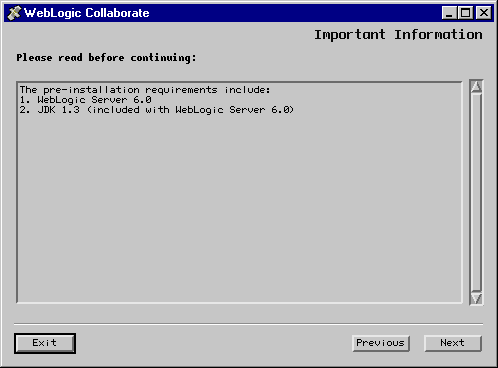
Before installing the WebLogic Collaborate software, you must have the following software and hardware installed on your machine:
Note: 256 MB RAM are recommended for one instance of WebLogic Server, where the c-hub and c-enabler are colocated. If you run two instances of WebLogic Server, the machine will need more memory.
Verify that JDK 1.3.0 is at the beginning of your machine's PATH. The PATH should begin with wls_6.0/jdk1.3/bin. wls_6.0 represents the location on the local machine in which WebLogic Server 6.0 is installed.
WebLogic Collaborate is supported on platforms that are certified and approved for WebLogic Server Version 6.0. For details about WebLogic Server Version 6.0 platforms, see http://download.oracle.com/docs/cd/E13222_01/wls/docs60/index.html.
You need EJB20.jar to activate the BEA WebLogic Server implementation of Sun Microsystem's Enterprise JavaBeans 2.0 specification. You can download it from BEA WebLogic Server Downloads at http://commerce.bea.com/downloads/weblogic_server.jsp. Choose the EJB 2.0 download option to download a zip file that contains the ejb20.jar file and the README file.
BEA ships the Cloudscape software—a pure-Java relational database management system (RDBMS)—with WebLogic Server.
The Oracle 8i (8.1.6) client libraries must be installed on the machine runningWebLogic Server 6.0. You must also have access to an Oracle 8.1.5 or 8.1.6 server. WebLogic Collaborate uses the Oracle thin driver, which is bundled with your WebLogic Server distribution and installed with WebLogic Server.
For more information about configuring the Oracle thin driver with WebLogic Server, see Using Third-Party Drivers with WebLogic Server at the following URL:
http://download.oracle.com/docs/cd/E13222_01/wls/docs60/jdbc/thirdparty.html
Note: Before you can use an Oracle database, you must define the following variables in the user you create for WebLogic Collaborate. Contact your Oracle Database Administrator for more information.
ORACLE_HOME=directory_where_Oracle_is_installed
PATH=$PATH:$ORACLE_HOME/bin
LD_LIBRARY_PATH=$LD_LIBRARY_PATH:$ORACLE_HOME/lib
For details about using the JDBC specification for database access, see Programming WebLogic JDBC at the following URL:
http://download.oracle.com/docs/cd/E13222_01/wls/docs60/jdbc/index.html.
Installing the BEA WebLogic Collaborate Software Package
The WebLogic Collaborate installation procedure installs the following components:
The following sections describe how to install WebLogic Collaborate using either a graphical user interface (available on Solaris) or a command-line text mode (available on Solaris, HP-UX, and AIX).
Installing WebLogic Collaborate on Solaris Systems
You can install WebLogic Collaborate on Solaris systems using either a graphical installation program or a text-based installation program. To install WebLogic Collaborate using a text-based installation program, see Installing WebLogic Collaborate on UNIX Systems.
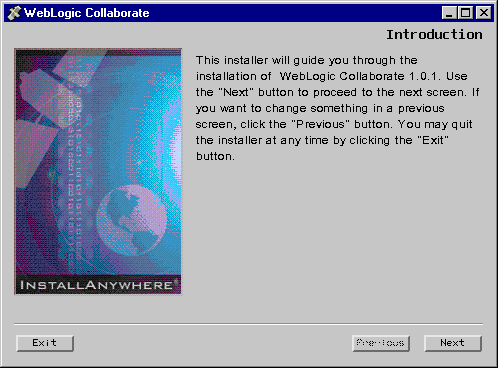
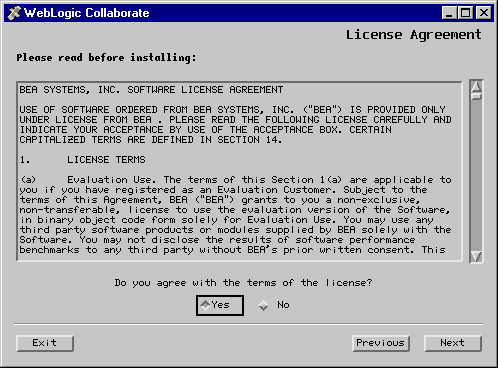
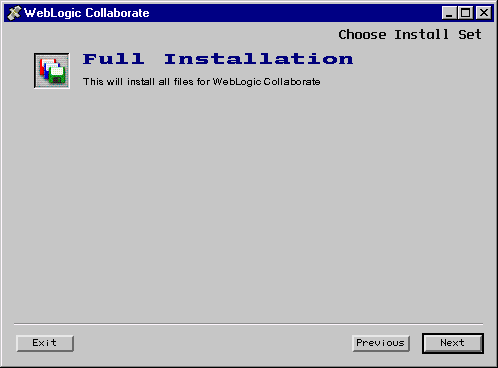
To install WebLogic Collaborate on a Solaris system using the graphical installation program, complete the following procedure:
Consult your UNIX documentation for information about mounting and unmounting CDs.
Note: The Solaris Volume Management software automatically mounts CDs on /cdrom/cdrom0/. It is not necessary to unmount CDs on Solaris systems. To open the CD reader, however, you need to issue an eject command from the root directory.
Warning: The installation fails if $JAVA_HOME/bin is not in your PATH. If necessary, update your PATH as follows:
export PATH=$JAVA_HOME/bin:$PATH
.
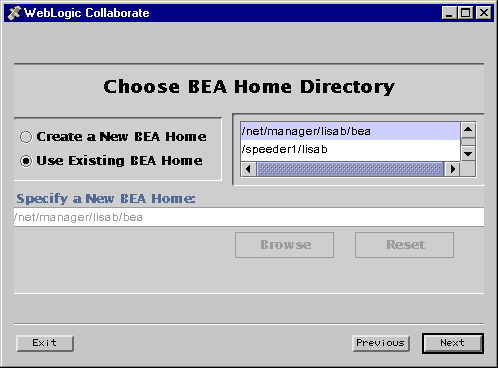
Warning: You must install WebLogic Collaborate in an existing BEA home directory. This home directory can reside anywhere on the system. It must contain the registry.xml file, which holds descriptions of all BEA products that are installed in the BEA home directory.
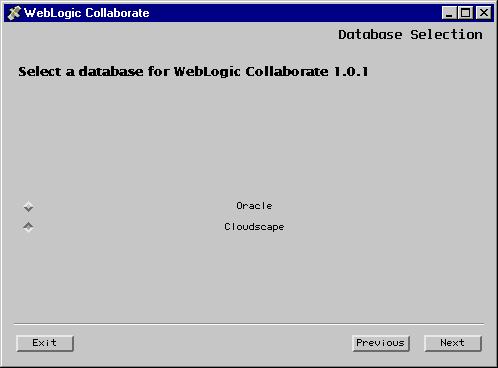
The next window displayed in the installation process depends on the database you selected.
Cloudscape is the default database. It is a pure-Java relational database management system that BEA ships with WebLogic Server and requires no database configuration to use.

The Confirm Database Selection window appears.

After you install all the WebLogic Collaborate components, the Install Complete window is displayed, indicating that the installation procedure is finished.

An evaluation license is included in the evaluation software and is installed automatically. If your installation is an upgrade to a previous version of WebLogic Collaborate, you will receive a new license file from BEA.
To modify your existing license after you install WebLogic Collaborate:
prompt> ksh
prompt> .<WLC_HOME>/setenv.sh
prompt> UpdateLicense.sh new_license
Installing WebLogic Collaborate on UNIX Systems
You can use the console-mode to install WebLogic Collaborate on Solaris, HP-UX, and AIX operating systems. This is a text-based installation program that offers the same capabilities as the graphics-based installation program also available on Solaris.
To install WebLogic Collaborate in console mode, complete the following procedure:
For information about mounting and unmounting CDs, see your AIX, HP-UX, or Solaris documentation.
Note: The Solaris Volume Management software automatically mounts CDs on /cdrom/cdrom0/. It is not necessary to unmount CDs on Solaris systems. However, to open the CD reader, you must issue an eject command from the root directory.
prompt> sh install.bin -i console
A series of prompts is displayed.
Warning: The installation fails if $JAVA_HOME/bin is not defined in your PATH. If necessary, update your PATH as follows:
prompt> PATH=$JAVA_HOME/bin:$PATH
An evaluation license is included in the evaluation software. If you purchased the software on a CD or from the BEA Web site, your permanent license is sent to you by email.
To modify your existing license after you install WebLogic Collaborate:
prompt> ksh
prompt> .<WLC_HOME>/setenv.sh
prompt> cd <BEA_HOME>
prompt> UpdateLicense.sh new_license
Customizing the Run-Time Environment
The installation procedure configures some components of your WebLogic Collaborate system. You should confirm the system configuration before you run the Installation Verifier example (see Verifying the Software Installation). The following sections describe the configuration elements you should set or confirm:
Environment Variables
To set the environment variables in the setenv.sh and createDB.sh files, complete the following procedure:
If necessary, replace the environment variables at the beginning of the file (<ORACLE_USER>, <ORACLE_PASSWORD>, and <ORACLE_SERVICENAME>) with the appropriate values for your system. ORACLE_SERVICENAME is defined in the Oracle client tnsnames.ora file; its value is usually the Oracle system ID.
Repository Data Files
XML files are used to configure the repository and load it with the data for the example verifier application. If you are using an Oracle database, confirm that the BulkloadOracleConfig.xml file is configured as follows:
Configuration File Settings
Confirm that the run-time environment is correctly configured, as described in this section. To configure the run-time environment, use the WebLogic Server Administration Console.
        <!-- Oracle settings -->
     <JDBCConnectionPool
       CapacityIncrement="1"
       DriverName="oracle.jdbc.driver.OracleDriver"
       InitialCapacity="1"
       LoginDelaySeconds="1"
       MaxCapacity="10"
       Name="wlcPool"
       Properties="user=<ORACLE_USER>;password=<ORACLE_PASSWORD>"
       RefreshMinutes="0"
       ShrinkPeriodMinutes="15"
       ShrinkingEnabled="true"
       Targets="myserver"
              URL="jdbc:oracle:thin:@<ORACLE_HOSTNAME>:1521:<ORACLE_SERVICENAME>"
        />
For more information about configuring JDBC pools, see "Managing JDBC Connectivity" in the BEA WebLogic Server Administration Guide at http://download.oracle.com/docs/cd/E13222_01/wls/docs60/adminguide/jdbc.html.
Verifying the Software Installation
An installation verification example is provided to ensure that the installation of WebLogic Collaborate is successful. This section explains what the installation verification example does and how you run it.
How the Installation Verification Example Works
Run this example immediately after the installation procedure to verify that WebLogic Collaborate was installed successfully on your system. The verification example starts a c-hub and two c-enablers colocated on a single WebLogic Server instance. Then it allows you to access, from your browser, a servlet that sends messages from one c-enabler to another c-enabler.
When your run the verification example, the following actions are performed:
Running the Installation Verification Example
After you complete the installation (as described in Installing the BEA WebLogic Collaborate Software Package) and customize your environment (as described in Customizing the Run-Time Environment), verify that the installation is successful by completing the following procedure:
prompt> cd $WLC_HOME/hub/config/mydomain
prompt> . ./setenv.sh
For more information, see Customizing the Run-Time Environment.
prompt> createDB.sh [oracle|cloudscape]
Specify the database name that corresponds to your database.
prompt> cd examples/verifier
prompt> bulkloader.sh \
../[BulkloadOracleConfig.xml|BulkloadCloudscapeConfig.xml]
Be sure to specify the XML filename that corresponds to your database.
prompt> build.sh
prompt> cd $WLC_HOME/hub/config/mydomain
prompt> ./startWeblogic.sh
http://localhost:7001/Verifier.html
Here localhost represents the name of the machine on which you are running WebLogic Server.
The verification example starts. During verification, the Partner1 c-enabler sends a message to the Partner2 c-enabler. The message sent by Partner1 is the string ABCDEFGHI, and the message returned by Partner2 is abcdefghi.
If the verification sample executes successfully, a report containing a verification SUCCESS message is displayed in the browser. The report identifies the process flow and the status of the verifier application.
The following is an extract from a typical report:
WLC Verifier
Partner 2 enabler started
Waiting for request...
Partner 1 process flow.
Starting enabler... done.
Creating conversation... done.
Sending message: conversation id=verifierConv ...
string=ABCDEFGHI
Status=success
Waiting for response... done.
Processing reply:
Received string=abcdefghi
Verification SUCCESS
Termination conversation:verifierConversation:1.0requ...
success
Troubleshooting Your Installation
The following information can help you troubleshoot your WebLogic Collaborate software installation.
Starting the Installer
If the graphical installer fails to start, the reason may be that the necessary operating system patches for the JDK are not installed. For example, the graphical installer will not work if the Solaris OpenWindows Motif patches are not installed. For a list of OS patches required for this release of WebLogic Collaborate, see the BEA WebLogic Collaborate Release Notes. For more details about Solaris patches for the JDK, see Solaris Patches at the following location:
http://www.java.sun.com/products/jdk/1.3/install-solaris-patches.html
Starting the C-Hub
If the c-hub fails to start, the license may not be installed. Check for error messages in the window in which WebLogic Server was started.
Running the Verification Example
If you have problems running the installation verification example:
Accessing Verifier.html
If your Web browser is unable to connect to the Verifier web page, the reason may be that your browser is using a proxy server and is preventing you from connecting to your local WebLogic server.
To bypass the proxy server, change your browser's proxy settings so the browser does not use the proxy server to access the servlet. For example, in Netscape:
localhost:listening_port
In the preceding line, listening_port is the listening port number specified in the config.xml file. The default listening port number is 7001.
Also check for error messages in the terminal window in which WebLogic Server was started.
Uninstalling the BEA WebLogic Collaborate Software Package
You can remove the WebLogic Collaborate software from your system by deleting the directory in which you installed it.
Alternatively, you can invoke the Uninstall script as follows:
prompt> $WLC_HOME/uninstaller/uninstall
A window prompts you to confirm the removal of the software. Click Uninstall to continue, and WebLogic Collaborate is then uninstalled from your system.

|

|
|
|
|
Copyright © 2001 BEA Systems, Inc. All rights reserved.
|