

|
|
|
|
|
|
Executing the Workflow Example
The execution starting point for the workflow example is the Start Order Processing workflow. You start this workflow manually through the WebLogic Process Integrator Worklist application.
The following sections describe how to execute the workflow example:
Logging On to the Worklist Application
To start the worklist application:
Figure 5-1 Logon to WebLogic Process Integrator Dialog Box

Executing the Sample Workflows
To execute the sample workflows:
Figure 5-2 Start Workflow Dialog Box
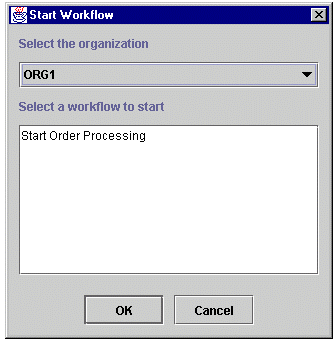
Figure 5-3 Workflow Successfully Started

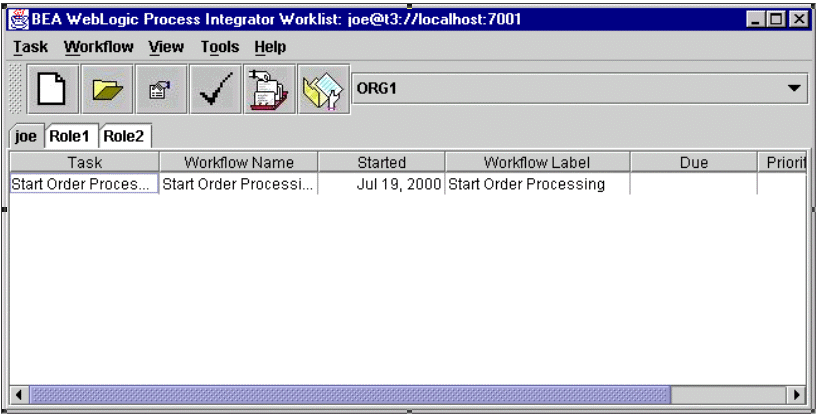
The first and only task of the Start Order Processing workflow is assigned to the user joe and is displayed on the worklist.
Figure 5-4 Worklist Application: Task List
The first task of the Order Processing workflow is Confirm Order, which is assigned to the user joe. This task is displayed on Joe's worklist, once the workflow is triggered.
Figure 5-5 Worklist Application: Triggered Workflow
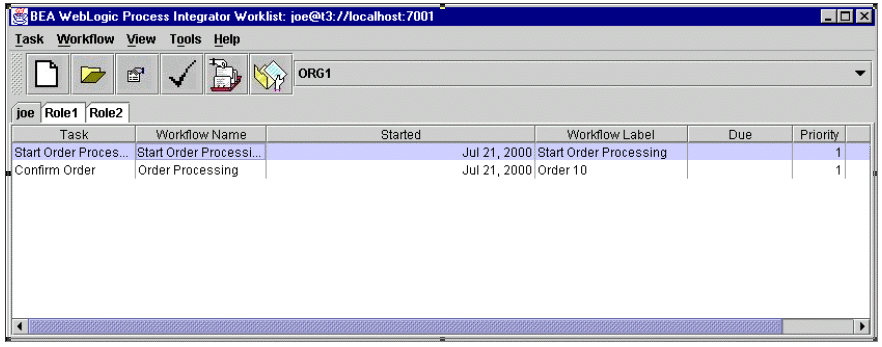
Figure 5-6 Workflow Status Dialog Box
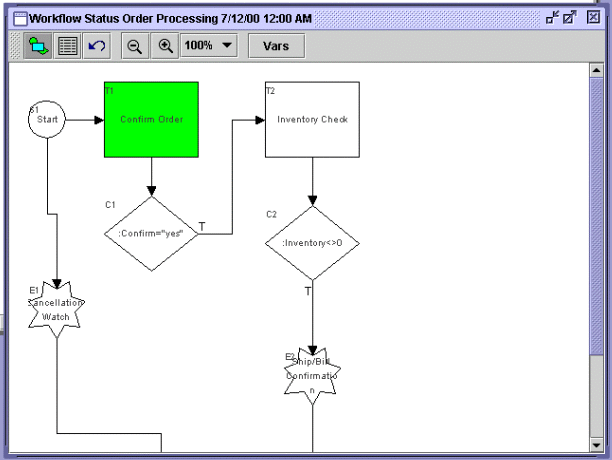
The diagram shows the instance that has been started.
The Confirm Order task will be highlighted, showing that it is active and not yet executed.
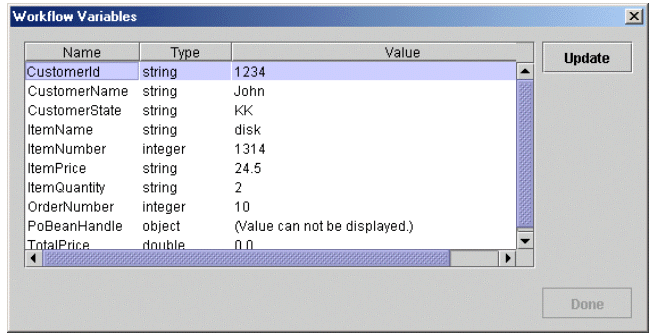
Note that all variables defined in the Start node are populated by the values coming from the XML document. The variable Confirm is still empty because the user has not confirmed the order yet.
Figure 5-7 Workflow Variables Dialog Box

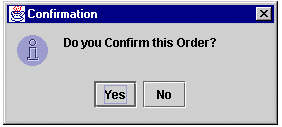
This executes the Send XML to Client action defined under the Executed tab of the Confirm Order Task Properties dialog box. The action displays the Confirmation message box to the user joe.
Figure 5-8 Confirmation Message
The dialog box shows that both Confirm and Inventory now have values.
Figure 5-9 Workflow Variables Dialog Box

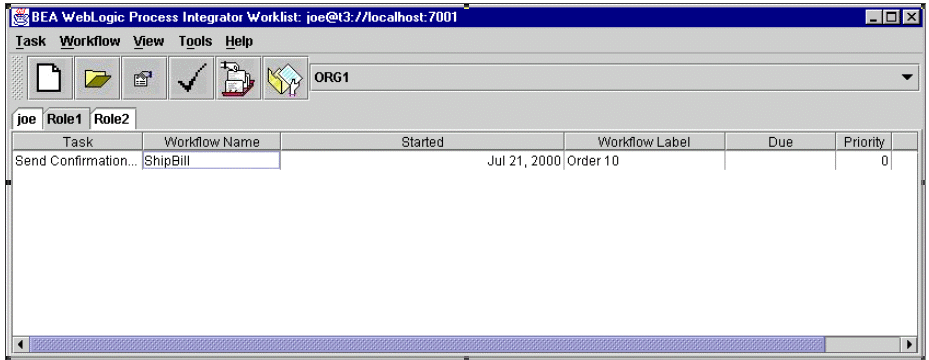
Because the value of the variable Inventory is not zero, the ShipBill workflow is called as the result of the execution of the Start Workflow action in the true case of the decision. This workflow assigns the Shipping and Billing tasks to the user joe. Therefore, joe's task list is updated with these tasks as follows:
Figure 5-10 Worklist Application: Joe's Task List

Figure 5-11 Workflow Status: ShipBill Workflow
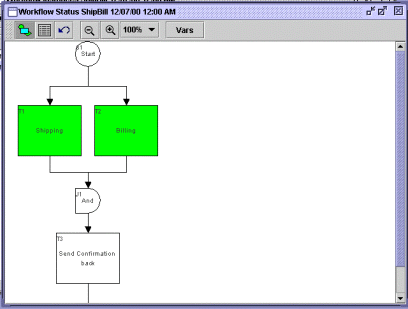
Note that the Shipping and Billing tasks are highlighted in green, because they are still active and have not been executed and marked done.
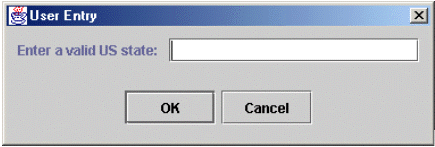
Note that the CustomerState variable contains an invalid value: KK.
Figure 5-12 Invalid Workflow Variable Value
When WebLogic Process Integrator invokes the exception handler, the Send XML to Client action is executed and you are prompted to enter a valid United States state abbreviation.
Figure 5-13 User Entry Dialog Box
The Billing task is now executed and marked as done. All variables that have been transferred from the parent Order Processing workflow are populated. The variable TotalPrice is calculated as the result of the call of the Billing POBean. The ShipBill workflow proceeds, and the next task, Send Confirmation Back, is activated.
Figure 5-14 Worklist Application: Role1 Assignment
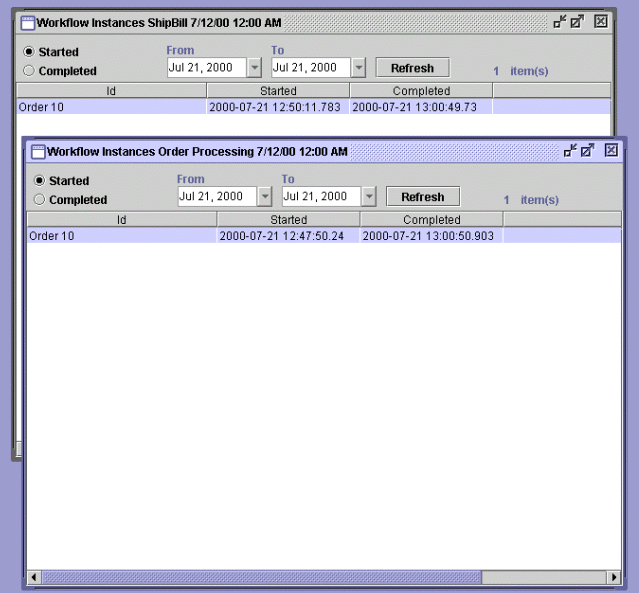
The Order Processing and ShipBill workflow instances are marked as complete as reflected in the monitoring dialog boxes. The completed date and time are displayed.
Figure 5-15 Workflow Instances Dialog Boxes: Completed Date and Time
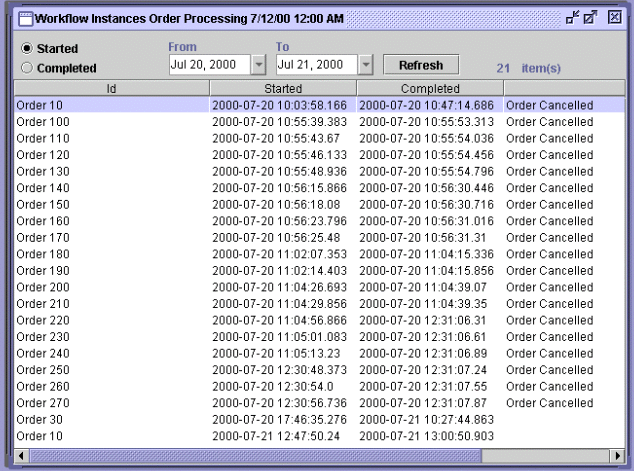
The preceding procedure is one scenario for this process. Another scenario that can be tested is to answer No to the confirmation and cause the order to cancel. In this case, the monitoring dialog box shows the instance of the Order Processing workflow with the comment Workflow Cancelled as defined in the Set Workflow Comment action.
Figure 5-16 Workflow Instances Dialog Box

|

|
|
|
|
Copyright © 2001 BEA Systems, Inc. All rights reserved.
|