|
|
In the Design view, the Variables tab displays the variables associated with the Java class that constitutes your business process. All business process variables are global to the business process instance.
This section describes business process variables and their data types. It includes the following topics:
There are two ways of creating variables for your business process. Variables can be created in the Data Palette by clicking Menu tab on the Data Palette menu and scroll down the list, select Add a Variable... or they can be created in the node builder when you are configuring the Send Data or Receive Data section of a Client Request, Client Request with Return (Start Node only), Client Response, Subscription (Start Node only), Control Send, Control Send with Return, or Control Receive node for your business process nodes. Whichever method you choose, you can always access your variables from the Data Palette after they are created. When you select a variable in the list on the Data Palette, its properties are displayed in the JPD Configuration view.
Before you can create an XML variable of a particular XML Schema type, you must first import the XSD file that contains the XML Schema into the WebLogic Integration schemas project
Before you can create a non-XML variable of a particular non-XML type, you must first import the MFL file that contains the schema for the non-XML type into the WebLogic Integration schemas project.
Before you can create a variable of a Java class, the Java class file must be available in the Workshop project.
You can create variables using the Add a Variable... option on the Menu tab. To learn how to create variables in the node builder, see To Create a New Variable in the Node Builder.
The Data Palette, which contains a Menu drop-down button, is displayed in the BEA WorkSpace Studio.
A description of the possible variable types options are as follows:
Lists Java primitive and classes data types.
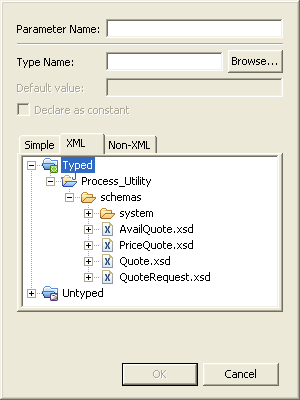
Lists the XML Schemas that are available in your business process project and the untyped XMLObject and XMLObjectList data types.
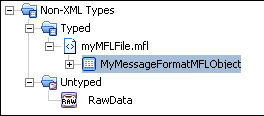
Lists the Message Format Language (MFL) files available in your business process project and the untyped RawData data type. WebLogic Integration uses a metadata language called Message Format Language (MFL), based on XML, to describe the structure of non-XML data. Every MFL file available in your project is listed in Non-XML Types. Note that an XML Schema representation of each MFL file is built by BEA WorkSpace Studio and is also available in the XML Types listing.
For more detailed descriptions of the data types, see Working with Data Types .
Book in the package named library, enter: library.Book. (For Java simple types, see step 7.)The Type Name field is populated with the variable type you selected.
The Variables tab in the Data Palette is populated with the variable you created; the name and type of the variable is displayed. When you select a variable in the list, the variable properties are displayed in the Properties view.
You can create variables directly in the node builder while you are configuring a node’s Receive or Send Data tab.
| Note: | The other fields in the dialog box are already populated with the variable types expected by the method you specified on the General Settings tab. |
Lists Java primitive and classes data types
Lists the XML Schemas that are available in your business process project and the untyped XMLObject and XMLObjectList data types.
Lists the Message Format Language (MFL) files available in your business process project and the untyped RawData data type. WebLogic Integration uses a metadata language called Message Format Language (MFL), based on XML, to describe the structure of non-XML data. Every MFL file available in your project is listed in Non-XML Types. Note that an XML Schema representation of each MFL file is built by BEA WorkSpace Studio and is also available in the XML Types listing.
For more detailed descriptions of the data types, see Working with Data Types.
The Type Name field is populated with the variable type you selected.
Book in the package named library, enter: library.Book. (For Java simple types, see step 6.)The Variable type field is populated with the variable type you selected.
The new variable you created is displayed in the Select variables to assign: drop-down menu in the node builder and is added to the Variables tab in the Data Palette; the name and type of the variable is displayed. When you select a variable in the list, the variable properties are displayed in the Properties pane.
The node builders support assigning typed data to untyped process variables, and untyped data to typed process variables in the following ways:
Assigning MFL Data to XML Variables and XML Data to MFL Variables
On the Data Palette, in the Variables tab, right-click the name of a variable and choose Delete from the drop-down menu. The variable is deleted from the Variables tab and from the source code for your application. To learn about variables in your source code, see Variables in Business Process Source Code.
The data types supported for your business process applications include:
XML Schemas are an XML vocabulary that describe the rules that your business data must follow. XML Schemas specify the structure of documents, and the data type of each element and attribute contained in the document. XML Schema files have an XSD file suffix. You can create new schemas or import schemas into your schemas folder.
| Note: | To make the Schemas in your project available in your business process, you must place them in the schemas folder. To learn about the Application and project folders in the Design view, see Components of Your Application and Designing Your Application. |
When you add XML Schemas to the Schemas folder in your business process project, they are compiled to generate XML Beans. In this way, BEA WorkSpace Studio generates a set of interfaces that represent aspects of your Schema. XML Bean types correspond to types in the XML Schema itself. XML Beans provides Java counterparts for all built-in Schema types, and generates Java counterparts for any derived types in your Schema. In addition when creating a variable or an xquery transformation method, xsd simple types would be mapped to java type names.
When you load an XML file that conforms to a particular XML Schema into an XML Bean generated from the Schema, you can access the XML as instances of the XML Bean types.
The XML untyped data includes:
XMLObject—This XML data type specifies untyped XML format data. In other words, this data type represents XML data that is not valid against an XML Schema.
XMLObjectList—This XML data type specifies a sequence of untyped XML format data. In other words, this data type represents a set of repeating elements of XML elements that are not valid against an XML Schema.
When you assign an XMLObject variable or typed XML variable to an XMLObjectList, the XML document is added to the list (instead of directly assigning the variable).
When you create XML Schema definitions, which contain declarations for attributes, we recommend that you make these declarations inside, or local to, the element declarations. If you declare attributes at the top level of the XML Schema document (that is, immediately under the xsd:schema root), they must be qualified by a target namespace, if one exists. Consequently, for an XML instance document to be valid against such a Schema, the attributes within the XML document must be qualified with a namespace prefix associated with the target namespace. If you do not specify this prefix in an XML instance document, transformations or validations against the Schema fails.
| Note: | When creating a schema file supporting two imports with the same namespace, the XQuery Mapper ignores the second import. |
WebLogic Integration uses a metadata language called Message Format Language (MFL), based on XML, to describe the structure of (typed) non-XML data. The Format Builder tool creates and maintains metadata as a data file, called an MFL document.
| Note: | When you create MFL files for use in your business process project, to make them available in your application, you must add the files to your schema folder. To learn about the Application and project folders in the Design View, see Components of Your Application. |
Every MFL file available in your project is listed in Non-XML Types in the Create Variable dialog box. However, an XML Schema representation of each MFL file is built by WebLogic Workshop. This XML Schema representation of your MFL data is available in the
XML Types listing. In other words, you can work with every MFL file in your project in its non-XML data representation (in non-XML MFL format) and in its XML Schema representation (XML typed data). For example if you add an MFL file named mydata.mfl to your business process project, mydata.mfl.xsd is listed in Non XML Types, and the corresponding XML Schema representation, mydata.mfl, is listed in
XML Types. Although you are provided with a typed XML version of your typed non-XML format, both types are not automatically populated. That is, if you receive data in a typed non-XML format and then assign it to a typed non-XML variable and you create a variable for the corresponding typed XML version, it will not automatically contain the data that is in the typed non-XML variable. You must use a transformation map to accomplish this.
| Note: | Non-XML variables are equivalent to Binary variables in prior versions of WebLogic Integration. |
The non-XML type data also includes the RawData type that specifies non-XML data for which no MFL file exists and therefore no known schema.
Although both XMLObject and RawData are both untyped data types in WebLogic Integration, the XMLObject data type is still XML and therefore has a structure that can be parsed. RawData is just a stream of data that has no known structure. Therefore, you cannot do things like use a RawData parameter in a XQuery expression or in a transformation method.
RawData type supports the following file type:
Contains the following Java data types:
Primitive Data Types—boolean, byte,char, double, float, int, long, and short.
Classes—Variables can be created from the Java classes in the current project. However, the Java classes available in the project are not listed in the Select variable to assign pane in the node builders. You must explicitly specify the Java class in the Type Name field as described in the following sections: To Create a New Variable in the Data Palette and To Create a New Variable in the Node Builder.
Java class variables can be used in business processes without any conversion. When you use Java classes in data transformations, WebLogic Integration converts the Java class into an internal XML Schema representation of the Java class file. The fields of Java class that cannot be converted to an XML Schema type are ignored.
Variables in Business Process Source Code
As described in Non-XML Types, an XML Schema representation of each MFL file in your application is built by BEA WorkSpace Studio. You can work with every MFL file in your project in its non-XML data representation (in non-XML MFL format) and in its XML Schema representation (XML typed data).
The variable assignment panes in the WebLogic Integration node builders treat MFL and their corresponding XML variables interchangeably, such that you can assign MFL data directly to the corresponding variables of type XML and XML data directly to the corresponding variables of type MFL; no data transformation is required.
In other words, the BEA WorkSpace Studio graphical design environment allows you to assign MFL data (that is passed into a business process from a client or a control) to strongly typed-XML variables directly, and to assign typed-XML data (sent from a business process to a client or a control) directly to MFL variables.
The node builders for the following nodes support the direct assignment of MFL data to XML variables and XML data to MFL variables: Client Request, Client Response, Control Send, Control Return, Control Send with Return. The example described in the following section describes a Client Request and a Client Response node; the steps are similar for any node.
Consider the following example:
Your business process is started by a request from a client. The request contains a purchase order document in MFL format, which is represented by an MFL file in a Schemas folder in your application.
To process the purchase order, your business process must first assign the MFL data to an XML variable (at a Client Request node). This XML variable is used in the processing of the purchase order at subsequent nodes. When the processing is complete, the business process sends a response document (from a Client Response node) to the client. The processed data (a price quote) is in XML format in your business process; because the client expects MFL data, a Client Response node assigns the XML data to a variable of type MFL before sending the response.
The business process in this scenario includes a Client Request node, a Client Response node, and the nodes between them (not described in this example) at which the processing logic is designed, as shown in Figure 19-2.

The following steps describe how to design the Client Request and Client Response nodes to do the MFL-to-XML and XML-to-MFL assignments required for the scenario described in this example.
| Note: | Every MFL file type in your project is listed in the Non-XML Types pane and every XML file type in your project is listed in the XML Types pane. In addition, because an XML Schema representation of each MFL file is built by WebLogic Workshop, an XML Schema representation of your MFL data is also available in the XML Types list. |
The Receive Data tab allows you to define the variable to hold the data your business process receives from clients.
The Client Sends field is populated with the parameter (or parameters) you specified on the General Settings tab. In this example, the data is of type MyMessageFormatMflObject:
To create a new variable, from the Select variables to assign drop-list, select Create new variable...
The Create Variable dialog box is displayed with the fields already populated with the variable types expected by the method you specified on the General Settings tab.
Save.The preceding steps described how to design a Client Request node to do a direct assignment of MFL data to an XML variable using the graphical design environment; no data transformation is required.
For this example scenario, assume that some processing is done by the business process to process the purchase order request. As a result of the processing, the business process creates a typed-XML price quote document. The client expects a quote in MFL format (the quote message must be valid against an MFL schema named POquote.mfl). Therefore, the business process stores the price quote data in an XML variable that is valid against the XML schema associated with this MFL file (in this case named POquote.mfl.xsd)
Before sending the response to the client, the typed-XML price quote must be assigned to a typed non-XML (MFL) variable at the Client Response node. The following steps describe how to design the Client Response node for this XML-to-MFL scenario:
The preceding steps described how to design a Client Response node to do a direct assignment of XML data to its corresponding MFL variable using the graphical design environment; no data transformation is required.


|