|
|
This tutorial helps you learn how to use the WebLogic Portal Administration Console for some basic portal organization tasks.
For more detailed information about each dialog of the wizards used in this chapter, refer to the Portal Development Guide.
The tasks described in this chapter are based on those described in Setting Up Your Portal Development Environment and Creating a Portal in Your Development Environment, so it is important that you complete those tutorials before starting the tasks described here.
The WebLogic Portal Administration Console is the tool that portal administrators use to not only control the behavior, content, and appearance of portals, but to perform many traditional system administration activities such as user management and security management as well. This tutorial focuses on basic tasks that assemble portals into desktops.
The WebLogic Portal Administration Console is organized according to the following categories of tasks:
This tutorial describes some of the basic Portal Management tasks. The Portal Development Guide and Portlet Development Guide provide details about Portal Management tasks.
The User Management Guide and Security Guide provides detailed information about the tasks in this category.
The Security Guide, Portal Development Guide, Federated Portals Guide, Interaction Management Guide, and User Management Guide provide detailed information about the tasks in this category.
The Interaction Management Guide provides detailed information about the tasks in this category.
The Content Management Guide provides detailed information about the tasks in this category.
Using the tutorial, you will create a portal desktop based on the portal and portlets created previously, make some modifications to your desktop, and then view your results.
The tutorial includes instructions on how to perform these tasks:
Before you can begin using the WebLogic Portal Administration Console, the server must be running. Depending on the state of your Workshop for WebLogic workbench, you might need to start the server before opening the Administration Console.
If you are continuing from Creating a Portal in Your Development Environment, and you have not closed/opened Workshop for WebLogic, you can skip to Step 4.
If you closed Workshop for WebLogic after finishing the tutorial in Creating a Portal in Your Development Environment, follow these steps:
 in the Servers view toolbar.
Wait while Workshop for WebLogic starts the server. This process might take some time, depending on the speed of your system.When the process completes, the Status column in the Servers view displays Started and the square Stop the Server button  becomes active.
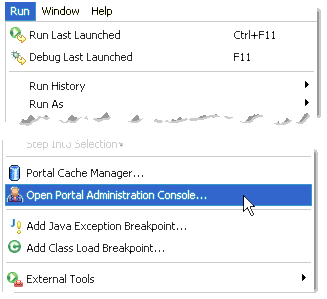
myPortal.portal in the Package Explorer view to select it. The Administration Console opens in a new tab in the workbench editor view, with the login dialog displayed, as Figure 4-2 shows.
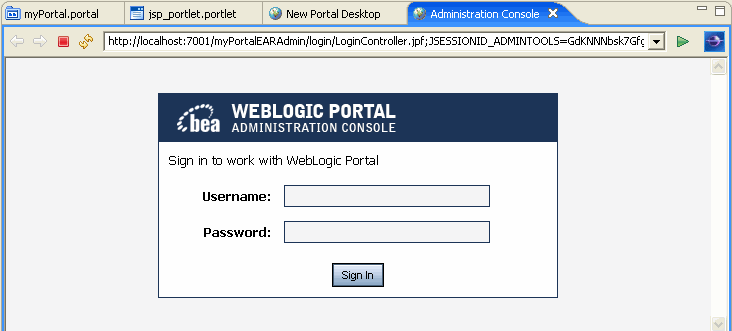
The Administration Console login dialog requires a WebLogic Server system administrator or a WebLogic Portal administrator user name and password. WebLogic Server system administrators have full security privileges for the entire domain and can log in to and use the WebLogic Server Administration Console tools. WebLogic Portal administrators have full security privileges for a Portal Web Project, which can include multiple portals.
Table 4-1 shows the default system administrator user names and passwords:
For purposes of this tutorial, you will use the default WebLogic Server login so that you have full privileges.
To log in to the WebLogic Portal Administration Console, follow these steps:
weblogic and password weblogic into the dialog and click Sign In.The main menu of the Administration Console displays.
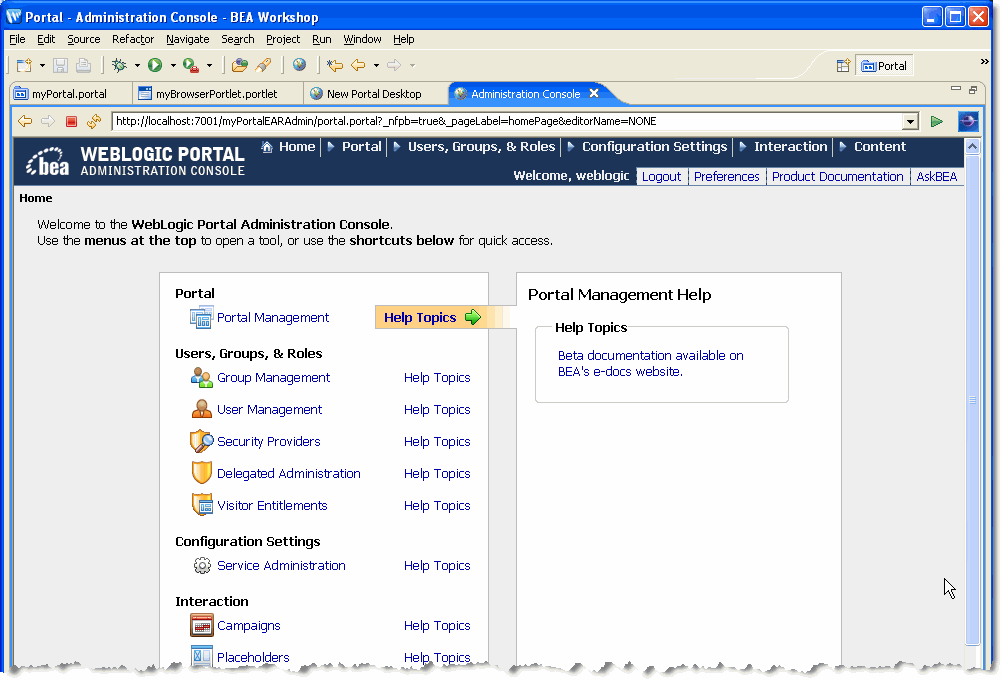
 in the editor view toolbar. Your display should look like the example in Figure 4-3.
 | Note: | If you set up your Workshop for WebLogic preferences to open external browsers instead of the internal browser, you do not need to perform this step. |
To create a desktop, you first create a portal to contain it.
To create a portal and desktop, follow these steps:
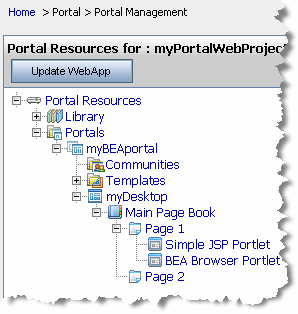
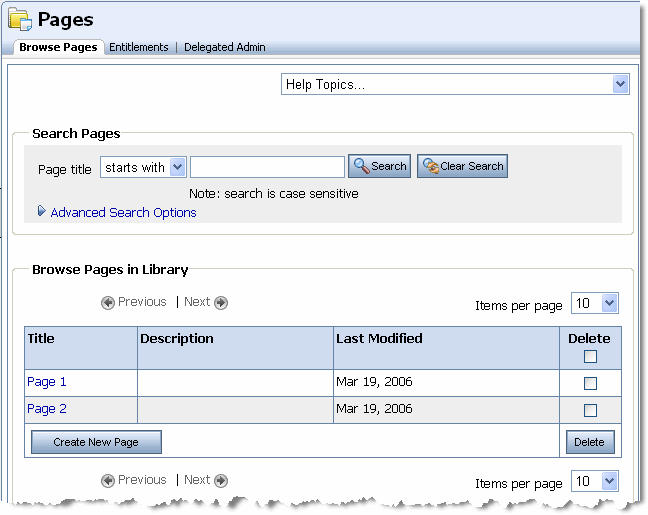
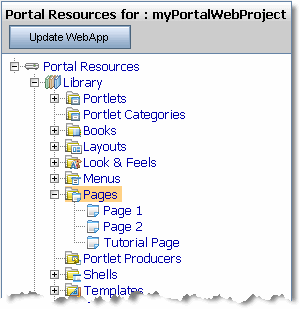
The Portal Management page displays; the Portal Resources tree displays in the left pane of the page, as shown in Figure 4-4.
Notice that the display is based on the Portal Web Project that you created in Creating a Portal in Your Development Environment. if you expand the Library > Portlets portion of the tree, you can see the portlets that you created earlier.
The Portals page displays, with the Browse Portals tab active. Because no portals exist yet, the table containing portals is empty.
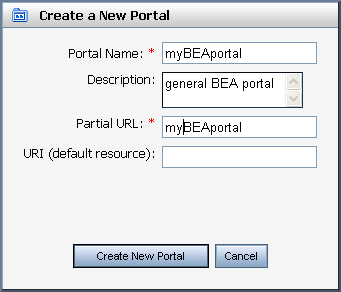
The Create a New Portal dialog displays, as shown in Figure 4-5.
When the Portals page displays again, the Browse Portals table includes the portal you created, and the Portal Resources tree includes the new portal.
The Portals page displays, with the Browse Desktops tab active. Because no desktops exist yet, the table containing desktops is empty.
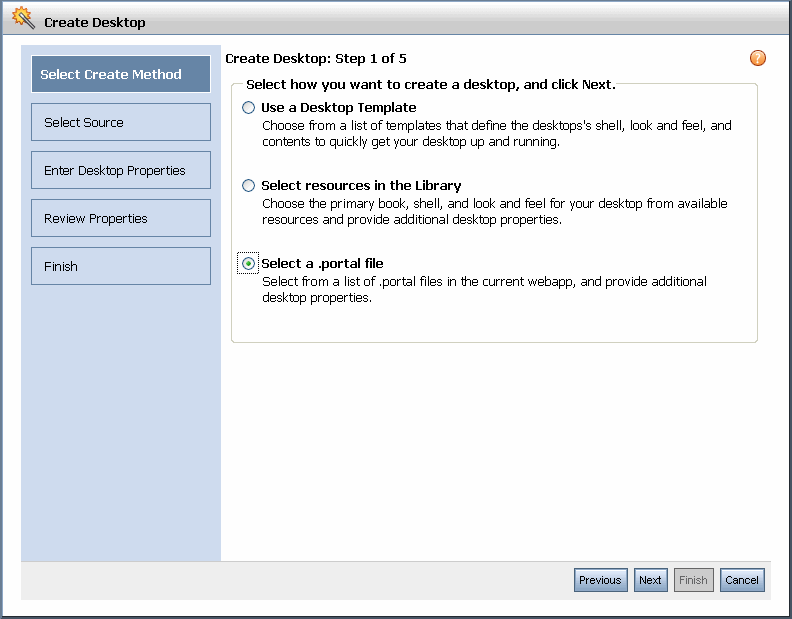
The Create Desktop wizard displays, as shown in Figure 4-6.
A confirmation dialog confirms that the desktop has been created and displays related information.
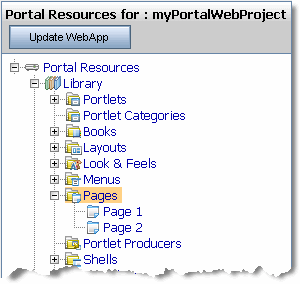
The Browse Desktops table includes the desktop you created, and the Portal Resources tree includes the new desktop, as shown in Figure 4-7, which shows the expanded tree.
Notice that the portlets that you created for this portal (which was used as the template for this desktop) appear automatically in the new desktop.
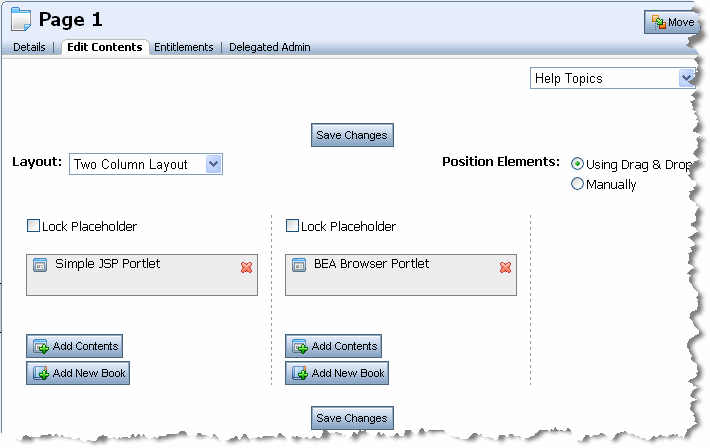
In this task you view the portlets for a desktop page—the portlets that you created using Workshop for WebLogic—and rearrange them on the page. Then you will view your work.
To update your desktop page, follow these steps:
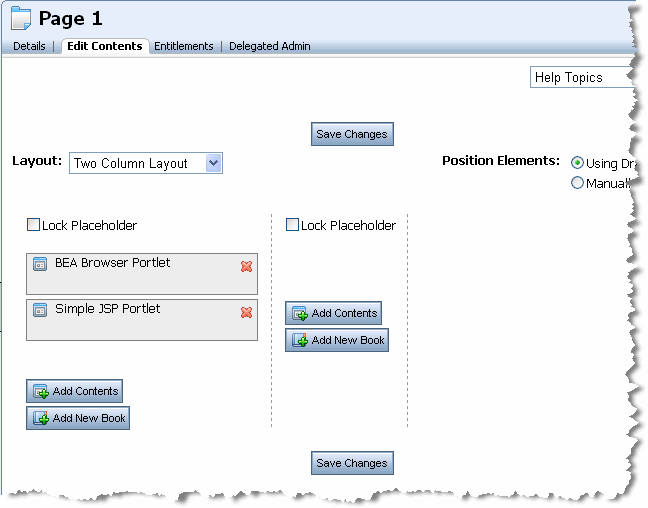
The Page 1 details display in the right pane of the Administration Console.
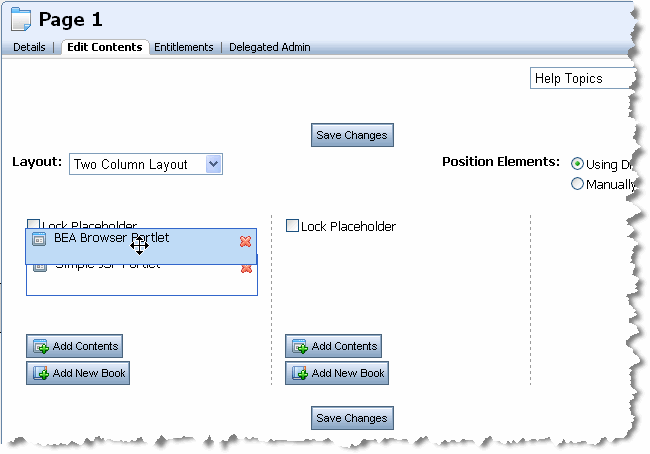
When you release the portlet, it displays above the Simple JSP Portlet, as shown in Figure 4-11.
The desktop displays in a browser, with the portlets in their new positions, as shown in Figure 4-12.
In this task, you will create a new page for your desktop. Follow these steps:
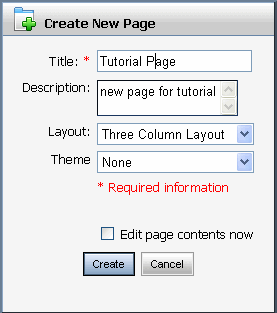
The Create New Page dialog displays, as shown in Figure 4-15.
The new page is added, and is displayed in the Details page for the desktop; the Portal Resources tree updates to include the new page, as shown in Figure 4-16.
With the completion of this tutorial, you have created a basic desktop and performed some additional tasks to become familiar with the staging environment and the WebLogic Portal Administration Console.
To get started with actual portal development and desktop staging, refer to WebLogic Portal document library on e-docs.


|