


|
|
WorkSpace Studio is an Eclipse-based tool used for portal development. WorkSpace Studio uses workspaces to organize your projects and keep track of your preferences.
This chapter includes the following topics:
A workspace is a directory that contains all your configuration and state information, such as your WorkSpace Studio color preferences, recently opened files, caches, and so on. By default your portal projects go in your workspace.
| Tip: | As a best practice, keep your projects outside of the workspace. This organization allows better sharing among team members, more flexibility for linking projects when working with multiple enterprise applications, and easier reassembly if the enterprise application is restructured. |
Rather than using the default project location, which is within the workspace directories, your projects should be in their own directories—where they can be managed by source control.
You will need to create separate directories for these projects:
Listing 2-1 shows an example structure for all the modules. Although, you don’t need to create every directory at this point, it may be easier to create them now rather than later (from WorkSpace Studio).
HOME/workspaces/projectX/            # workspace directory for Project X

HOME/projects/projectX/              # directory for the Project X projects
                 projectXapp/        # your EAR project
                 projectX/           # your WAR project
                 projectXdatasync/   # a Datasync project
                 projectXejb/        # an EJB project
                 projectXutility/    # a J2EE utility project

HOME/domains/projectX/               # domain directory for Project X
After deciding on the structure or setting up your project directories, create a workspace in WorkSpace Studio. WorkSpace Studio is built on the Eclipse IDE framework. As a result, many of the standard features of WorkSpace Studio are described in the Eclipse documentation, available at http://eclipse.org and WorkSpace Studio online help.
Microsoft Windows: From the Start menu, click All Programs > BEA > WorkSpace Studio.
Linux: Enter <BEA_HOME>/workSpaceStudio_1.1/workSpaceStudio/workSpaceStudio
When WorkSpace Studio launches, it asks you for your workspace. Select the workspace folder you created in Setting Up Your Workspace and Project Directories or create a clean folder.
| Tip: | As a best practice, create your workspace outside of the installed BEA directory. This reduces problems if you reinstall or upgrade WebLogic Portal later. |
When WorkSpace Studio opens, the initial window displays the Welcome screen. This screen displays useful links for various local and online resources. You can return to the welcome screen at any time with the Help > Welcome command. It may be helpful to explore the content before continuing.
To start writing code, click the button  in the upper-right corner of the welcome screen. Workshop is displayed.
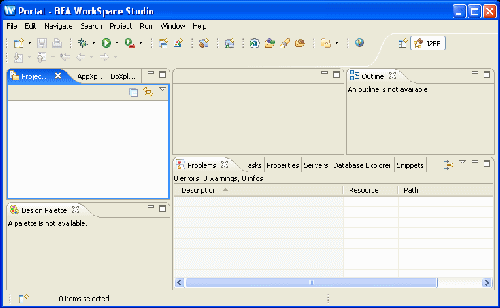
WorkSpace Studio is the basic development environment for Eclipsed-based applications. WorkSpace Studio contains a menu bars, tool bars, code editors, and information panes called views. Views let you browse properties, projects, and so on.
The window layout is called a perspective. A perspective is a preset arrangement of editors and views tailored for performing specific tasks with specific resources. For example, WorkSpace Studio provides perspectives for Java EE (formerly, J2EE) development, debugging, and portal development. Each perspective can be extensively customized or you can create your own.
The perspectives that you recently used are displayed in the upper-right corner of WorkSpace Studio, as shown in Figure 2-2. You can switch back and forth between them at any time without loosing any work; you are just changing the way you look at your work.

The following topics provide more detail for preparing and creating your workspace:


|