MobileAware Interaction Server Sample Moblity Portal Guide
|
|
|
MobileAware Interaction Server Sample Mobility Portal Guide
About This Manual
This document describes the main components, features and interaction of a mobile Portal application developed using the MobileAware Mobility Extension for BEA Platform 8.1. The mobile Portal extends the functionality of the WebLogic Portal platform to allow developers to seamlessly create mobile applications that run on handheld devices as well as PCs.
This document assumes that the reader has a familiarity with developing applications using BEA WebLogic Portal and has installed the mobile extension and configured the device emulators as described in the installation guide.
Terms Used
The term "menu-driven" used in this document refers to devices (usually web-enabled smart phones) that, because of screen size and bandwidth limitations, must use primarily menus of links that allow the user to navigate to different parts of the content.
The term "full browser" is used to describe conventional browsers usually Internet Explorer or Mozilla used on a PC.
The Mobile Interaction Server (MIS), which drives the device recognition and transformation of the application content, was previously known as Everix. This name remains on some parts of the Portal software and installer.
The Multi-Channel Portal
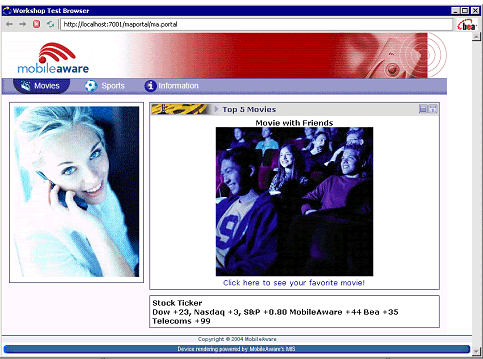
MobileAware extends WebLogic Portal to allow developers to seamlessly create mobile applications that run on handheld devices as well as PCs. MobileAware's mobility technology and mobility framework for WebLogic Portal 8.1 ensure an optimal user experience on devices such as smart phones, PDAs and so on.
Typical portals live in a two-dimensional PC-browser world with relatively large amounts of screen real-estate allowing for complex layouts and substantial content on-screen simultaneously. Content in this format is not generally suitable for direct delivery to handheld devices such as PDAs and smart phones. The Multi-Channel portal automatically restructures the content and provides new navigation mechanisms as necessary, tailoring it for the device making the request.
One of the most important principles of the Multi-Channel Portal is allowing portlet developers to develop portal content (i.e. portlets) without having to deal with the issues involved in delivery to, and navigation on, handheld devices. This is achieved by placing logic to handle these issues into a mobility framework.
There is little or no impact in developing a portal for multi-channel devices.
The Mobility Framework
The multi-channel portal leverages MobileAware's technology - the Mobile Interaction Server (MIS). The main core of this technology comprises:
- A Servlet Filter which processes JSP/HTML/XHTML content and transforms it to a format and markup language appropriate to the device which is requesting the content.
- Extensions to XHTML markup and matching JSP taglib tags to enable author control of this transformation.
- Automatic device recognition on incoming requests.
- An extensive database of device information and specifications.
- APIs to allow dynamic content (such as JSPs, portals...) to retrieve and act upon this information, based on the requesting device.
The mobility framework builds upon this core technology, adding the following components:
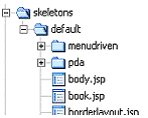
- Mobility skeletons - each portal skeleton is extended with "menudriven" and "pda" subdirectories. These "sub-skeletons" are activated when the portal receives a request from a menu-driven device (for example smart phone) or a PDA (for example Palm, PocketPC) respectively.
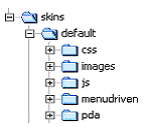
- Similarly, each skin in the portal has "menudriven" and "pda" sub-skins.
- A second Servlet Filter - the Portal Mobility Filter - uses the Mobile Interaction Server Delivery Context API to identify the class of device and through the "client classifications" mechanism, directs BEA Portal to the appropriate skeleton and skin.
- A Mobility Control allowing applications to access information about the current devices capabilities. Business logic decisions can be made with this information, The Mobility framework uses this control when creating content (layouts, skeletons & skins).
- Resources, such as images and CSS files, for mobile devices are stored in a directory with short path names to reduce URL size overhead when delivering to devices that impose content size limits.
Figure 2 The Mobility Skeleton
These components can be re-used in creating your own multi-channel portals or to mobilize an existing portal.
Portal Mobility Filter and Client Classifications
The Portal Mobility Filter is responsible for determining the class of device that is making the request.
As a request comes in, the Mobile Interaction Server automatically recognises the requesting device and makes available the corresponding information from the MobileAware Device Database.
Client Classifiactions is a Weblogic mechanism for determing a device based on the User Agent information sent by a device.
The Portal Mobility Filter simplifies the device recognition by placing a specific device into a general Device Class. The Mobility Framework has the default framework for Fullbrowsers, a "pda" framework and a "menudriven" framework.
The Portal Mobility Filter appends the general device class to the User-Agent header. This is based on a properties file called mis.headers.
This file uses MobileAware's expression language to determine the device class. The expressions it uses and the corresponding device classes are configured in the file: WEB-INF/classes/mis.headers:
Example: WEB-INF/mis.headers file
User-Agent:Everix-Identified-PDA:IsPDA
User-Agent:Everix-Identified-PC:IsFullBrowser
User-Agent:Everix-Identified-WAP1:DeliveringWML
User-Agent:Everix-Identified-WAP2:DeliveringXHTMLMP
The Portal Mobility Filter can be configured to set any HTTP header on the incoming request. WebLogic Portal's client classifications mechanism relies specifically on the User-Agent header so we use the above (default) configuration to modify this header. The strings "Everix-Identified-PDA", "Everix-Identified-PC", "Everix-Identified-WAP1" or "Everix-Identified-WAP2" as appropriate are appended to the incoming User-Agent header.
From this point WebLogic Portal's client classification mechanism takes over and these strings are matched against regular expressions in the WEB-INF/client-classifications file.
Example: WEB-INF/client-classifications file
<?xml version="1.0" encoding="UTF-8"?>
<client-classifications is-complete="true"
   xmlns:xsi="http://www.w3.org/2001/XMLSchema-instance"
xsi:schemaLocation="http://www.bea.com/servers/p13n/xsd/client/classifications/1.0.0 client-classifications-1_0_0.xsd"
xmlns="http://www.bea.com/servers/p13n/xsd/client/classifications/1.0.0">
<classifications>
<classification name="pda" description="Everix Identified PDA Device">
<useragent-regex value=".*Everix-Identified-PDA.*" priority="1"/>
</classification>
     <classification name="menudriven" description="Everix Identified WAP
      device">
<useragent-regex value=".*Everix-Identified-WAP.*" priority="2"/>
</classification>
</classifications>
</client-classifications>
This particular configuration results in a client classification of "menudriven", "pda" or no classification (for full PC-type browsers) as appropriate. These classifications are later used to identify which skin and skeleton should be used. They can also be used to restrict individual portlets to specific device classes.
MobileAware's continually updated Device Database and intelligent device-recognition technology ensure that as new devices become available, the portal will be able to deliver the appropriate content to these devices without requiring changes to the client-classifications.xml file or portal framework.
Mobility Skeletons
Each skeleton in the Multi-Channel Portal framework contains two mobility sub-skeletons. These sub-skeletons reside in the "menudriven" and "pda" subdirectories of the main skeleton's directory. When a request comes in to the Multi-Channel Portal, the requesting browser or device is categorized (see the section "Portal Mobility Filter and Client Classifications") and if appropriate, BEA WebLogic Portal uses one of the sub-skeletons.
WebLogic Portal allows a skeleton to specify a search path for jsps. This allows each skeleton to "override" only the specific jsps required to implement the mobility features, with the remainder being defined in the default skeleton. The search path is specified in the skeleton.properties file in the skeleton's directory. The following is the simplest example of a menudriven skeleton's search path:
jsp.search.path: .
The skeleton jsps required to structure portal content for menu-driven devices override their equivalents in the main skeleton. Any jsps that do not need to be overriden are simply omitted and WebLogic Portal uses the search path to find the default jsp.
If the main skeleton was a custom skeleton, it could already have a search path of its own including, for example, the default skeleton. In this case, the menudriven sub-skeleton's search path would also include the appropriate directories from the default skeleton, for example:
jsp.search.path: ., ../default/menudriven, .., ../default
The exact same principles hold for PDA skeletons.
The menudriven Skeleton
The menudriven skeleton, with the help of the MobileAware Interaction Server, is responsible for:
- Delivering the content one portlet at a time to the device. This ensures that only the appropriate amount of content is displayed on the smaller screen.
- Creating a hierchical menu structure from the books, pages and portlets in the portal and presenting these menus to the user.
- Adding headers and footers to individual books, pages and portlets. Each level of the menu hierarchy represents a single book, page or portlet. In each case, an individual header and footer can be used.
- Adding breadcrumb-like "back to" navigation links. Shortcut back links to the top-level menu and, in the case of portlet content, back to the page menus are automatically added to improve navigation.
- "Focusing" on a portlet. In a normal PC portal, following a pageflow link inside a portlet reloads the whole portal desktop in the browser. On a menu-driven device this would result in the entire menu structure being delivered again and the user would have to navigate back to the correct portlet. The menudriven skeleton recognises this situation and automatically navigates directly to the portlet in question.
- Optionally expanding a portlet so that instead of the portlet being displayed as a link on a menu, it is displayed in full. Sometimes a portlet may have important or a small amount of content, so for these or other reasons, it may be desirable to reduce the number of "clicks" required to view the portlet, which is achieved through this mechanism.
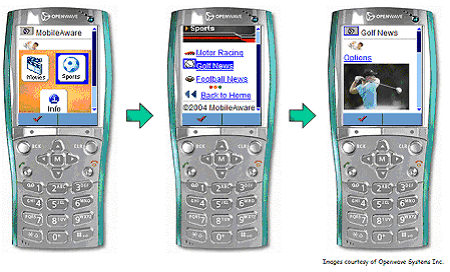
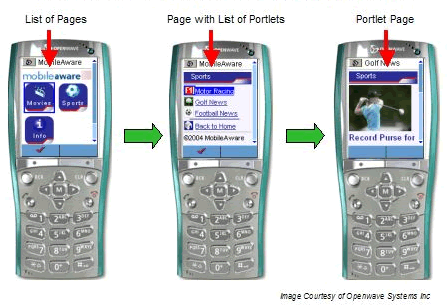
Below is an example of navigating through the sample portal on a menu-driven device emulator.
Files in the sample menudriven skeleton are shown in the table below.
Table 1 Sample menudriven Skeleton Files
Note: If a custom layout or menu is used with jsps other than those listed above, menudriven counterparts will need to be created for these custom jsps.
For example, if you create a threecolumnspanninglayout.jsp for your PC portal and reference it in a .layout file (in /framework/markup/layouts), you will need to create a corresponding threecolumnspanninglayout.jsp file in the skeleton's menudriven subdirectory. Usually this would simply be a duplicate of the menudriven singlelevelmenu.jsp renamed as appropriate.
The PDA Skeleton
The PDA skeleton, using MobileAware mobility markup and the Mobile Interaction Server, is responsible for:
- Delivering the content one portlet at a time to the device. This ensures that an appropriate amount of content is displayed on the smaller screen.
- Displaying a menu of pages at the top of each page.
- Displaying a menu of portlets at the bottom of each page to allow the user to change the portlet that is displayed.
- Adding headers and footers to the portal content.
- Focusing" on a portlet, similar to the menudriven case.
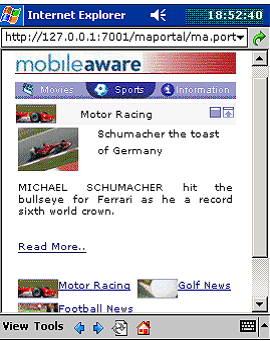
Below is an example of how the PDA skeleton delivers the sample portal to a PocketPC browser.
Files in the sample PDA skeleton:
Table 2 Sample PDA Skeleton Files
Again, as in the menudriven case, if a custom layout or menu is used with jsps other than those listed above, PDA counterparts will need to be created for these custom jsps.
Mobility Skins
Similar to the menudriven and PDA skeletons described above, the mobility framework uses menudriven and PDA skins. Each skin defined in the Multi-Channel Portal has a "menudriven" and "pda" subdirectory. These mobility skins allow images and styles to be chosen on a per-device basis. Notice how the page icons on the PocketPC have been altered to better suit the device's form factor.
Each skin, including the menudriven and PDA skins, contains a skin.properties file which defines properties, including search paths for images and CSS files, used by the portal framework. Below is an extract from a sample menudriven skin.properties file:
images.search.path: images, ../../../../mask/def, ../images
link.homepage.href: wapcss.css
link.homepage.rel: stylesheet
link.homepage.type: text/css
link.search.path: ../../../../mask/def, ../images
In the above example, the search path includes the main skin's images directory. Therefore, if a portal page's icon image is specified as "sports.gif", BEA WebLogic Portal will search for it in the mobility skin's own resource directories first and then, if not found, in the main skin's directory.
Notice the /mask/def entry in the search paths. Typically in a PC portal, resource files (for example images, css) are contained within the skin directory itself. However, the resulting URLs can be quite long; for example for a menudriven skin, a typical URL might be:
http://hostname:7001/webapp/framework/skins/default/menudriven/images/image.gif
As menudriven devices tend to have a small "maximum deck size" (the amount of content that they can process at any one time), long URLs reduce the amount of useful content that can be displayed. To address this problem, the sample portal uses directories with short paths for menudriven skin resources.
The PDA skin works in a similar fashion to the menudriven skin. The main difference is that most PDAs do not have the same content size restrictions. This means that the normal practice of having images inside the skin directory can be followed if desired.
Mobility Properties
To enable enhanced customization for mobile devices, the Multi-Channel Portal adds some extra configurable parameters. These mobility properties are configured in three places:
- Portal-wide and book/page-specific properties are configured in the portals.maprops file in the web project root.
Examples of each type of property
- Portal-wide property: "[portal_name.]menudriven.defaultheader"
Defines the default jsp used to generate the header for menudriven devices when delivering a page menu or portlet content, when the page or portlet does not specify its own header jsp. - Page property: "[portal_name.]page.page_name.header"
Overrides the above property for the named page. - Skin property: "menudriven.menu.display"
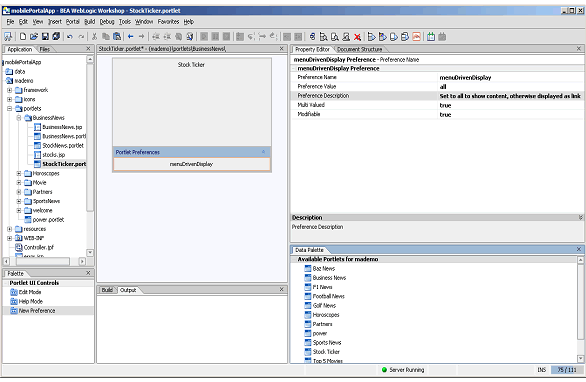
Specifies in this skin whether each top-level menu item is displayed as an icon only, or as an icon with the page/book's name. - Portlet property: "menuDrivenDisplay"
When set to "all", causes the mobility framework to render the portlet in full, instead of displaying it behind a link, on the page menu.
Please refer to the section "Sample Portal" for a full overview of the properties that can be set to modify the behaviour of the mobile Portal.
Mobility Framework Components
This section lists all the components that make up the mobility framework. It can be used as a checklist for building a mobility framework from scratch or adding mobility features to an existing portal framework.
The first set of components are installed automatically into a web project by right-clicking the project and selecting "Enable Multi-Channel" (note: you must install the MobileAware Interaction Server, BEA WebLogic Edition, including the Mobility Extension for BEA WebLogic Workshop to make this option available).
WEB-INF/lib/mcpfilter.jar
WEB-INF/classes/mis.properties
WEB-INF/classes/mis.license
WEB-INF/classes/oscache.properties
(modifications to) WEB-INF/web.xml
Support libraries in WEB-INF/lib
WEB-INF/lib/mmJSPtaglib.jar
WEB-INF/mobility.tld
WEB-INF/mobility.tldx
WEB-INF/mobility-wlp.tld
WEB-INF/lib/mobility-wlp.jar
WEB-INF/classes/everix.headers
(modifications to) WEB-INF/web.xml
The remaining components of the mobility framework are not installed automatically. They may be copied from the sample Multi-Channel Portal and customized to your portal's needs:
Mobility skeletons (for each skeleton in the portal):
skeleton_directory/menudriven/ directory and files as listed in a previous section. In the sample portal, /framework/skeletons/default/menudriven.
skeleton_directory/pda/ directory and files as listed in a previous section. In the sample portal, /framework/skeletons/default/menudriven.
Mobility skins (for each skin in the portal):
skin_directory/menudriven/ directory and files. In the sample portal, the /framework/skins/default/menudriven directory and contents.
skin_directory/pda/ directory and files. In the sample portal, the /framework/skins/default/pda directory and contents.
resources/controls/MobilityControl and contents resources/Header and contents resources/Footer and contents (optional) /mask directory and contents. See section on Error! Reference source not found.
Portal and web project-wide configuration file:
Client-Classifications configuration file:
WEB-INF/client-classifications.xml
Sample Portal
The mobile sample Portal was created to demonstrate how easy it is to create and extend mobile portlets with little or no extra effort. The extension works within the Portal framework in the following ways:
The sample Portal contains three main sections - Movies, Sports and Info. Each of these sections contains individual portlets. Each portlet contains content related to the section that it is in.
Navigation on PDA and Menu-Driven Devices
PDA and menu-driven devices require a streamlining of the information that can be displayed in a logical, intuitive way on a small screen. To do this, the Mobile Interaction Server creates navigation specifically for each class of handheld device. Developers and Administrators can choose the portlets that they wish to include and eliminate others without affecting the PC display.
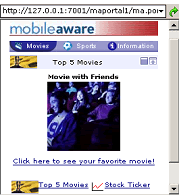
As will be seen in the walkthrough of this sample application, PDAs contain customizable links to the other pages. By default, the page links are across the top followed by the currently active portlet content. This is followed by links to the other portlets on that page.
Figure 6 Portal Main Page on a PDA Display
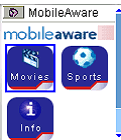
Menu-driven devices are even more restrictive in the amount of information they can display. Link navigation is much more important on these devices. The display for menu-driven devices starts with a main menu page that contains image links to the three sub-pages that contain the individual portlets. Selecting a page gives you a page with a list of Portlets, with each link taking you to the individual portlet. The Mobility Extension allows you to customize the display by showing page contents either as links or in full.
Figure 7 Portal Main Page on Menu-Driven Display
Menu-driven devices typically have the a navigation flow as in the figure below.
Figure 8 Menu-Driven Navigation
Look-and-Feel Integration
The mobile portal framework integrates seamlessly with BEA WebLogic Portal's look-and-feel skin mechanism. Mobilized skins allow administrators and users to easily switch a portal's look-and-feel and have the change reflected across all channels, whether PC or mobile device.
The sample mobile portal contains three examples of mobilized look-and-feels, namely "default", "MobileAware" and "xmas". In development mode, the portal's look and feel can be changed in the property editor in WebLogic Workshop.
Streaming portals created through the WebLogic Admin Portal can have their look-and-feel changed using the Admin Portal. In either case, the mobile portal framework will take care of applying the look-and-feel across all channels.
Sample Portal Features Tour
This section demonstrates the features of the sample Portal. Many of these features are customizable. Changing property values will result in changes to the display across a range of handheld devices. Experiment with the organization and the look and feel of the portal by changing the values of these properties.
The following features will be covered:
- Styling menu navigation
- Customising headers and footers
- Managing portlet content
- Generation of back-to-page and back-to-home links
- Customising separators
- Using CSS files
Changing Properties
Here are the locations where the properties can be changed to modify the look and feel of the page.
- Property Editor
The Workshop Property Editor is part of the WebLogic Workshop. The properties it contains will depend on the file that is open in the Edit Pane and the feature that is selected. The mobility framework uses properties defined on portal pages and portlets. - Portlet Preferences
BEA WebLogic Portal includes a mechanism for specifying portlet preferences. These are added in Workshop by opening a portlet, dragging a "New Preference" from the Portlet UI Controls Palette and using the Property Editor to set the Portlet Preference's name and value. - Admin Portal
Portlet preferences can be modified in streaming portlets by using the Admin Portal. Any properties that are specified as Portlet Preferences can be modified using the Admin Portal. - skin.maprops
This file contains properties that control skin-specific customizations - properties that will change when the portal's look-and-feel is changed. It is located in the folder of the skin that you wish to customize.
(for example, /mobilePortalApp/maportal/framework/skins/xmas/skin.maprops). - portals.maprops
This file is located in the portal web project's root directory
(for example, /mobilePortalApp/maportal/portals.maprops). It includes portal-wide and page-specific properties. These properties do not change when the portal's look-and-feel is changed. By default, properties in this file apply to all portals, both ".portal" and streaming portals.
To target a specific portal, the portal's name can be prefixed to the property - in the case of a development portal (for example, ma.portal), the first part of the filename is used (for example, ma.pda.header).
In the case of streaming portals, the portal and desktop "partial URL" as specified in the Admin Portal are used. For example, for maportal/madesktop, the properties would be of the form maportal.madesktop.pda.header.
Finally, one portal can inherit another portal's properties by specifying an "inherits" property (for example maportal.madesktop.inherits: ma).
Styling Menu Navigation
Navigational links can be styled to change the way they appear when delivered to menu-driven and PDA devices. The customisations are used to give a precise look and feel to the page and to facilitate navigation through the site being viewed on a handheld device. These customizations do not have an effect on full browser (PC) display.
Select the portals.maprops file from the Application file tree window. Open it in the Workshop Edit Pane, edit and save the file and view the effect that the changes have using the mobile device emulators provided.
Navigation on menu-driven devices
The first screen, when viewed on a menu-driven device contains three icons that link to the Movies, Sports and Info pages. The links can be changed to text instead. This is a customization that can be different in different skins.
You can display the main menu icons as either icons only or icons and text together.
- Property: menudriven.menu.display
- Location: /framework/skins/<skin name>/menudriven/skin.maprops
- Possible values: icon | text
Figure 10 Example of menudriven.menu.display: icons
Note: The icons should be changed to smaller ones for this type of display. This will be explained later.
Navigation on PDAs
This property determines the navigation menu style that will be used for the PDA menu.
- Property: pda.menu.display
- Location: /framework/skins/<skin name>/pda/skin.maprops
- Possible values: icon | text | icontext
Figure 11 Example of pda.menu.display: text
Note: Both menu-driven and PDA displays require the appropriate icons being available and selected for optimum presentation. These icons are located in this project in the icons/50x50text and in the icons/wap directory.
Icon Layout for PDA
This property determines the number of columns that will be used for the PDA menu.
- Property: pda.menu.columns
- Location: /framework/skins/<skin name>/pda/skin.maprops
- Possible values: <integer>
Changing the Page Icons
The page icon images can be configured in the Workshop Property Editor.
- Enter the image required into the Selected/Unselected/Rollover Image fields using images available from the skins directories.
Figure 12 The Page Tabs in the mademo.portal File
Figure 13 Changing the Page Icon Images
Default icons
A default menu-driven icon can be set for pages that do not require individual settings. The following properties should be set:
- Property: menudriven.menu.defaulticon
- Property: menudriven.menu.defaulticon.wbmp
- Location: portals.maprops
- Possible values: <uri>
Changing Headers and Footers (menu-driven only)
When creating menu-driven navigation, it is important that the user knows where in the navigation hierarchy they are at any given time. For this reason, the mobility extension gives developers the power to change the header and footer content. The header and footer can reflect the subject of a given page to give context to the contents that are delivered. It is possible to specify headers and footers for the main menu, individual pages and portlets. PDAs use a different organisational structure, which makes a page's context more self-evident, and so this feature is unnecessary. For this reason, customisation is only available for menu-driven devices.
Default home page header and footer
A default home page header can be set for pages that do not require individual settings. The following properties should be set:
- Header property: menudriven.defaultheader
- Footer property: menudriven.defaultfooter
- Location: portals.maprops
- Possible values: <uri>
For example, in order to set the header and footer for the home page, the properties should be set to:
menudriven.defaultheader: /resources/Header/header.jsp
menudriven.defaultfooter: /resources/Footer/footer.jsp
These JSPs will be included for the header and footer when no specific page or portlet header or footer has been specified.
Page-specific header and footer
These properties let developers select a header or footer for a specific page to reflect the contents of the page. If none is specified, the default header and footer will be used instead.
- Header property: page.<pagename>.header
Example: page.sports.header: /resources/Header/header_sports.jsp - Footer property: page.<pagename>.footer
Example: page.sports.footer: /resources/Footer/footer_sports.jsp - Location: portals.maprops
- Possible values: <uri>
Figure 14 Setting the Page Header Image
Portlet-specific header or footer
These properties let developers select a header or footer for a specific portlet within a page. If none is specified, the default header and footer will be used instead.
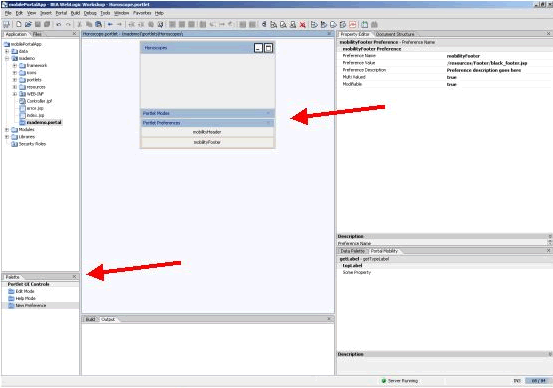
- Header property: mobilityHeader
Example: mobilityHeader: /resources/Header/header_sports.jsp - Footer property: mobilityFooter
Example: mobilityFooter: /resources/Footer/footer_sports.jsp - Location: Portlet Preference
- Possible values: <uri>
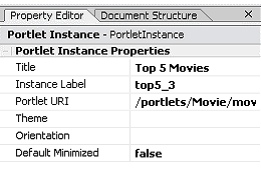
- In "Preference Name" enter "mobilityHeader" or "mobilityFooter" as appropriate. In "Preference Value" enter the desired jsp uri.
Figure 15 Setting the Horoscopes Portlet Preferences
Changing the Portlet Title Bar Image
The Icon URI property is used to change the image in a portlet title bar.
- Property: Icon URI
- Location: Workshop Portlet Property Editor - Titlebar
- Possible values: <uri>
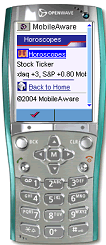
Figure 16 Specifying Images for Portlets - Menu Driven
Image Courtesy of Openwave Systems Inc
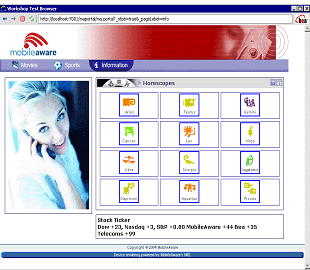
Figure 17 Specifying Images for Portlets - PC
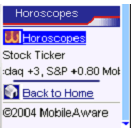
Notice the difference in the images displayed for the Horoscope portlet between the menu-driven device and the PC browser.
To change the image in a portlet title bar:
Managing Portlet Display (menu-driven only)
This option will determine how the portlet appears on a page. You can have it appear as a link or as a fully visible portlet.
To change the way the way the portlet is displayed on a menu-driven device:
Note: If the Preference Value field is left blank it will default to `link'.
Figure 19 Setting the Display Option to All for Stock Portlet
Figure 20 Stock Portlet with menuDrivenDisplay Set to All
Custom Separators (menu-driven only)
These properties override the default separator for pages/portlets. The separator used is dependent on the device capabilities, i.e. the width of the device and whether it can support colour, which is automatically detected.
- menudriven.page.separator.gif: narrow colour menudriven devices
- menudriven.page.separator160.gif: wide colour menudriven devices
- menudriven.page.separator.wbmp: monochrome menudriven devices (for example wap 1.1 devices)
The separator appears above the "Back to" keys.
The three images are stored in the /mask directory, which contains resources for each of the skins. Different images with the same name can be put in each skin folder to give the separators in each skin a different look and feel.
Page Separator
The following properties should be set to customise the page separator:
- Property: menudriven.page.separator.gif
Example: menudriven.page.separator.gif: /icons/sepB.gif - Property: menudriven.page.separator160.gif
Example: menudriven.page.separator160.gif: /icons/sepB160.gif - Property: menudriven.page.separator.wbmp
Example: menudriven.page.separator.wbmp: /icons/sepB.wbmp - Location: portals.maprops
- Possible values: <uri>
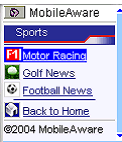
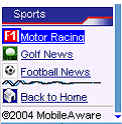
The figure below shows a custom separator inserted below Football News.
Figure 21 Customized Separator
Portlet Separator
The following properties should be set to customise the portlet separator:
- Property: menudriven.portlet.separator.gif
Example: menudriven.portlet.separator.gif: /icons/sepB.gif - Property: menudriven.portlet.separator160.gif
Example: menudriven.portlet.separator160.gif: /icons/sepB160.gif - Property: menudriven.portlet.separator.wbmp
Example: menudriven.portlet.separator.wbmp: /icons/sepB.wbmp - Location: portals.maprops
- ossible values: <uri>
Back to Home Icon
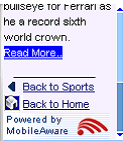
These properties allow the user to identify the specific image to use for the "Back To" links. The images are stored in the /mask directory.
- From sub-page back to the home page:
Property: menudriven.page.backtohome.gif
Property: menudriven.page.backtohome.wbmp
Example: menudriven.page.backtohome.gif: /icons/back2.gif - From a portlet back to the home page:
Property: menudriven.portlet.backtohome.gif
Property: menudriven.portlet.backtohome.wbmp
Example: menudriven.portlet.backtohome.wbmp: /icons/back2.wbmp - From a portlet sub-page back to it's parent page
Property: menudriven.portlet.backtopage.gif
Property: menudriven.portlet.backtopage.wbmp
Example: menudriven.portlet.separator.wbmp: /icons/sepB.wbmp - Location: portals.maprops
- Possible values: <uri>
Figure 22 Portlet View of Back To: Links with Images
Styling the Main Menu for Menu-Driven Devices
The "main menu" screen can be styled on devices that support it by setting CSS properties in the "menudriven-homepage" class. This class is defined in the CSS file referenced in the relevant menudriven/skin.properties file. In the example portal, the CSS files are /mask/def/wap.css for the default skin, /mask/ma/wap.css for the MobileAware skin and /mask/xma/wap.css for the xmas skin.
Additional Information
Documentation
- MobileAware Mobility Extension for BEA WebLogic Workshop 8.1: Mobilising the Sample Project (1.2 MB, requires Adobe Acrobat Reader)
- BEA Dev2dev Articles
Further Assistance
For any further assistance on the MobileAware product set, please contact us at partners@mobileaware.com.
 )
)
