

|
This chapter focuses on how to use Workshop for WebLogic to create and configure remote portlets. This chapter includes the following sections:
Before getting started, we recommend that you review the following chapters in the architecture part of this guide:
.These chapters explain basic concepts such as producers, consumers, and remote portlets. This chapter assumes you familiar with these concepts.
| Note: | This chapter is primarily for developers using Workshop for WebLogic to create consumer portal applications. If you plan to use the WebLogic Portal Administration Console to create federated portals, see Part III, Staging. |
WebLogic Portal applications can consume the following types of portlets:
To be consumable, a portlet must be deployed to a web application that is running in a WSRP-compliant producer. The consumer application must also be capable of contacting the producer using the producer’s WSDL URL.
This section presents a step-by-step example showing you how to create a remote (proxy) portlet in a consumer application using Workshop for WebLogic. This section includes the following topics:
For this example, you will consume a portlet deployed in a producer application. The producer application in this example is a Portal Web application deployed to a WebLogic Portal Domain.
| Tip: | For information on working with a producer that is running in a WebLogic Server domain (as opposed to a WebLogic Portal Domain), see Configuring a WebLogic Server Producer. |
The basic procedure for creating remote portlets is fairly simple: Workshop for WebLogic provides a convenient wizard for this purpose. No programming is required. The basic steps always include:
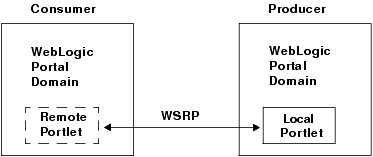
Figure 4-1 illustrates the basic parts of a federated portal, where the consumer includes a remote portlet. A remote portlet is a proxy for a portlet that is deployed in a producer application.
| Tip: | To an end user, the features of the remote portlet are indistinguishable from the actual portlet deployed on the producer. It is possible, however, to customize many of the properties of a proxy portlet, as explained in Configuring Remote Portlets. |

If you want to try the example discussed in this section, you need to run Workshop for WebLogic and perform the prerequisite tasks outlined in this section.
To set up the example environment, perform the prerequisite tasks outlined in Table 4-1. If you are not familiar with the specific procedures for these tasks, they are described in detail in the tutorial Setting Up Your Portal Development Environment.
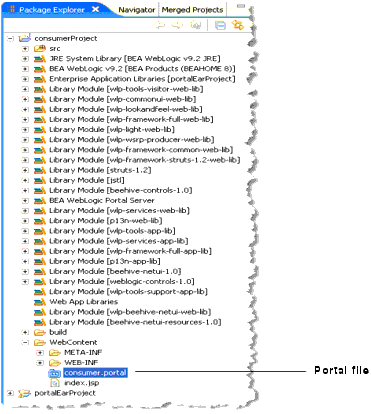
Figure 4-2 shows the Package Explorer after the prerequisite tasks have been completed.

| Tip: | If you do not see the Portlet feature on the New menu, be sure to open the Portal perspective using Window > Open Perspective > Portal. |
remoteExample.portlet in the File name field, and click Finish. The Select Portlet Type dialog appears. http://wsrp.bea.com/portal/producer?wsdlYou can use another WSDL URL if you want to. Just remember that the pattern for the URL is as follows:
http://host:port/webAppName/producer?wsdl
where host is the host and port are the hostname and port number of the server on which the producer is deployed, and webAppName is the name of the web application in which the producer’s portlets are deployed.
| Tip: | This WSDL URL points to an example producer hosted by BEA. This example producer hosts several demonstration portlets. WSDL stands for Web Services Description Language and is used to describe the services offered by a producer. For more information, see Federated Portal Architecture. |
Checkpoint: At this point, the consumer uses the WSDL to locate the producer and learn about its available portlets. The Producer Details section of the wizard panel now displays information about the producer, including the number of portlets that are available to the consumer, as shown in Figure 4-5.
| Tip: | During registration, the producer stores information about the consumer and returns a handle to the consumer. Registration is an optional feature described in the WSRP specification. A WebLogic Portal complex producer implements this option and, therefore, requires consumers to register before discovering and interacting with portlets offered by the producer. See Complex Producers for more information. |
beaProducer in the Producer Handle field, as shown in Figure 4-6. This handle identifies the producer on the consumer.Checkpoint: At this point the WSDL data from the producer has been retrieved and is displayed in the Producer Details panel of the dialog, as shown in Figure 4-7. Note that four portlets on the producer are available to the consumer.
The new remote portlet shows up in the Package Explorer in the WebContent folder, as shown in Figure 4-10.

To view the portlet, you need to add it to the consumer portal, as explained in this section.
In this section you added a remote portlet to a WebLogic Portal consumer application. The consumed portlet is a proxy for a portlet that is deployed in a remote producer application. In addition to the basic setup steps, this example demonstrated the following tasks:


|