

|
Portal visitors can use browser-based tools to personalize the makeup and appearance of their portal if you enable this feature. This chapter describes how to set up your portal to allow visitor customization.
This chapter includes the following sections:
The GroupSpace Guide provides information about Visitor Tools from an end user’s perspective; if you want to create a customized user guide for your portal visitors, you might want to use that content as a starting point.
You can add functionality to your portal desktops that allows portal visitors to modify the content and appearance of their desktops, books, and pages. In order to use these Visitor Tools, visitors must be logged in to a desktop that is running in streaming mode. For more information about streaming portals, refer to File-Based Portals and Streaming Portals.
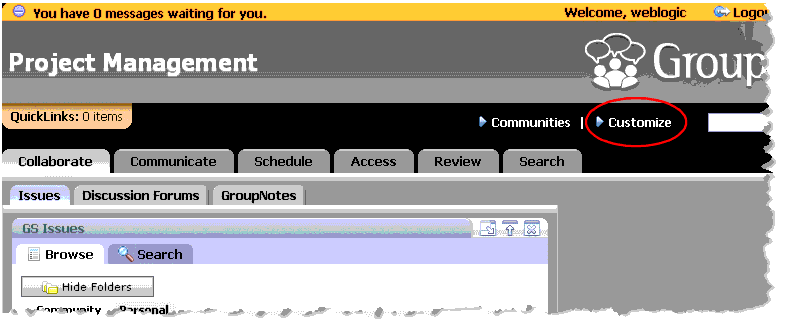
WebLogic Portal includes a “customize” menu that portal visitors can use to access the visitor tools; for example, the GroupSpace sample application’s Customize menu contains a drop-down menu of links (the three menu items are Page Contents, Colors, and Pages). Figure 9-1 shows the Customize menu (circled in red).

| Tip: | A “Communities” menu is also provided for use in the context of a community application; for more information, refer to the Communities Guide. |
A portal web project includes a set of JavaServer Pages (JSPs) and other files that enable visitors to set properties on personalized views of the portal, if you enable this capability.
The following sample procedure shows you the steps involved in adding visitor tools to a portal web project.
| Notes: | Your portal must include authentication (for example, a login portlet) to use visitor tools. |
| Note: | The Visitor Tools are not visible when running the .portal file in the Workshop for WebLogic development environment. |
To do this, right-click the portal web project, and select Properties. Choose Project Facets from the tree on the left side of the dialog and look for the library Portal Visitor Tools. The dialog should look similar to the example shows in Figure 9-2:
If the facet is not in the list, add it by following the instructions in Adding Facets to an Existing Project.
.portal for which you want to enable Visitor Tools.Figure 9-3 shows an example.
You can use the WebLogic Portal Administration Console to create a streaming desktop using the .portal file as a template. After you complete this task, you can then visit the desktop and view the Visitor Tools.
 in the Servers view menu.
 .portal file in the Package Explorer and choose Run > Open Portal Administration Console to start the WebLogic Portal Administration Console. .portal created previously as the basis for the new desktop. When you use the portal that you created in Workshop for WebLogic as the basis for the new desktop, that desktop inherits the usage of the Visitor Tools Desktop shell. This provides access to Visitor Tools from the desktop.
For instructions on creating a desktop, refer to Creating a Desktop.
To confirm that visitor tools are enabled:


|