Previous Next vertical dots separating previous/next from contents/index/pdf

Step 1: Create a Workspace for Development

In this step you'll get your workspace set up, then create two projects to get your EJB source code going. You'll start writing EJB source code in the next step.

In this section, you will:

To Start Workshop for WebLogic

If you haven't started Workshop for WebLogic yet, use these steps to do so.

... on Microsoft Windows

If you are using a Windows operating system, follow these instructions.

...on Linux

If you are using a Linux operating system, follow these instructions.

To Create a Workspace

You use a workspace to contain related source code. This one will end up containing both your EJB source and the source you'll test the EJB with.

  1. If the Workshop Launcher dialog is not displayed, select File > Switch Workspace. Otherwise, skip to the next step.
  2. In the Workspace Launcher dialog, click Browse, then browse to the directory that you want to contain your new workspace directory.

    This can be any directory. You'll be creating a new directory inside this one for your workspace.

  3. When you have a directory selected, click Make New Folder. Name the new folder EJBTutorial press Enter to create the folder, then click OK.
  4. In the Workspace Launcher, click OK.
  5. Workshop for WebLogic will create a new empty workspace in the folder you created, then refresh to display the workspace.

To Create an EAR Project

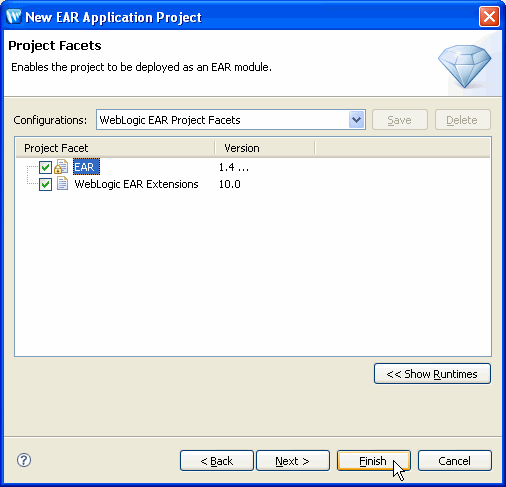
An EAR project is a special kind of project that represents an enterprise application. When you "add" a project to an EAR project, you're actually adding a project reference. Projects added to the EAR project in this way will end up as part of a single Enterprise ARchive (EAR) file, which can be deployed to WebLogic Server. An EAR project is also a way to designate libraries that are to be shared across projects.

  1. Click File > New > Project.
  2. In the New Project dialog, expand J2EE, select Enterprise Application Project, then click Next.
  3. In the New EAR Application Project dialog, in the Project name box, enter EJBTutorial_EARProject, then click Next.
  4. Under Select Project Facets, leave the Presets dropdown as it is. It should say WebLogic EAR Project Facets. Selecting this preset group of facets ensures that you'll have the JARs you need to support your EAR project.

    Click Finish.
  5. After Workshop for WebLogic has finished creating your EAR project, if the Package Explorer is not displayed, display it by selecting Window > Show View > Other, then selecting Java > Package Explorer.

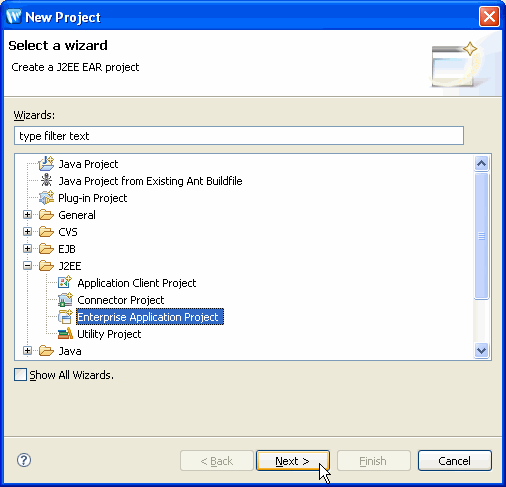
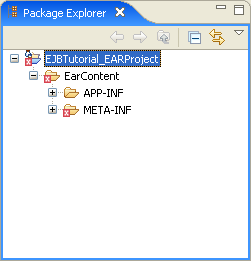
In the Package Explorer view notice that the new project has been marked with an error (indicated by the red X mark in the lower left-hand corner of the EAR project folder). That's as it should be — an EAR project must contain references to other projects. You'll remedy it in just a moment.

EAR project with error.

To Create an EJB Project

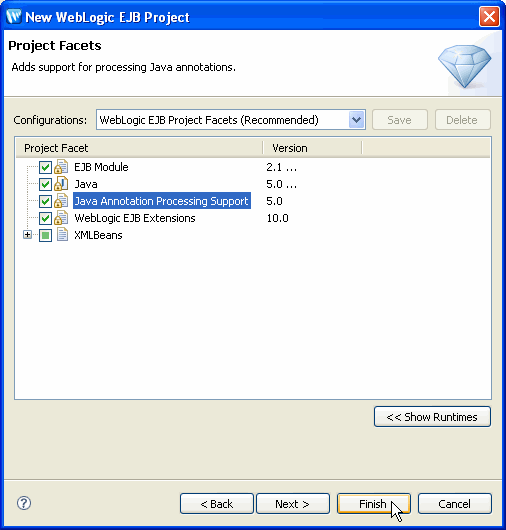
Now that you've got an EAR project, you can create an EJB project within which to build your EJBs. The EJB project will contain your EJB source code.

  1. Click File > New > Project.
  2. In the New Project dialog, expand EJB, click WebLogic EJB Project, then click Next.
  3. In the New EJB Project dialog, in the Project name box, enter VisitEJBProject.
  4. Place a check next to Add project to anEAR and select EJBTutorial_EARProject from the dropdown menu. (This is the EAR project you created earlier. )

    Click Next.
  5. Under Select Project Facets, note that you're provided support for creating EJB source code that includes annotations for faster development.

    Click Finish.

You should now see both your EAR project and EJB project in the Navigator view. Also, after you've created the EJB project, you'll see that the error flag on the EAR project has gone away.

Note that the new project you created, VisitEJBProject, has an error flag next to it. The error flag is present because no EJB code exists yet in the project. In the next step you will remove this error flag by adding EJB code to the project.

Related Topics

Enterprise JavaBeans in Workshop for WebLogic

Click one of the following arrows to navigate through the tutorial:


Skip navigation bar   Back to Top