This tutorial teaches you how to build a web application capable of accessing a database using BEA Workshop for WebLogic Platform. It also provides a general introduction to the web application and control technologies that are part of Workshop for WebLogic.
Note: This tutorial requests that you create a new workspace; if you already have a workspace open, this will restart the IDE. Before beginning, you might want to launch help in standalone mode to avoid an interruption the restart could cause, then locate this topic in the new browser. See Using Help in a Standalone Mode for more information.
The tutorial contains step-by-step instructions for building a simple web application for managing a customer database. As you progress through the tutorial you will learn:
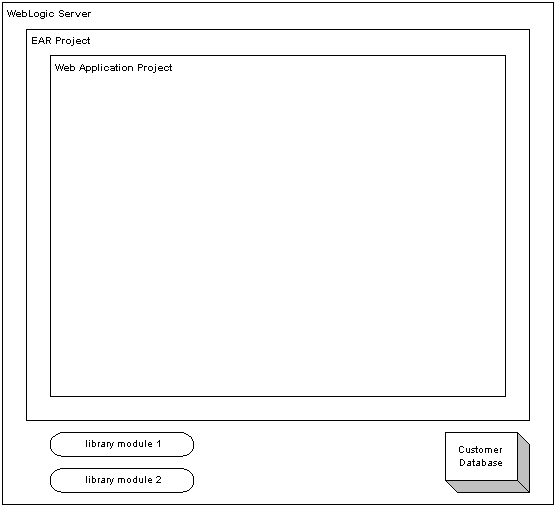
The first step of this tutorial you will create two projects: an EAR project and a Web Application Project which contains a default minimal page flow. You will define a server which connects to the sample database and has library modules deployed on it.
By the end of the first step, your application consists of the following components:

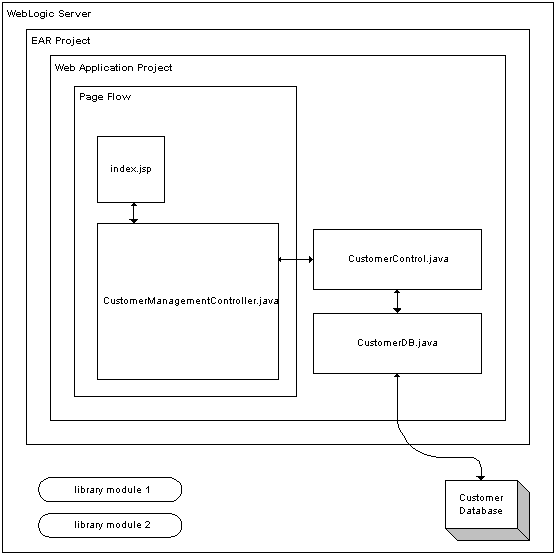
In the second step, you will add a Page Flow, and two controls to the web application project.
Page Flows are user-facing components of a web application. A Page Flow consists of any number of JSP pages and a single Java class, called a Controller class, that handles user actions and events inside the application.
The two controls used in this tutorial allow your application to interact with a database. The first control (CustomerControl.java) is a custom Java control. The second control (CustomerDB.java) is a database control that queries the database directly. Strictly speaking, a web application needs only one control, a database control, to access a database; but two controls are used here (a database control with a wrapper custom control) to increase the modularity of the application. Details about this modularity are provided in step 2 of this tutorial.
At the end of step 2, your application will consists of the following components:

In the third step you add a data grid to a JSP page that will display the data in the database.
The components work together as follows: a method in the Page Flow Controller class will call the custom control, which will call the database control, which finally will query the database. The results returned by the query will then be displayed by the data grid on the JSP page.
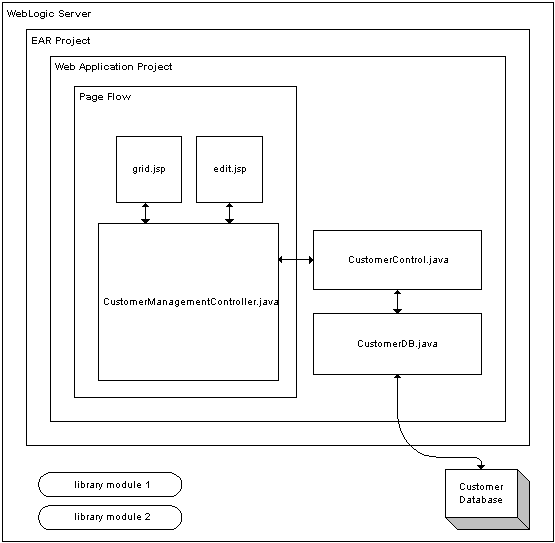
In the last step you add an edit page to the Page Flow allowing you to edit the data in the database.
When the application is complete, it appears as follows:

Click the arrow below to navigate through the tutorial: