If you haven't started Workshop yet, follow these steps: Start
Workshop.
Create a New Workspace (Optional)
If you would like to execute the tutorial in a separate workspace follow these
steps: Create
a New Workspace.
Note: If you already have a workspace open, this
will restart Workshop. Before beginning, you might want to launch help in standalone
mode to avoid an interruption the restart could cause, then locate this topic
in the new browser. See Using
Help in a Standalone Mode for more information
For Workshop Studio and Workshop for JSP Users: Install WebLogic Server
If you are using Workshop for WebLogic, skip this step and
go directly to the next step.
If you are a Workshop Studio or Workshop for JSP user,
follow these instructions in install the WebLogic Server domain for Workshop:
This server domain contains runtime libraries required by the tutorial application.
Undeploy Previous Tutorial Code
WebLogic Server does not support the deployment of projects with the same
name from two different locations on disk.
For this reason, anytime you deploy a sample or run through a tutorial,
you should check your server for previous deployments of the same code. If
your server already has a deployment of the sample or tutorial code, you
should undeploy
any previous code.
Create a New Web Project and a New EAR Project
Right-click anywhere within the Project Explorer view
and select New >
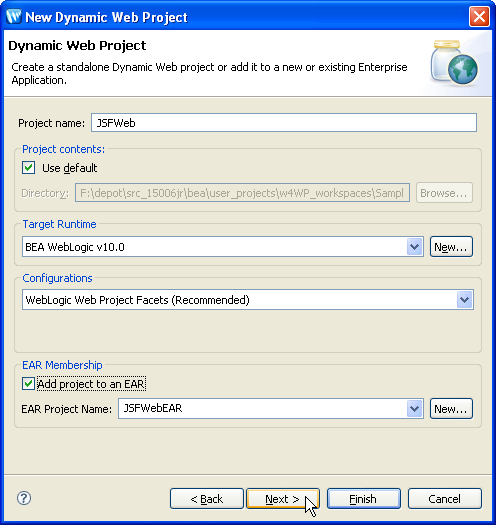
Dynamic Web Project.
Click Next.
In the Project Name field, enter JSFWeb.
Place a checkmark next to Add project to an EAR.
Confirm that the field EAR Project Name shows the value:
JSFWebEAR.
Click Next.
Place a check mark next to the facet JSF.
Click Finish.
Import Files into the Web Project
In this step you will import control files into your web project, control files
that provide access to customer data.
On the Project Explorer tab, open the nodes JSFWeb
> Java Resources.
Open Windows Explorer (or your operating system's equivalent) and navigate
to the directory BEA_HOME/tools/eclipse_pkgs/1.0/pkgs/eclipse/plugins/com.bea.workshop.product.wl.samples_1.0.1/tutorials/resources/jsf/ and
locate the folders businessObjects and controls.
Drag the folders businessObjects and controls
into the Project Explorer tab directly onto the folder JSFWeb/Java
Resources/src.
Confirm that the following directory and file structure exists before proceeding.
Add a WebLogic Server
In this step you will point to a server where you can deploy your application.
Right-click anywhere within the Servers tab, and select
New > Server.
In the New Server dialog, select BEA Systems
>
BEA WebLogic Server v10.0.
Click Next.
In the Domain home field, use the pulldown to set the
domain to BEA_HOME/wlserver_10.0/samples/domains/workshop_10.1.
(Note: if you are using a newly created server domain for the JSF tutorial,
then use the Browse button to navigate to that new server domain, e.g.,
BEA_HOME/user_projects/domains/base_domain.)
Click Next.
In the Available projects column, select JSFWebEAR.
Click the Add button to move the selected project to the Configured
projects column.
Click Finish.
A new server is added to the Servers tab.
You can use the Servers tab to manage your servers
and project deployments as you develop your applications.
To deploy or undeploy a project from a server,
right-click the server and select Add and Remove Projects.