In this step, you will add a new action to the opening page (index.jsp) that navigates to another JSP page.
The tasks in this step are:
- Add a new Action to the Page Flow
- Add a new Linked JSP page to the Page Flow
- Test the Expanded Page Flow
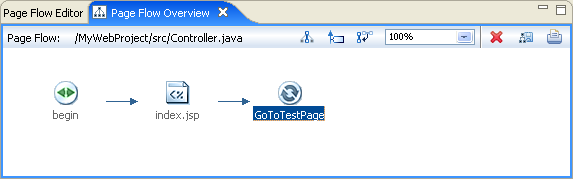
The Page Flow Editor shows the current structure of the page flow. There are three panes on the Page Flow Editor:
In this case, we have the simple situation of a single action, begin, shown in the center, and the JSP page linked to it, index.jsp.
Add a new Action to the Page Flow
- Click on the index.jsp link in the Page Flow Editor view.
Note how this moved index.jsp to the center of the view.

- Right click on the downstream area (to the right) and click New Action from the menu.

- In the New Action dialog, enter the name of the new action as GoToTestPage.
Click Finish.
The new action appears on the downstream area of the Page Flow Editor and is automatically linked to the JSP page (index.jsp) displayed in the center of the Page Flow Editor .
Note that the Page Flow Overview pane has also been updated to display a map of all of the current actions and pages, including the newly created GoToTestPage action.
To Add a new Linked JSP File to the Page Flow
- In the Page Flow Editor view, click on the GoToTestPage link
once.
Note that clicking on the link centers the node, clicking on the icon to the left of the link simply selects the node, and double clicking on the icon goes to the corresponding source artifact.
- To create a new JSP page linked to the GoToTestPage action, right click on the downstream pane. Click New JSP.
Type the name of the new file: TestPage.jsp and press Enter.
- A new JSP file is created, linked to the GoToTestPage action. If you close the editor window displaying the result of running the original page flow, you can see the change that was made in the index.jsp file.
- Note that an asterisk (*) has appeared on the tab for both Controller.java and index.jsp in the editor area. The asterisk indicates that a file has unsaved changes, and if you click on the Controller.java tab, you can see the new code that was inserted automatically when the new action was created (shown with a highlight below).

- Right click on the JSP again and click Open to open the file in an editor tab. Change the default text to My linked Test Page in the body of the JSP file.
Click File > Save All to save all of the changed files in your page flow files.
To Test the Expanded Page Flow
To run your application on the WebLogic Server:
-
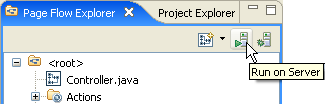
To run the page flow, click on the Run on Server button
on the Page Flow Explorer view toolbar.
The page flow runs and the begin action is invoked, resulting in the rendering of the index.jsp page. The result appears in a new tab in the editor window.
- Click on the link that invokes the GoToNewPage action and the second JSP page will be displayed.
Displaying the second page should be very fast because at this point, the whole application has been deployed to the server and you are running your page flow.