Generating Hibernate Object Relational Mappings
Workshop provides a powerful and flexible object relational mapping interface to popular persistence services like Hibernate.
Depending on the development scenario, OR Mappings can be generated through different mechanisms:
Creating Hibernate OR Mappings from a Schema
Generating Hibernate Mappings from an Object Model
Creating Hibernate OR Mappings from a Schema
By reverse engineering a database schema, Workshop provides a simple mechanism to automatically generate the associated object model and mappings.
Note: If the DbXplorer is not currently open, go to the Window menu
and select Show View > Other. Expand the Workshop branch, select DbXplorer, and click OK.
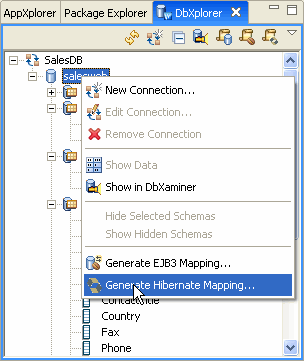
- From within the DbXplorer right-click a database artifact and select Generate
Hibernate Mapping.
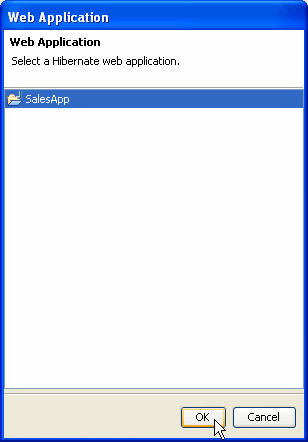
- Select the web application project that will store the Hibernate mapping
files and data objects and then click OK. A Hibernate web
application is required prior to generating the mapping.
Note: Currently Workshop considers a web application to be
a Hibernate application if it has the Hibernate configuration file hibernate.cfg.xml
at the root level of an Eclipse source folder and contains the hibernate.jar file in the application classpath.
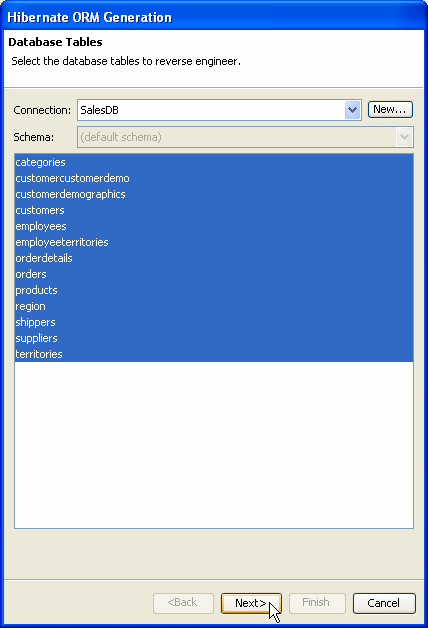
- In the Database Tables dialog, choose the appropriate database Connection,
Schema, and Tables to be mapped through
reverse engineering and then click Next.
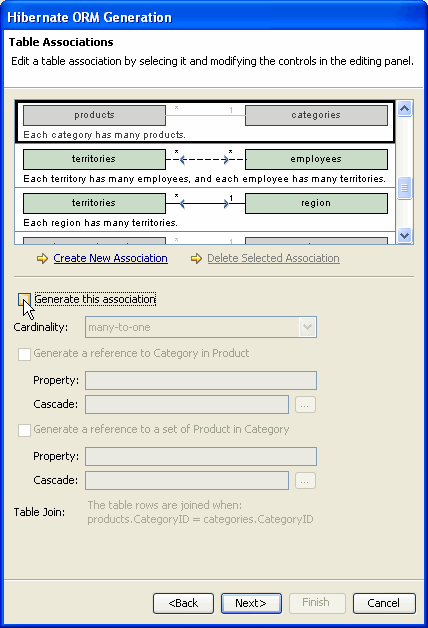
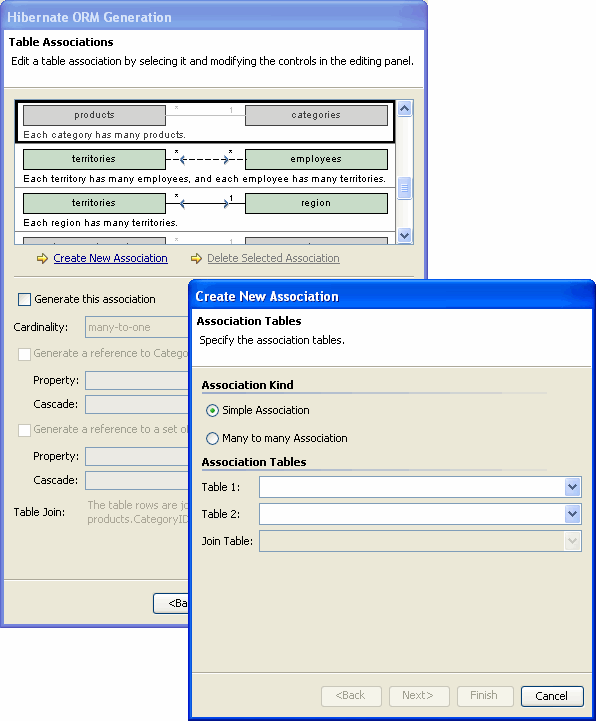
- The Table Associations dialog displays current entity relationships as observed
in the database schema from the foreign key definitions (shown in green).
Select an association and choose whether this association is valid and should
be mapped, and, if so, provide the properties for this association.

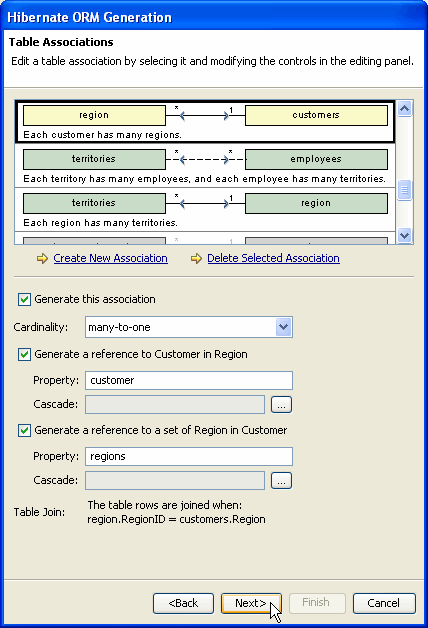
- If an observed table association should not be mapped, uncheck Generate
this association. Disabled associations appear as grey in the Table
Associations dialog.
- Workshop also supports the creation of new associations. Click the Create
New Association option and specify the properties of the new association.
Notice that Workshop supports the creation of Simple Associations (one to one,
one to many, many to one) between two tables and Many to Many Associations
through an intermediate table. Click Next to associate the columns used to
join the table rows.
This is useful to create Hibernate mappings when the database tables do not
have foreign keys, and to create many-to-many relationships.
- Since the new associations (shown in yellow) are not observed in the database
schema, they will be created programatically in the Hibernate mapping file
and object model. Once the entity associations have been configured, click
Next.
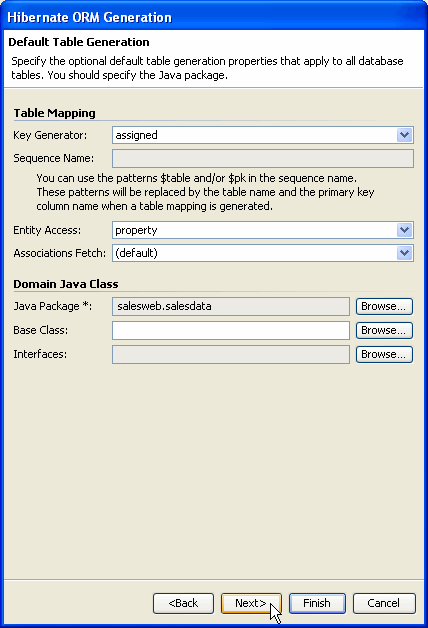
- In the Default Table Generation dialog, fill in the optional properties
if necessary and click Next.
Note: A Java Package is required for generating the object model classes.
- The Tables and Columns dialog defines the table and column mapping names
for the generated mapping files and bean classes. By default, the schema's
table and column names are used for the Hibernate mapping file and JavaBeans.
Notice that tooltips display the table and column properties as defined in
the database schema. Click Next.

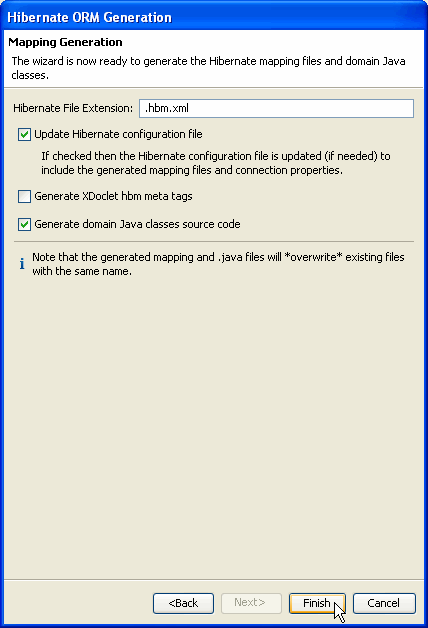
- In the Mapping Generation dialog, decide which artifacts should be generated
and whether XDoclet meta tags should be added to the generated files. Click
Finish to create the Hibernate mapping files and domain Java classes.
Workshop will generate all of the Hibernate mapping files and Java Beans based
on the properties supplied to the ORM Generation wizard. Once generation is
complete, the Entities can be accessed through the AppXplorer under the Hibernate
Configuration branch of the project.
Note that all the settings you specify in this wizard are remembered the next
time you use the wizard for the same database connection.
Save State of ORM Generation Wizard
You can now save the state of the ORM Generation wizard prior to ORM Entity bean generation. This allows you to use the mapping wizard to specify some of your O/R mappings, save the state, and return at a later time to add additional mappings before generating. On the last page of the wizard, click Save wizard state to save the current mappings without generating.
Creating Hibernate OR Mappings from an Object Model
Workshop supports the generation of Hibernate mappings from a Java object model, the top down development scenario. When all entity relationships have been defined, Workshop provides the ability to define a schema based on the Hibernate mappings through a DDL file.
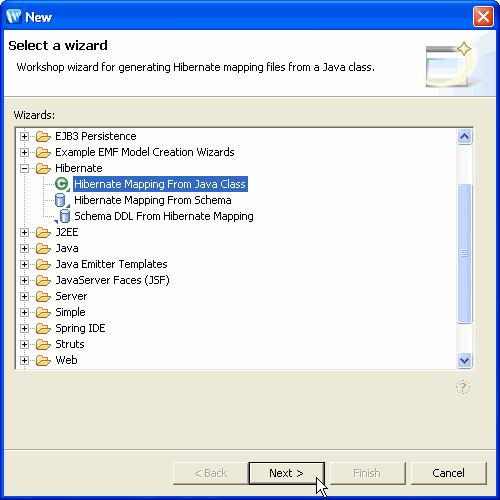
- From the File menu, choose New > Other. Expand Hibernate. Select Hibernate Mapping from Java Class and then click Next.
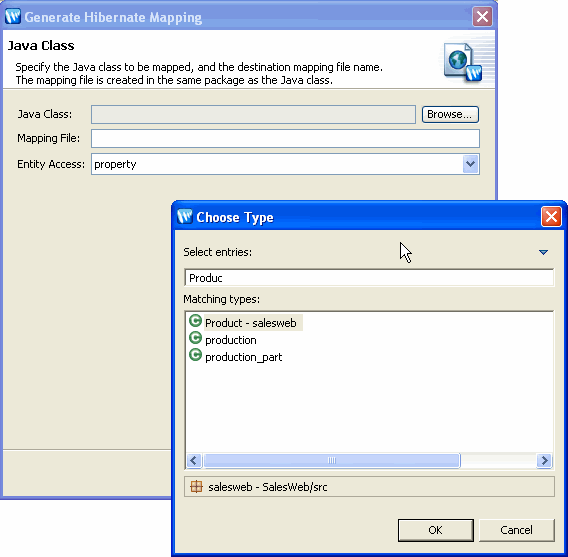
- Browse to and select the object to be mapped, select a name for the automatically generated mapping file, and click Next.
- In the Class Mapping Properties dialog, if it is available, specify the database information and primary key and then click Next. The Database Schema and Database Table options are not required elements since there are development scenarios where the database has not yet been defined.

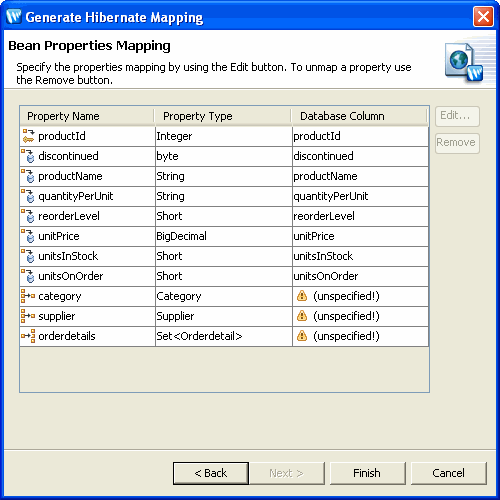
- In the Bean Properties Mapping dialog, select which bean properties should be mapped. Highlight the property and click the Remove button to unmap the property from the Hibernate mapping file. For properties that will be mapped, select the property and click Edit to specify the column mapping information.
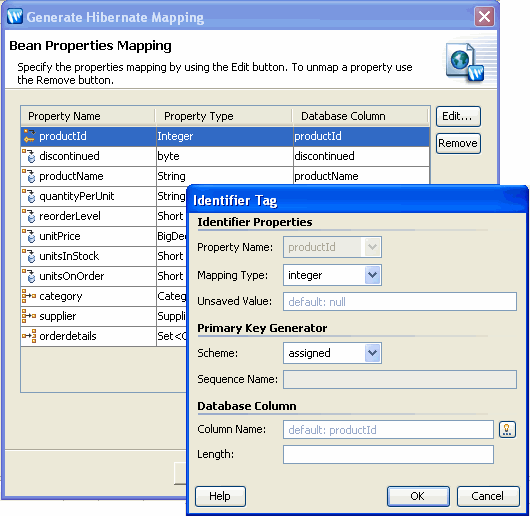
- To configure the Bean Property mapping, fill in the relevant information and click OK. If the database schema is available, click the Browse button to view the current list of available Column Names for the table.
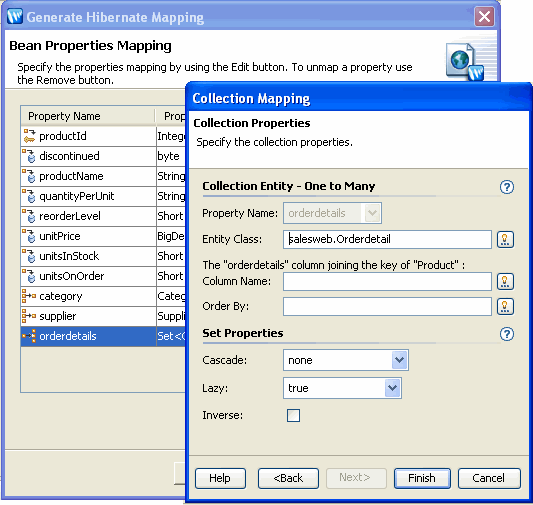
- Instead of a simple data type, some Bean Properties are a collection. To define the collection mapping properties, highlight the item and click Edit. Specify the Collection Type, Element Type, and Cardinality and then click Next.
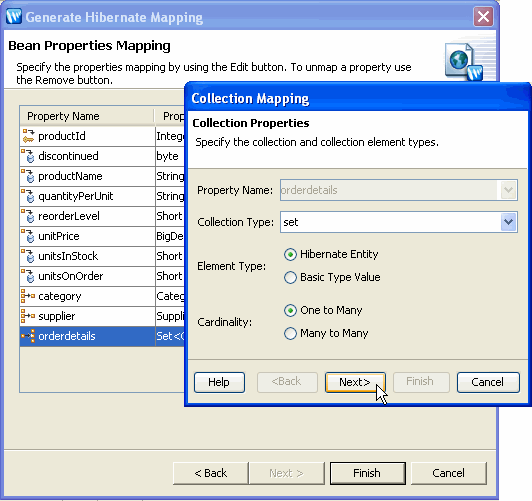
- Based on the Cardinality selected, provide the Collection Entity information, Set Properties, and then click Finish. In the following example, the orderDetails collection is mapped to an OrderDetail through the foreign key, ProductId.
- Once all of the Bean Properties have been selected and the Column mapping information has been added, click Finish to generate the Hibernate mapping.

Exploring Databases with the DbXplorer
Managing Entity Relationships
Configuring Hibernate
Still need help? Post a question on the Workshop
newsgroup.