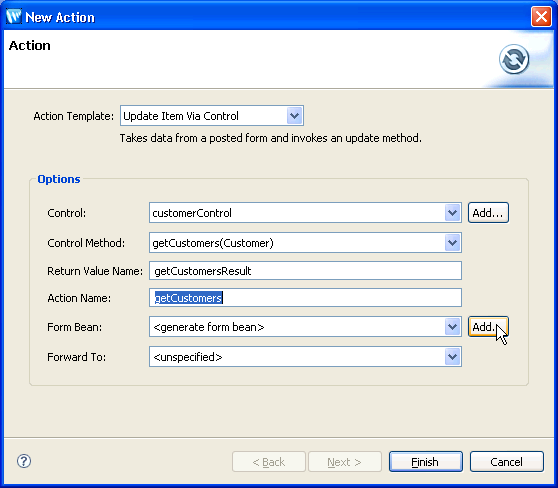
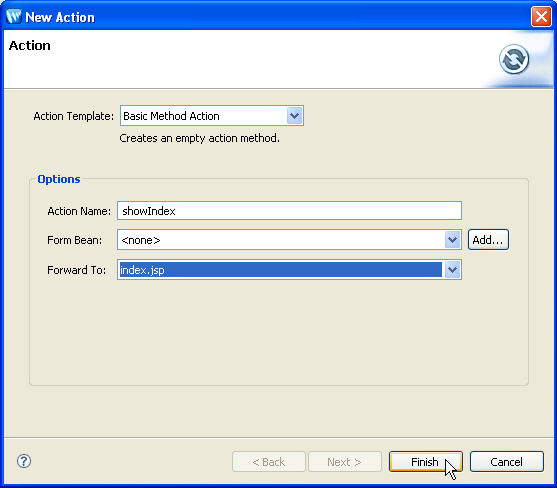
Next to the Form Bean field, click Add.
Under Matching Types, select Customer - businessObjects.
Click OK.
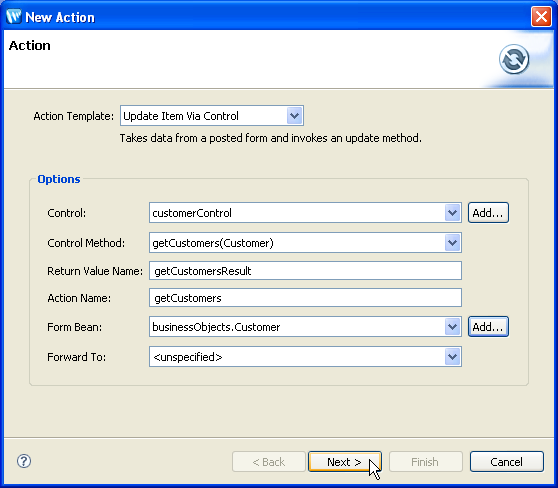
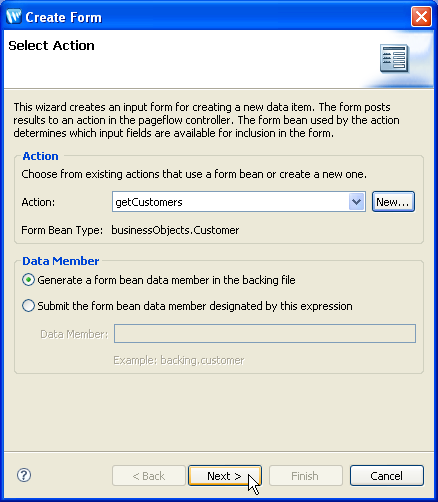
Click Next.
id
first
last
address
city
state
zip
Click Finish.
The tasks in this step are:
In this step you will add a control to the web application. The control is designed to return customer data in the form of an ArrayList of Customer objects. In a more real world scenario this control might call out to a database or a web service to retrieve the customer data. But for the sake of testing the JSF components, the control in this scenario simply returns a fixed ArrayList of Customer objects.
You have just added four lines of code to the Page Flow controller class:
    import org.apache.beehive.controls.api.bean.Control;
    import controls.CustomerControl;

	...

    @Control
    private CustomerControl customerControl;
These lines declare the Customer control on the Page Flow, allowing you to call control methods.
In this step you will add a JSF form (<h:form>) for submitting search queries on the customer data.
You will also add a new NetUI action (getCustomers) to the controller class. The JSF form will call this action through the form's attribute action. This action has a form bean parameter of type Customer: form beans are Java representations of HTML form data.
When a user submits data though the form, the following events occur:
<h:form> tag passes the Customer
object.)
You have just added the following form to the page index.jsp.
<%@ page language="java" contentType="text/html;charset=UTF-8"%>
<%@ taglib prefix="f" uri="http://java.sun.com/jsf/core"%>
<%@ taglib prefix="h" uri="http://java.sun.com/jsf/html"%>

    <h:form>
        ....
        <h:outputLabel value="Last:" for="backing_formBean1_last" />
        <h:inputText value="#{backing.formBean1.last}" id="backing_formBean1_last" />
        ...
        <h:commandButton action="getCustomers" value="getCustomers">
            <f:attribute name="submitFormBean" value="backing.formBean1" />
        </h:commandButton>
    </h:form>
The form works by constructing a Customer object from the search data entered by the user. The Customer object is constructed by loading the entered data into the backing bean's form bean: <h:inputText value="#{backing.formBean1.last}" id="backing_formBean1_last" />. Note that backing.formBean1 refers to a Customer object field on the backing bean.
The form, with the Customer object attached as an attribute, is then submitted to the NetUI action getCustomers.
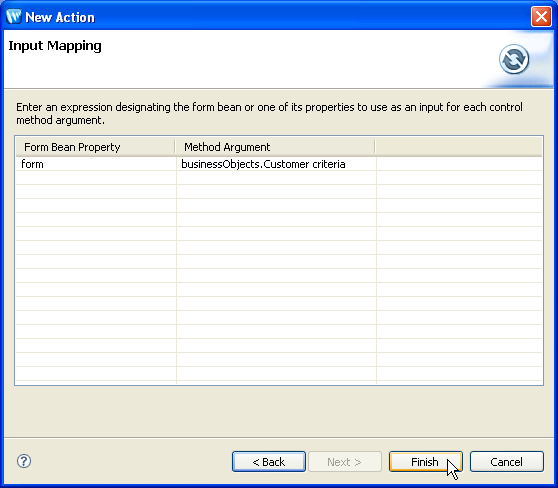
The attached form bean is submitted as the action's method parameter:
getCustomers(businessObjects.Customer form)
You have also added the following action to the controller file Controller.java.
	@Jpf.Action(forwards = { @Jpf.Forward(name = "success", path = "", actionOutputs = { @Jpf.ActionOutput(name = "getCustomersResult", type = java.util.ArrayList.class, typeHint = "java.util.ArrayList<businessObjects.Customer>") }) })
    public Forward getCustomers(businessObjects.Customer form) {
        Forward forward = new Forward("success");
        businessObjects.Customer criteria = form;
        java.util.ArrayList<businessObjects.Customer> getCustomersResult = customerControl.getCustomers(criteria);
        forward.addActionOutput("getCustomersResult", getCustomersResult);
        return forward;
    }
Notice that the action takes a Customer object parameter: this parameter is the form bean submitted by the form.
In this step you will create a new JSF page and add JSF tags for displaying query results.
You will add a <h:dataTable> tag that renders an HTML table when appropriate data is passed to it. In this case, a java.util.ArrayList of Customer objects is passed to the <h:dataTable> tag. The tag iterates over the Customer objects rendering each object as a row in a standard HTML table.
Note that when you create a new JSF page, it automatically creates the page's backing Java bean.
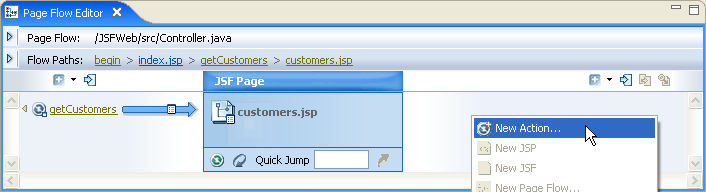
Press Ctrl-Space to bring up the content assistant dropdown.
Double-click getCustomers.
The getCustomers action will be given focus in the Page
Flow Editor.
You have just added the following code to the customers.jsp file.
<%@ page language="java" contentType="text/html;charset=UTF-8"%>
<%@ taglib prefix="f" uri="http://java.sun.com/jsf/core"%>
<%@ taglib prefix="h" uri="http://java.sun.com/jsf/html"%>
<%@taglib uri="http://beehive.apache.org/netui/tags-databinding-1.0" prefix="netui-data"%>
<netui-data:declarePageInput required="true" type="java.util.ArrayList<businessObjects.Customer>" name="getCustomersResult" />

<html>
    <head>
    </head>
    <f:view>
        <body>
           <f:verbatim><p>Beehive NetUI-JavaServer Faces Page - ${pageContext.request.requestURI}</p></f:verbatim>

    <h:dataTable value="#{pageInput.getCustomersResult}" var="item0" border="1">
        <h:column>
            <f:facet name="header">
                <h:outputLabel value="Last" />
            </f:facet>
            <h:outputText value="#{item0.last}" />
        </h:column>
        <h:column>
            <f:facet name="header">
                <h:outputLabel value="Address" />
            </f:facet>
            <h:panelGrid columns="2">
                <h:outputLabel value="State: " />
                <h:outputText value="#{item0.address.state}" />
                <h:outputLabel value="Zip: " />
                <h:outputText value="#{item0.address.zip}" />
                <h:outputLabel value="City: " />
                <h:outputText value="#{item0.address.city}" />
            </h:panelGrid>
        </h:column>
        <h:column>
            <f:facet name="header">
                <h:outputLabel value="First" />
            </f:facet>
            <h:outputText value="#{item0.first}" />
        </h:column>
        <h:column>
            <f:facet name="header">
                <h:outputLabel value="Id" />
            </f:facet>
            <h:outputText value="#{item0.id}" />
        </h:column>
    </h:dataTable>
    </body>
    </f:view>
</html>
Notice that the data table gets it's input data through the NetUI implicit object pageInput. This is one of the most common ways to integrate NetUI and JSF technologies. For information about integrating these technologies, see Integrating Java Server Faces into a Web Application.
You have also specified the navigational target of the getCustomers action:
	@Jpf.Action(forwards = { @Jpf.Forward(name = "success", path = "customers.faces", actionOutputs = { @Jpf.ActionOutput(name = "getCustomersResult", type = java.util.ArrayList.class, typeHint = "java.util.ArrayList") }) })
    public Forward getCustomers(businessObjects.Customer form) {
        Forward forward = new Forward("success");
        businessObjects.Customer criteria = form;
        java.util.ArrayList<businessObjects.Customer> getCustomersResult = customerControl.getCustomers(criteria);
        forward.addActionOutput("getCustomersResult", getCustomersResult);
        return forward;
    }
Notice that the action forwards to the customers.jsp page using the .faces file extension: path = "customers.faces".
In this step you will add a link on the results page that will navigate the user back to the search form page. The link you add will be a JSF link that directly raises a NetUI action.
Integrating Java Server Faces into a Web Application
Click one of the following arrows to navigate through the tutorial:
|
|
|