To Create a New Web Service
To create a new web service:
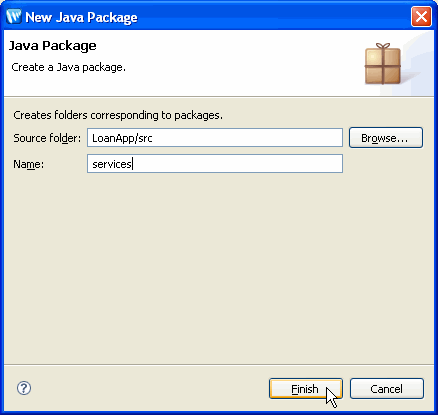
- On the Project Explorer view, open the folders LoanApp
> Java Resources > src. Right-click the src folder
and select New > Package.
Set the package name to be services and
click Finish.
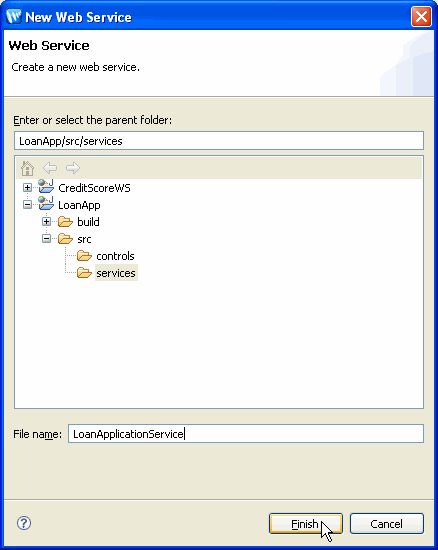
- Right-click on the new package and choose New > WebLogic
Web Service. Set the name of the web service to be LoanApplicationService and
click Finish.
To Access an Existing Control from a Web Service
After creating the web service, it is automatically displayed in Design View. To modify the web service to access the existing loan approval control, do the following steps:
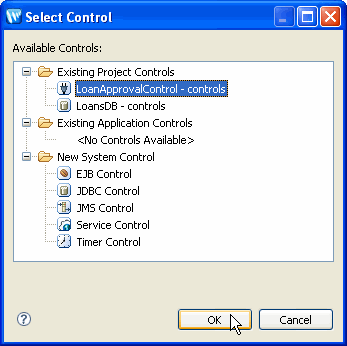
- Insert the code to instantiate the current loan application control by right-clicking on the Design View editor and choosing New Control Reference.
- On the Select Control dialog, select LoanApprovalControl
- controls and click OK.
The new control is added to the right-hand side of Design View.
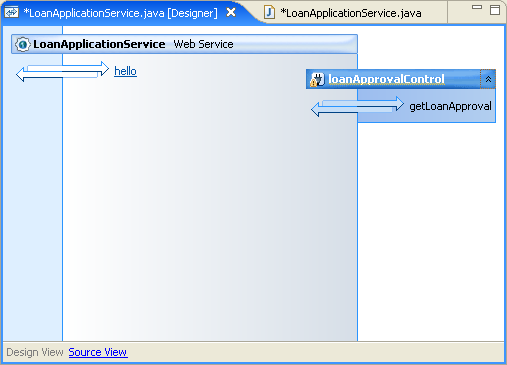
- Right-click the control method getLoanApproval and select
Generate Delegate Method.
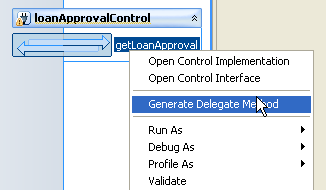
A corresponding web method is added to the web service client interface.
-
We now have a web service that:
- Instantiates a LoanApproval control object (with the @Control annotation line and the declaration following the @Control annotation line).
- Defines a single web method (through the @WebMethod annotation) that uses the LoanApproval control to determine loan approvals.
- Save the new web service with File > Save or by pressing Ctrl+S.
To Test the Web Service
Now that the web service contains an operation, you can test it. To test the web service:
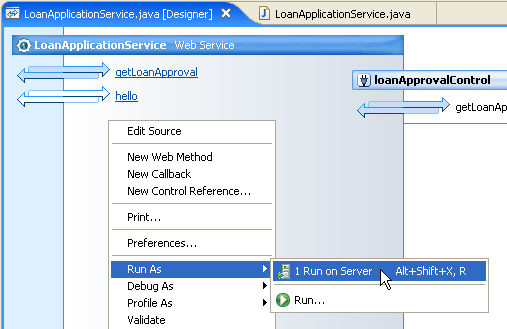
- Switch to Design View, right-click anywhere within Design View and select
Run As > Run on Server.
- In the Run On Server dialog confirm that the server
WebLogic Server v10.3 @ localhost has been already
been selected.
Click Finish. - The test client window appears in the editors pane, showing the getLoanApproval
web method.
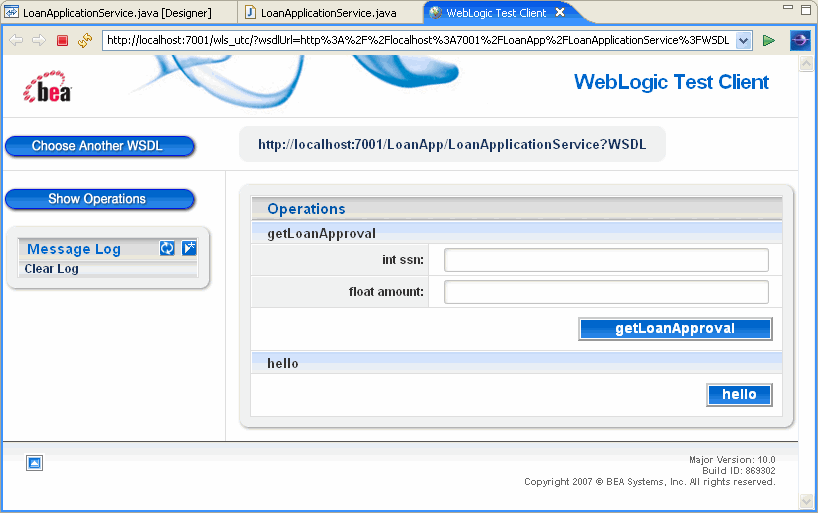
Enter a 9-digit ssn and a loan amount and click getLoanApproval. When you have reviewed the result of running the operation, click Show Operations to return to the main test client page so that you can run another test.
- Enter the same ssn value and a loan amount and click getLoanApproval again. This time, the operation should return false since the person with this ssn already has a loan.
- Click Show Operations to return to the operations page.
- Note that the Message Log at the left now has two entries, one for each test. You can click on an entry in the message log and the results of that test will be displayed again.
- You can also click on the link to the right of the Show Operations link to display the WSDL file that was generated automatically for your web service.