In this step, you will create and run/deploy a complete (albeit very simple) web application.
The tasks in this step are:
Web applications that perform user interface functions (such as displaying "Hello, world!" in a browser page) are implemented as page flows. A page flow is a group of files (a Java controller class and JSP pages) that implement the flow of a portion of your user interface. When a user accesses a URL in the page flow, an instance of the controller class is created and remains in existence until the user exits the page flow. The page flow controller maintains state information for use by the controller's methods.
Web applications can contain several page flows that implement functional units. For example, one page flow could validate users, another page flow could browse data, and a third page flow might retrieve some specific information or perform navigation. Page flows in Workshop for WebLogic are based on the NetUI features of the open source framework called Beehive, a high-level project of Apache. Information on the organization and structure of NetUI and page flows is available at NetUI Overview in the Apache Beehive documentation.
The page flow controller manages state variables and the actions of the page flow. When the initial (default) page flow controller is created, Workshop for WebLogic inserts a class definition that looks something like this:
@Jpf.Controller()
public class Controller extends PageFlowController { }
@Jpf.Controller is an annotation which provides metadata for the page flow controller class. Annotations look like this:
@annotation-name ( parameters )
similar to method calls except that they begin with @. Annotations always occur immediately before the definition for the class or method to which the annotation applies--they annotate the class or method with metadata. As you modify the page flow, the annotation on the page flow class will be updated by Workshop for WebLogic.
Every page flow controller class must define the begin action, the entry point for the page flow. In the default class, the initial action for begin is defined by a parameter to the @Jpf.Controller annotation:
@Jpf.Controller(simpleActions = { @Jpf.SimpleAction(name = "begin", path = "index.jsp") })
public class Controller extends PageFlowController { }
The @Jpf.SimpleAction annotation specifies the begin action that opens the index.jsp page.
A page flow is implemented within a dynamic web project in Workshop for WebLogic. A dynamic web project can contain multiple page flows.
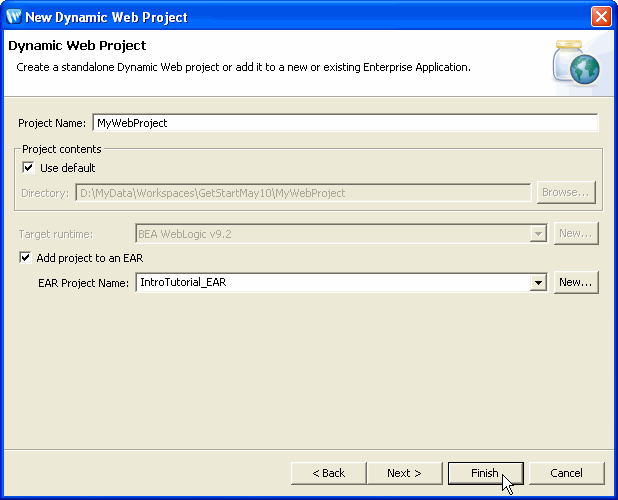
After you create the dynamic web project, a top level folder is created for the project and the project files are initialized. The working file set includes a default page flow consisting of two files: Controller.java in the src folder and index.jsp in the WebContent folder.
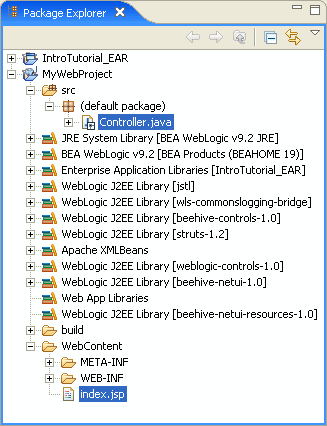
Depending on the options selected when creating the web projects, you may see a slightly different set of folders and files.
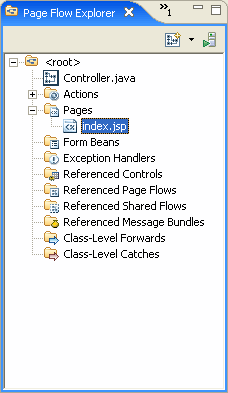
To Open the Initial (Default) Page Flow in the Web Project
To work with the default page flow controller:

To Edit the Page Flow Components
You can display/edit other source files (JSP pages or Java files) for your page flow by double clicking on their names in the Page Flow Explorer view at the left. When you open a file, Workshop for WebLogic creates an editor--a tab in the editor area where the file is open for editing.
Double clicking an action opens an editor for the page flow controller (if it is already open, its tab is brought to the top of the editor area) and positions the cursor at the method for that action.
To edit the index.jsp file:
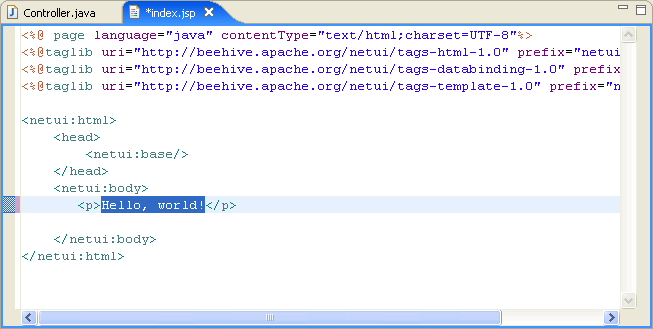
The page flow is not very interesting at this point, since all that it does is invoke the initial JSP page index.jsp. However, to verify that the page flow works, let's run it now.
Workshop for WebLogic creates a WebLogic Server as part of installation and we will use this local server for testing the application we will create in this tutorial. You must set up the server before you can test any applications.
If you are working through this tutorial for a second time, you must remove previous, duplicate projects (modules) from the server.
The first time you run an application, Workshop for WebLogic prompts you for information about the test server. To run your application (and set up a WebLogic Server):
On the editor for either index.jsp or Controller.java, right click on the editor area and from the submenu, click Run As > Run on Server. From the Run on Server dialog, click Set server as project default so that when you run your projects in the future you will not be prompted again. Note that Manually define a new server is selected since you have not yet specified the server for testing.
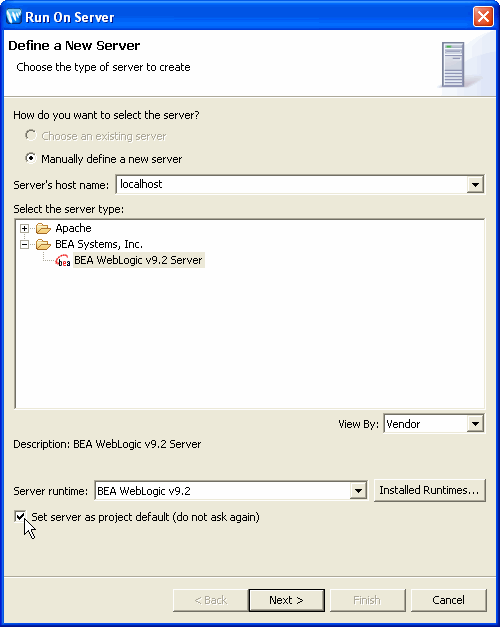
Click Next to proceed.
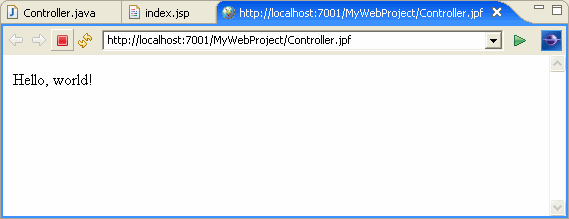
The results appear in a new tab in the editor window. Note that the URL used to launch the application is .../Controller.jpf, where the JPF (Java Page Flow) was generated from the Controller.Java source file.
Click one of the following arrows to navigate through the tutorial:
|
|
|