In this step you will add a data grid to your application. A data grid is a set of JSP tags that are designed to render data as an HTML table. This is especially useful for rendering database data: the data grid renders the database fields as columns of the table and it renders the database records as rows of the table.
The tasks in this step are:
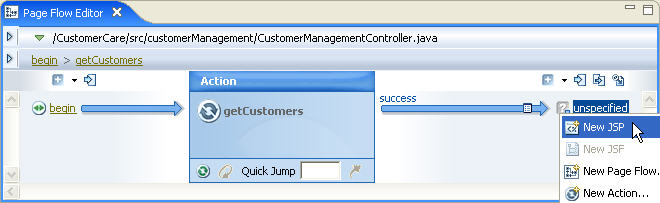
In this step you will create a new JSP page and place it within the navigation scheme of your Page Flow: when the getCustomers() action is called, the user is navigated to this JSP page.
@Jpf.Forward(name = "success", path = ""
).
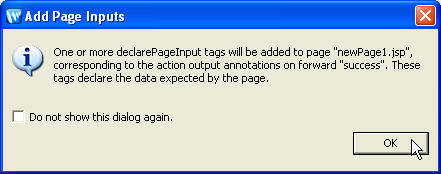
On the Add Page Input dialog, click OK.
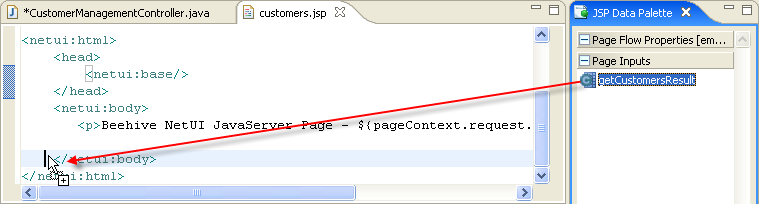
Note: Data is passed from an Action to a JSP page through
the pageInput implicit object.
A implicit object is a location within a Page Flow where you can read and
(oftentimes) write data for the purpose of passing the data around within
the Page Flow.
The pageInput implicit object is the standard
location for passing data from an Action to a JSP page.
An Action writes data to the pageInput implicit
object by declaring an action output. The following action
is declaring that it writes Customer[] data to the pageInput.getCustomerResult
implicit object.
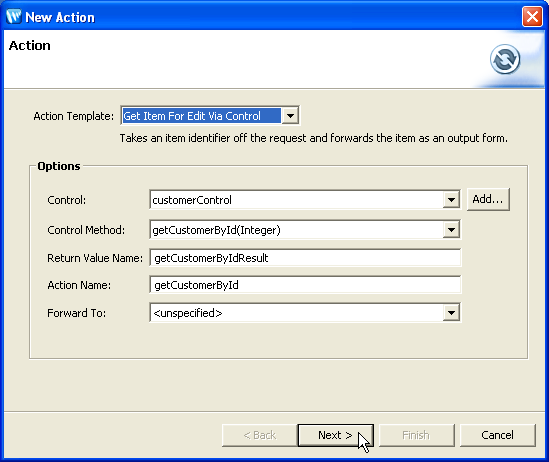
    @Jpf.Action(
                ...
                actionOutputs = { @Jpf.ActionOutput(  name="getCustomersResult", type = model.Customer[].class) }
                ...
                )
    public Forward getCustomers() {
A page input declares the data type that a JSP page expects
to receives. The following JSP page tag is declaring that it expects
Customer[] data from the pageInput.getCustomerResult
implicit object.
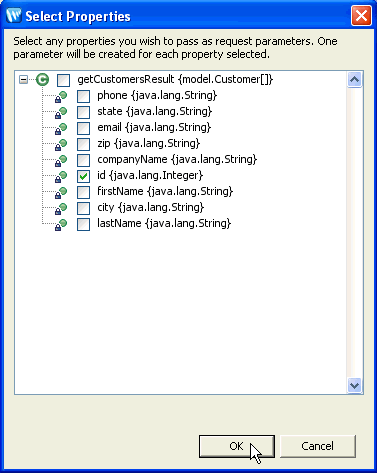
<netui-data:declarePageInput name="getCustomersResult" type="model.Customer[]" required="true" />Note that if the Action passes something other than the expected data type, then a runtime exception will be thrown.
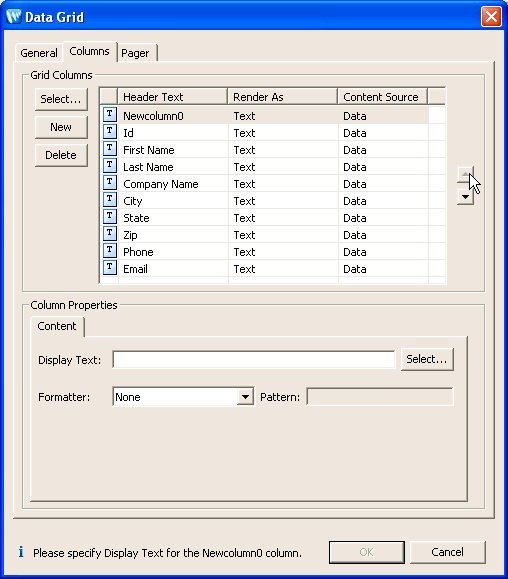
In this task, you will add a set of JSP tags (<netui-data:dataGrid>, <netui-data:rows>, etc.) that are specially designed to render Java objects as an HTML table.
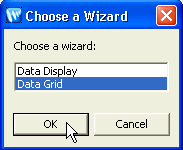
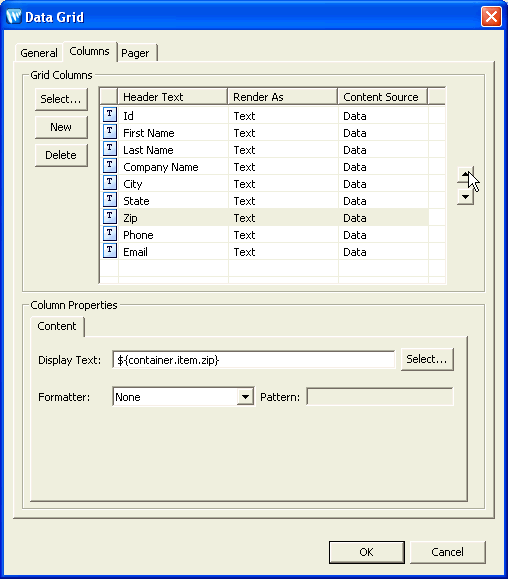
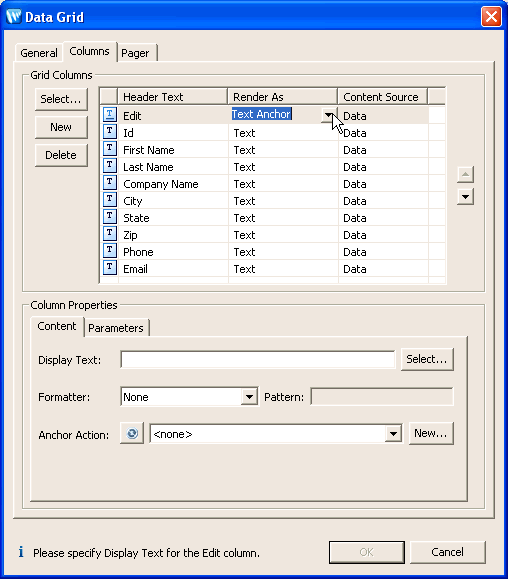
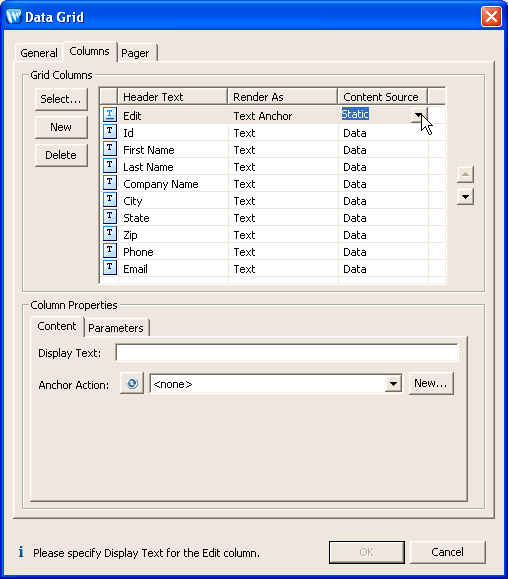
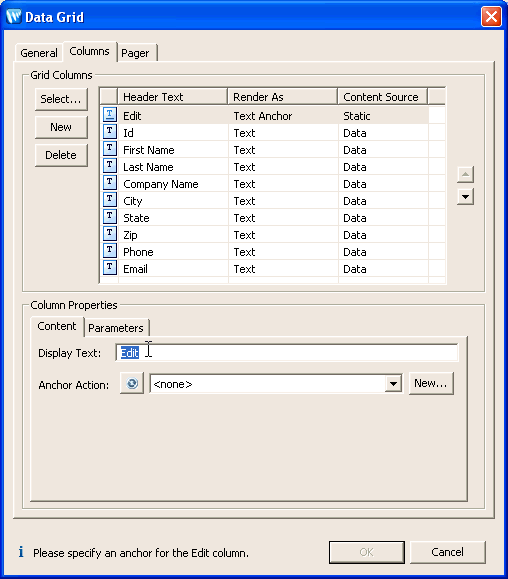
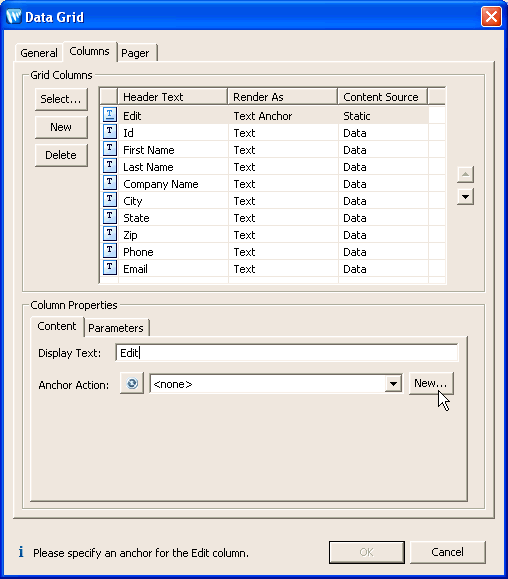
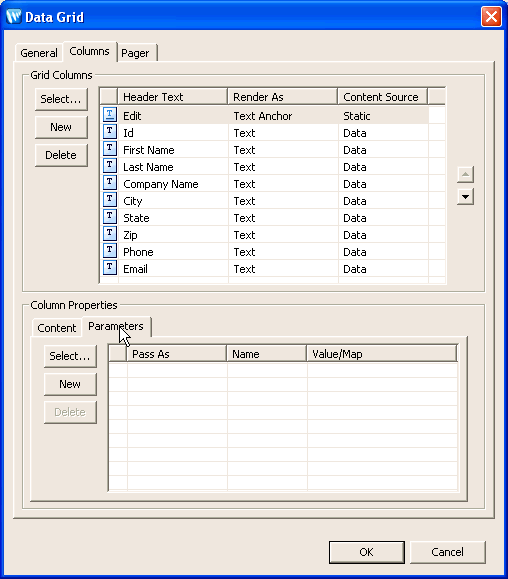
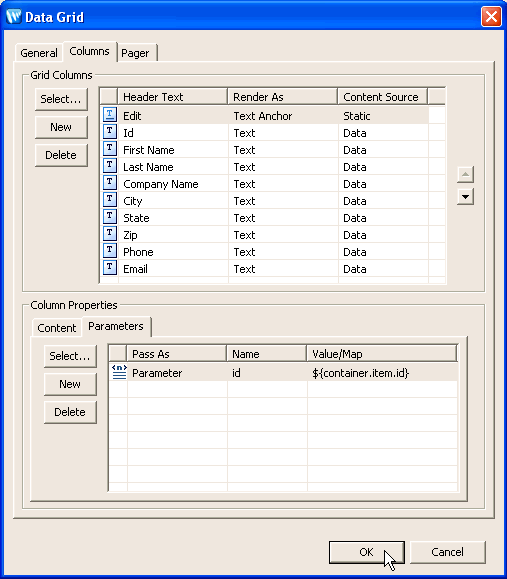
You have just added the following data grid to the customer.jsp page.
<netui-data:dataGrid name="getCustomersResultGrid"
dataSource="pageInput.getCustomersResult">
<netui-data:configurePager disableDefaultPager="true" />
<netui-data:header>
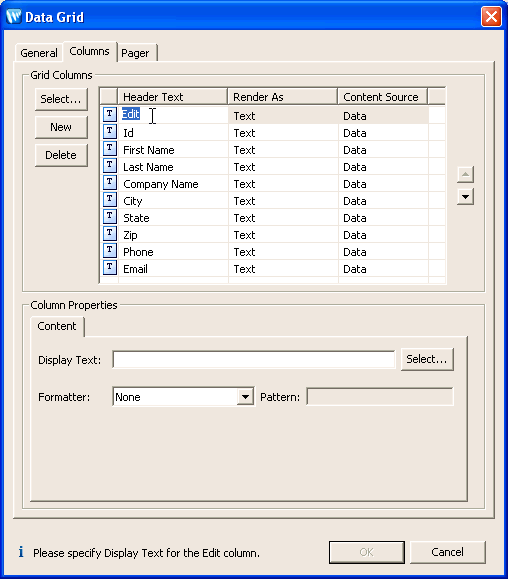
<netui-data:headerCell headerText="Edit" />
<netui-data:headerCell headerText="Id" />
<netui-data:headerCell headerText="First Name" />
<netui-data:headerCell headerText="Last Name" />
<netui-data:headerCell headerText="Company Name" />
<netui-data:headerCell headerText="City" />
<netui-data:headerCell headerText="State" />
<netui-data:headerCell headerText="Zip" />
<netui-data:headerCell headerText="Phone" />
<netui-data:headerCell headerText="Email" />
</netui-data:header>
<netui-data:rows>
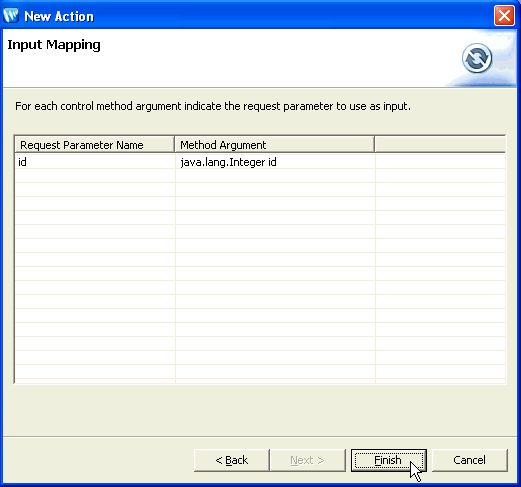
<netui-data:anchorCell value="Edit" action="getCustomerById">
<netui:parameter name="id" value="${container.item.id}" />
</netui-data:anchorCell>
<netui-data:spanCell value="${container.item.id}">
</netui-data:spanCell>
<netui-data:spanCell value="${container.item.firstName}">
</netui-data:spanCell>
<netui-data:spanCell value="${container.item.lastName}">
</netui-data:spanCell>
<netui-data:spanCell value="${container.item.companyName}">
</netui-data:spanCell>
<netui-data:spanCell value="${container.item.city}">
</netui-data:spanCell>
<netui-data:spanCell value="${container.item.state}">
</netui-data:spanCell>
<netui-data:spanCell value="${container.item.zip}">
</netui-data:spanCell>
<netui-data:spanCell value="${container.item.phone}">
</netui-data:spanCell>
<netui-data:spanCell value="${container.item.email}">
</netui-data:spanCell>
</netui-data:rows>
</netui-data:dataGrid>
None.
Click one of the following arrows to navigate through the tutorial:
|
|
|