As you develop a web service, you can typically test it directly by using the Test Client. In some cases, you will need to test indirectly by creating a separate web service that acts as a client for testing.
The Test Client is included with Workshop for WebLogic Update (in a ZIP file), but not installed. Use the following instructions to install it.
BEA_HOME\workshop92\workshop4WP\eclipse\features\com.bea.wlw.workshop_9.2.1.0\archives\wlstestclient.zip
The Test Client provides a user interface through which you can test web service operations with parameter values you choose. With the Test Client you can:
Note: You can also launch the Test Client without using the IDE.
For an example of using the Test Client, see Web Service Tutorial: Step 4: Test the Web Service.
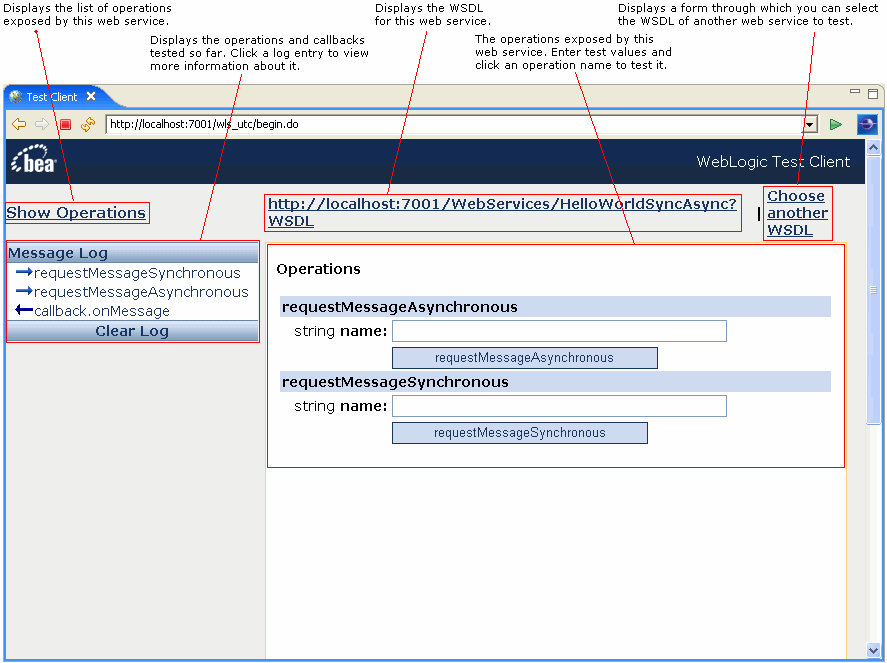
When you test web services with Workshop for WebLogic, you follow simple steps that launch the Test Client with a visual interface for invoking the web service's operations. Briefly, these steps are:
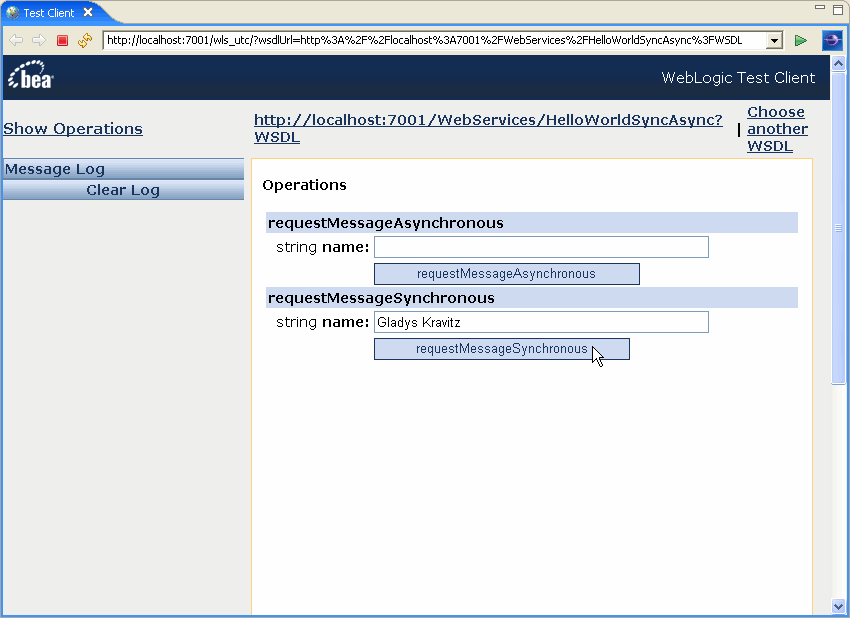
When the Test Client is displayed, you choose an operation to test by clicking the button labeled with the operation's name. If the operation has parameters, the Test Client provides boxes for you to enter the values to test with.
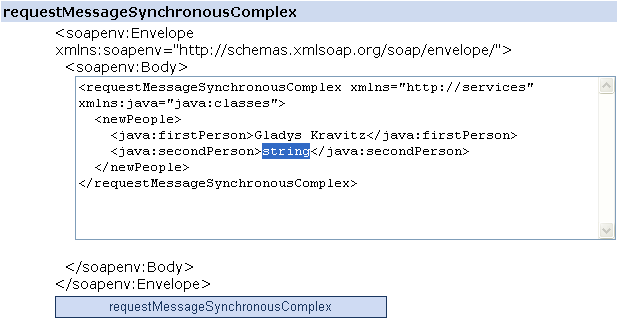
When an operation includes complex types as parameters, the Test Client will display an XML template with placeholders for your test values. For example, the following illustration shows a template in which "Gladys Kravitz" has been entered for one String placeholder and the other placeholder is about to be replaced with a test value.
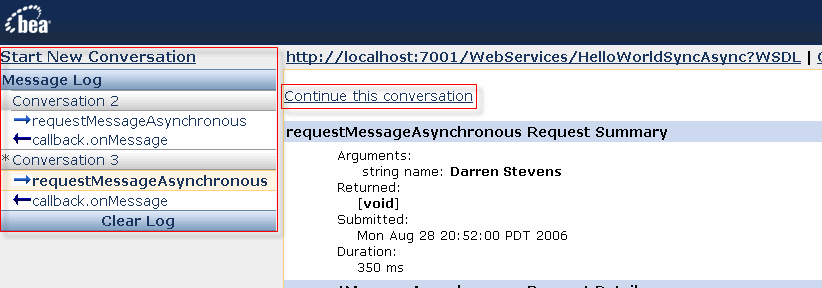
The Test Client provides special links through which you can test conversational web services.
When testing a conversational web service, the Test Client will only display the operations that are valid in the current phase of the conversation. In other words, when you begin testing, only START methods show. You click the Continue this conversation (or the conversation's log heading — such as "Conversation 3" in the following illustration) link to display the list of operations after you invoke a START method — then only CONTINUE and FINISH methods are displayed.
Note that the message log groups the operations invoked according to the conversation in which they were tested with each message shown chronologically within the conversation.
Click Start New Conversation to display the list of operations so that you can choose one and start a new conversation.
When you execute an operation, the Test Client refreshes to display information about the message exchanged by the operation. The user interface provides a summary of message values as well as the message XML itself. This information is provided for both operation messages and callback messages. When an exception occurs, a fault message is displayed.
Notice that in the message XML, all but the most important parts of the message payload are displayed in grey.
After you have executed a web service operation, the Test Client displays information about messages related to the operation. The request summary provides a shorthand version of the message's contents. It gives parameter and return values (if any), along with time stamp information.
Each test of a web service operation will have its own entry in the Message Log list. In this way you can compare tests that use different values.
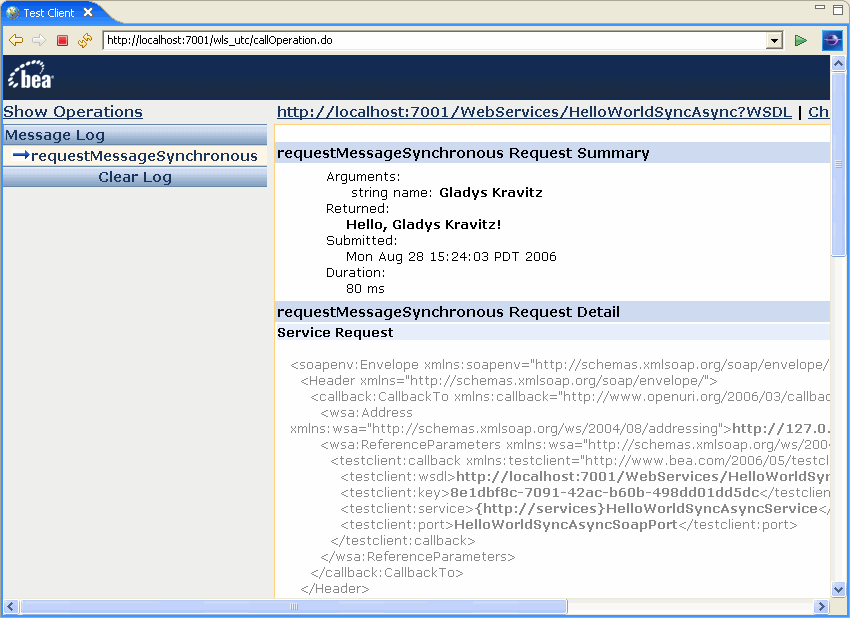
Beneath the request summary the message XML is displayed, as shown in the following image. Messages for both the operation's request and its return value are displayed.

If your web service sends a callback, you can view the results of the callback's execution by clicking its name in the Message Log list. Note that because the callback log entry won't show up until after the callback executes, you might need to refresh the Test Client after an interval to get the entry (you can click the Test Client's Refresh link).
As with operation messages, the Test Client displays callback message data as a summary as well as the message XML. The callback request message will describe the data sent to your web service by the callback.

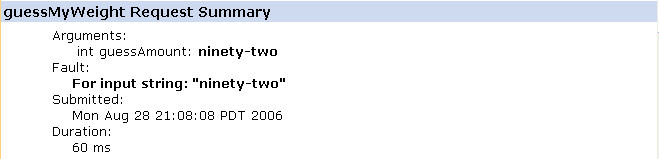
When testing the web service generates a fault or exception, the Test Client displays the resulting message. Note in the following summary example that a fault has been noted. Here, a string was provided for the operation's argument rather than an int.
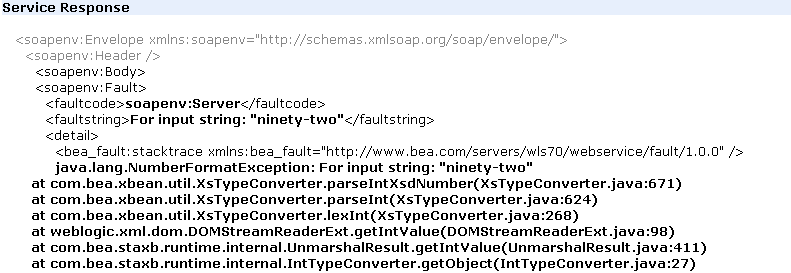
The message XML below is also displayed.
You can view the WSDL file for the web service you're testing by clicking the WSDL URL provided at the top of the Test Client window.

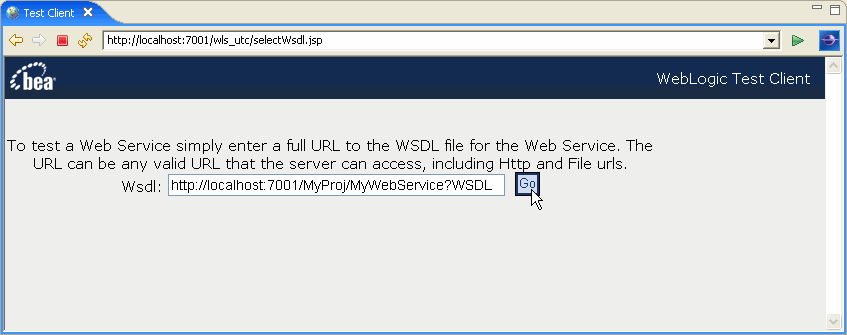
You can test another web service without closing the Test Client by clicking the Choose Another WSDL link at the top of the Test Client window. The Test Client will display a page with a box where you enter the WSDL URL, then click Go to display the test form for that web service.
You can use the Test Client outside the IDE by launching the client through a web browser.
Some web services can not be tested standalone with the Test Client. In these cases, you will need to create a separate web service to act as a client of the main web service for the purpose of testing. You will need to test in this "indirect" way if the web service you want to test:
You can test it by setting up a service control and a client web service for that control. The following gives the basic steps for setting up a service control and control client. Note that you do not need to create a separate web service client for every testing scenario.
When debugging a transactional web service, you should consider increasing the transaction timeout period in order to compensate for delays caused by the debugger. The default timeout is 30 seconds, which may be too short in some debugging situations, especially when the web service is conversational.
To increase the timeout period, use the timeout attribute on the @weblogic.jws.Transactional annotation:
    @WebService
    @Transactional(value=true, timeout=600) // Increase the timeout period to 600 seconds/10 minutes.
    public class TransactionalService implements Serializable {
        ...
    }