

|
A Message Path is used to interrupt an executing process on delivery of a message from either a client or a control. This allows the process to halt the current stream of execution and take alternate actions. You can have as many message paths as you like in your business process.
A Message path can be associated with a node that can receive messages. For example, a client request node, a control receive node, or a client request with return node.
| Note: | Message paths are not supported on the following individual nodes: Perform, Client Response, Control Send, and Control Send with Return. |
A Message Path can contain a Client Request or Control Receive node at which it receives the message. For the case in which an On Message path is specified for the process (that is, specified at the Start node) the first node on the path can be a Client Request with Return node.
This section contains the following topics:
You can associate a message path with individual nodes in your business process, with groups of nodes, or with the whole process (global). You create a global message path by adding a message path to the start node of your process.
This section contains the following topics:
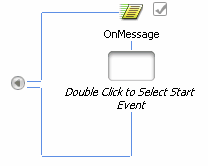
A message path is added to your node or group of nodes and is displayed as shown in Figure 16-1.
You can rename the path anything you like by double-clicking OnMessage and entering the new name. You can also change the name in the name field of the JPD Configuration pane.
| Note: | This option is only available when a Message Path is added to a Start node of a business process. |
The node you selected is added as the starting event to your message path. To configure your starting node see, step 6
The related properties are displayed in the JPD Configuration view. If the JPD Configuration view is not visible in Oracle Workshop for WebLogic, choose Window > Show View > Other > General > JPD Configuration from the Oracle Workshop for WebLogic menu bar.
| Note: | The default Process view displays only the Properties pane. The JPD Configuration view and the Properties pane can not be used together in the Process perspective. |
| Note: | To modify values in the JPD Configuration pane, you need to first close the Properties pane and then open the JPD Configuration pane and reload the JPD. To return to the Properties pane, close the JPD Configuration pane, open the Properties pane and reload the JPD. |
skip—Skip the node or group with which the message path is associated. That is, resume execution of the process at the node following the node or group for which the path is defined.
resume—Resume execution of the process at the node that was executing when the message was received. The process state returns to what it was before the message path executed and the message port is still active.
exclusive— Blocks process execution until the handler completes.
afterExecute path is taken. When you create message path, the following icon appears beside a node (or group of nodes) in the Design view to indicate that an exception path is activated for the specified node:

|
You can collapse the view of any message path (or exception handler or timeout path) by clicking the grey arrow of the message path icon. The following figure shows the icon associated with your node to indicate a collapsed path.
| WARNING: | Deleting a path deletes any business process nodes you defined on that path. When you attempt to delete a path, a dialog box displays a warning message that you must acknowledge before proceeding with the deletion. |
Grouping Nodes in Your Business Process
Writing Custom Java Code in Perform Nodes


|