Object-Relational Mappings: Editing JPA Entities
This document describes the following:
1. Using an Entity Diagram Editor
OEPE provides graphical interfaces for viewing entity relationship within a JPA project.Using the Entity Diagram Editor, you can view and modify relationships between entities, get easy access to the entity source code, and create additional object-relational mappings. Note that the editor lets you edit properties of both entities and their fields. You can also edit the persistence.xml file that describes the persistence context.
To open the editor, right-click your project in the Project Explorer and select JPA > Show in Entity Editor from the drop-down menu, as Figure 1 shows. This will open the graphical entity editor shown in Figure 2.
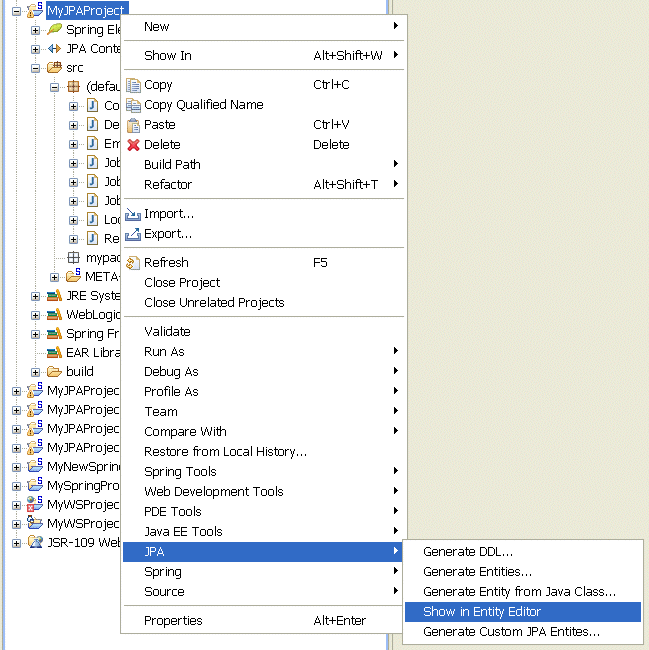
Figure 1. Show in Entity Editor Menu
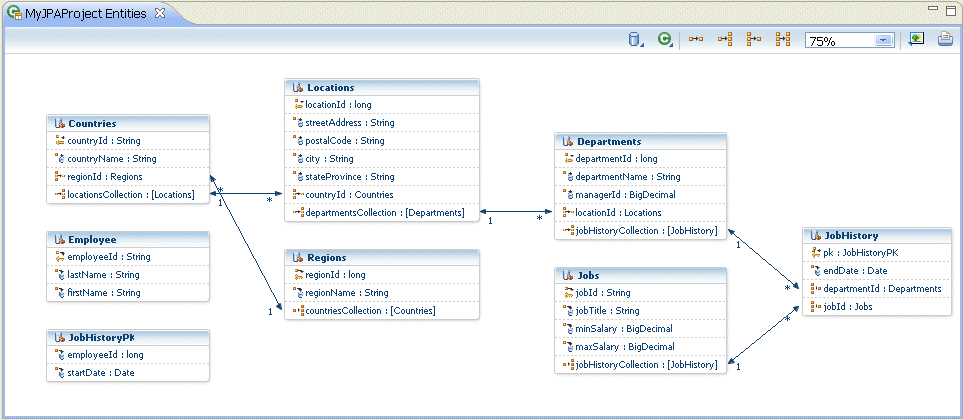
Figure 2. Entity
Diagram Editor
Alternatively, you can open the editor from your project's JPA Content > persistence.xml folder by expanding the persistence unit and selecting a specific entity. In this case, the entity from which you launched the editor, will appear selected in the diagram.
The entity editor allows you to do the following:
- View entity properties
- Edit entity properties and field properties
- Filter the view of relationships
- Create new entities
- Perform other actions
To view entity properties in JPA Details view, select an entity in the editor by clicking on the entity name, as Figure 3 shows.
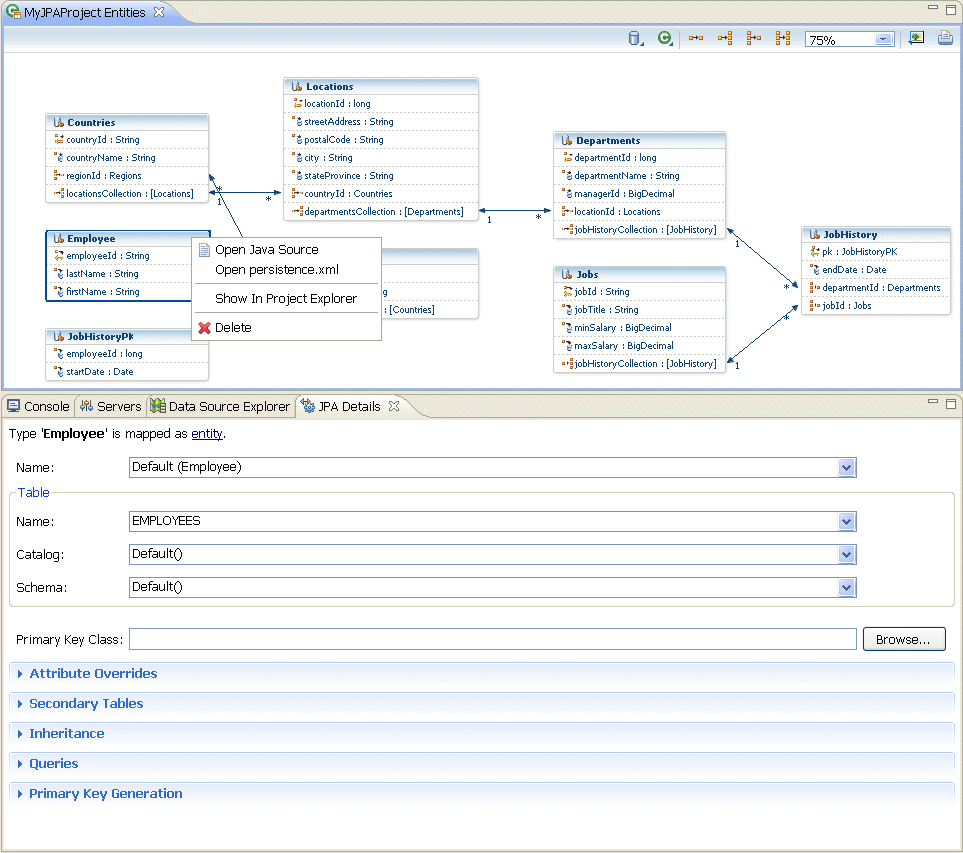
Figure 3. Entity Properties in JPA Details View
By right-clicking the entity name in the editor and making an appropriate selection from the drop-down menu shown in Figure 3, you can view the following:
- the entity source code;
- your project's
persistence.xmlfile; - the entity selected in the Project Explorer.
1.2 Editing Entity Properties and Field Properties
Using the JPA Details view, you can change the following entity properties:- the entity name (see Section 8.1 "Entity" of the JPA Specification);
- the database table with which the entity interacts (see Section 9.1.1 "Table Annotation" of the JPA Specification);
- the primary key class (see @IdClass);
- overriding of attributes (see @AttributeOverride and @AttributeOverrides);
- secondary tables with which the entity interacts (see Section 9.1.2 "SecondaryTable Annotation" of the JPA Specification);
- the inheritance properties (see @Inheritance), including the discriminator column (see @DiscriminatorColumn), and the primary key join columns (see Section 9.1.32 "PrimaryKeyJoinColumn Annotation" of the JPA Specification);
- named and native queries (see Section 8.3.1 "NamedQuery Annotation" and 8.3.2 "NamedNativeQuery Annotation" of the JPA Specification), as well as query hints (
javax.persistence.QueryHint); - the primary key generation (see @TableGenerator and @SequenceGenerator);
The changes that you make in the JPA Details view are reflected in the entity's source code. The example in Figure 4 shows the source code of an unchanged Employee entity.
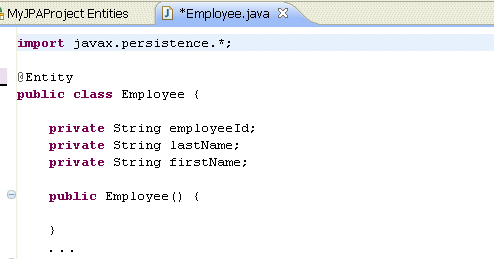
Figure 4. Unmodified Employee Class
Figure 5 and Figure 6 show the modified Employee entity properties in the JPA Details view and source code view respectively.
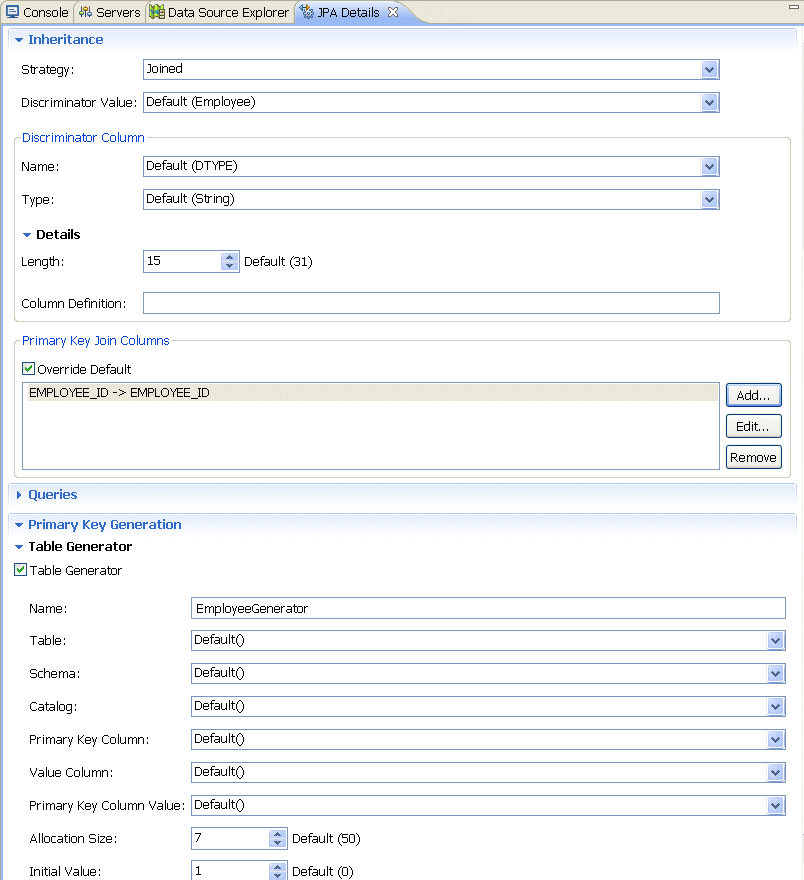
Figure 5. Modified Employee Entity in JPA Details View
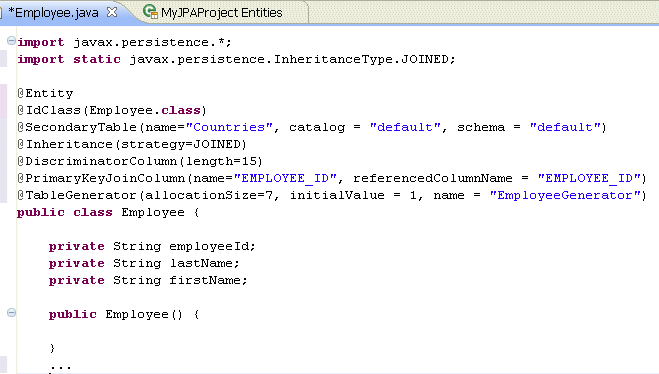
Figure 6. Modified Employee Class
The JPA Details view allows you to modify entity field properties. To do so, select a field in the editor, and then make changes in the JPA Details view, as Figure 7 shows.
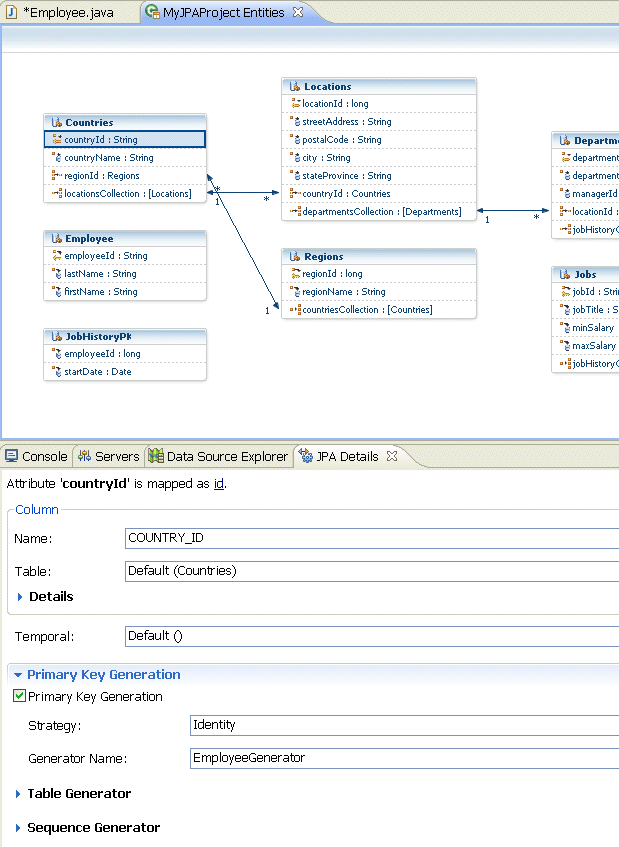
Figure 7. Modifying Entity Field Properties
Once again, the changes are reflected in the source code of this particular entity (Countries), as Figure 8 shows.
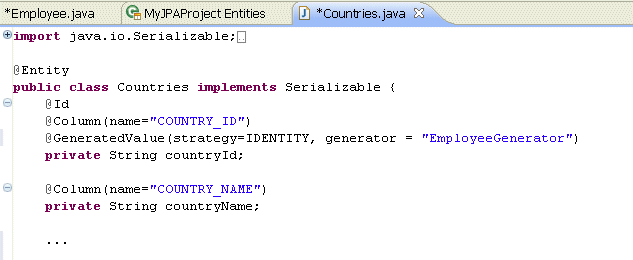
Figure 8. Modified Countries Class
For more information on various types of properties that you can modify for each entity, field, and mapping, see the following:
1.3 Filtering the View of Relationships
OEPE Entity Diagram Editor lets you hide relationships in order to reduce the number of relationship lines displayed in the editor. This can be useful when you have a complex set of relationships between many entities. To hide specific relationships, use one of the following options:- Click one of the following icons on the editor menu:
- Right-click on the editor display area and select one of the following from the drop-down menu:
- Hide Relationship > One to One
- Hide Relationship > One to Many
- Hide Relationship > Many to One
- Hide Relationship > Many to Many
If you compare the entity editor diagrams shown in Figure 3 and Figure 9, you will notice that Figure 9 displays the entity editor with one-to-many relationships hidden from view.
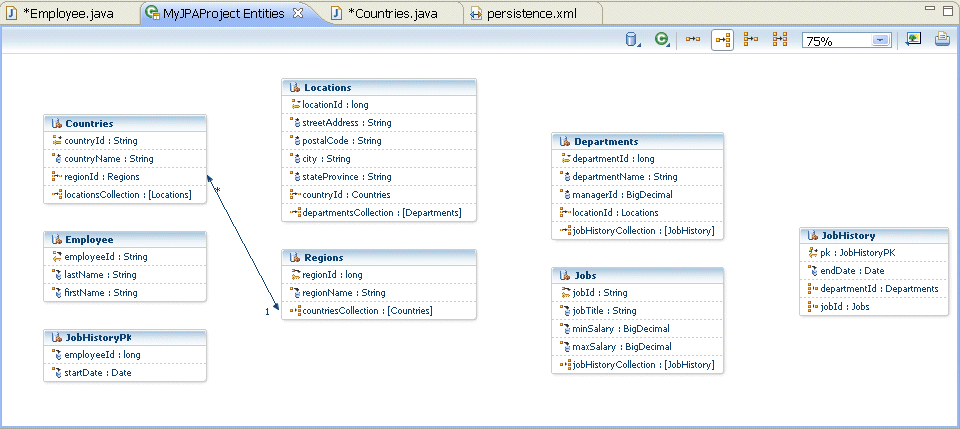
Figure 9. Hiding One-to-Many Relationships on the Entity Editor
For more information on mapping relationships, see the following:
You can create new entity mappings by either clicking the icons on the editor menu (shown in Figure 10), or right-clicking on the editor display area and selecting either Add Entity from Database Table or Add Entity from Java Class from the drop-down menu.
Clicking the icons or selecting the options from the menu will launch OEPE wizards that generate entity mappings. For more information on using the wizards, see the following:
Once new entities are added, the entity editor will be refreshed and you will be able to see the new entities in the diagram.
1.5 Performing Other Actions in the Entity Diagram Editor
In addition to viewing and editing entities, OEPE Entity Diagram Editor allows you to do the following:- Delete an entity by right-clicking the entity name and selecting Delete from the drop-down menu.
- Select entites, fields, and relationships by clicking on their representations.
- Highlight fields and relationships by mousing over entites, fields, or relationships.
- Open Java source code for an entity by right-clicking the entity and selecting Open Java Source from the drop-down menu.
- Open the project's
persistence.xmlfile by right-clicking the entity and selecting Open persistence.xml from the drop-down menu. - Highlight an entity in the Project Explorer by right-clicking the entity and selecting Show in Project Explorer from the drop-down menu.
- Display the tool-tip text by mousing over the table header or column.
- Zoom in and out of the display by using either a combo box located on the editor menu, or a menu that pops up upon the right click.
- Export the entity diagram to the image by clicking on the corresponding icon located on the editor menu, or a menu that pops up upon the right click.
- Print the entity diagram by clicking on the corresponding icon located on the editor menu, or a menu that pops up upon the right click.
EclipseLink JPA Reference
JPA Specification
Getting Started With the Oracle Database Plugin for Eclipse
Configuring a Persistence Provider for JPA Projects
Introduction to EclipseLink JPA


