Web Services Development: Generating Client Code
This document describes the following:
1. Generating Client Code From a WSDL File
Using OEPE, you can generate the client code for the following types of projects:- Web service project
- Dynamic Web project
- EJB project
To generate the client code for your Web service, do the following:
- Create new, or obtain an existing WSDL file for your target Web service project.
For more information, see the following: - Create another Web service project, which will be your client project.
- Copy the WSDL file (from step 1) located in the
WebContentfolder of your target Web service into theWebContentfolder of your client project (from step 2). - Generate the client code as follows:
- In the Project Explorer, right-click your client project's WSDL file, and then select WebLogic Web Services > Generate Web Service Client from the drop-down menu, as Figure 1 shows. This will open the New Web Service Client dialog that Figure 2 shows.
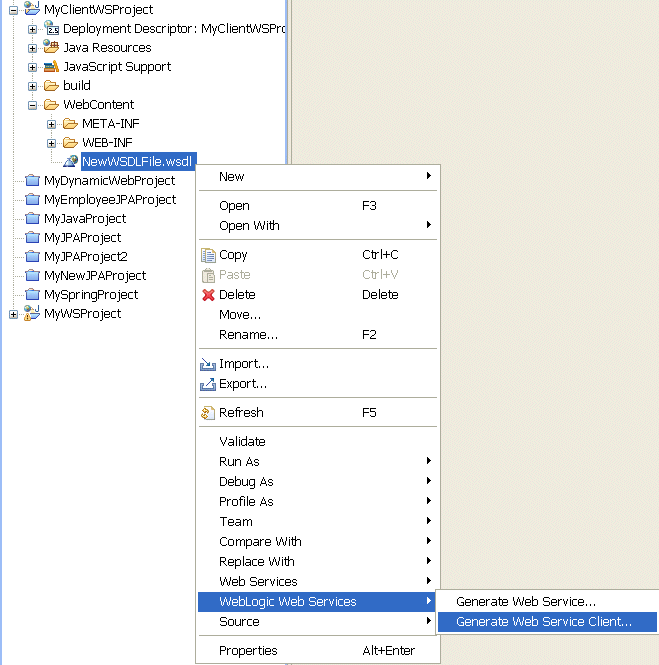
Figure 1. Create Web Service Client
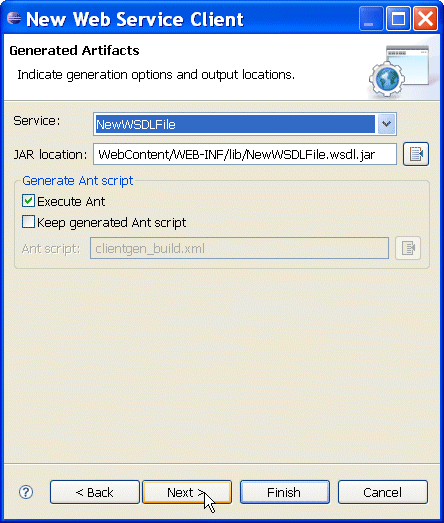
Figure 2. New Web Service Client Wizard - Generated Artifacts - On the New Web Service Client dialog, specify the service name, the output location of the generated JAR file, as well as Ant script generation options, and then click Next.
- On the next New Web Service Client > Customization Options screen, shown in Figure 3, you may choose to specify additional options, and then click Finish.
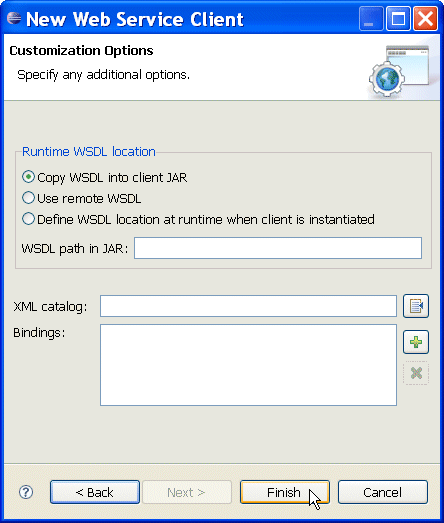
Figure 3. New Web Service Client Wizard - Customization Options
- In the Project Explorer, right-click your client project's WSDL file, and then select WebLogic Web Services > Generate Web Service Client from the drop-down menu, as Figure 1 shows. This will open the New Web Service Client dialog that Figure 2 shows.
Upon completion of the preceding procedure, Eclipse does the following:
- Creates the client JAR file in your client Web service project's
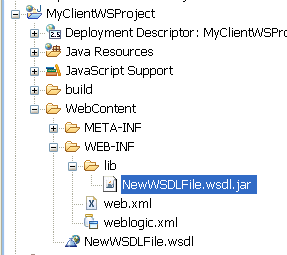
WebConent/WEB-INFdirectory, as Figure 4 shows.
- Modifies properties of your target Web service project, as necessary (sets the project facet, classpath, and so on).
If you deploy and run both your target and client Web service projects, your generated client code will successfully call your target Web service.
Note that nondeployment-based applications, such as Java applications, may require additional manual configuration.
You can reference the client from the target Web service using the template-based code snippets.
2.1 Alternative Ways to Generate the Client Code
There are alternative entry points to the client code generation wizard. Instead of right-clicking your client project's WSDL file, and then selecting WebLogic Web Services > Generate Web Service Client from the drop-down menu, shown in Figure 1, you may choose to right-click the Project Explorer area, select New > Other > WebLogic Web Services > Web Service Client, and then click Next. This will open the ClientGen Wizard > WSDL File dialog, as Figure 5 shows.
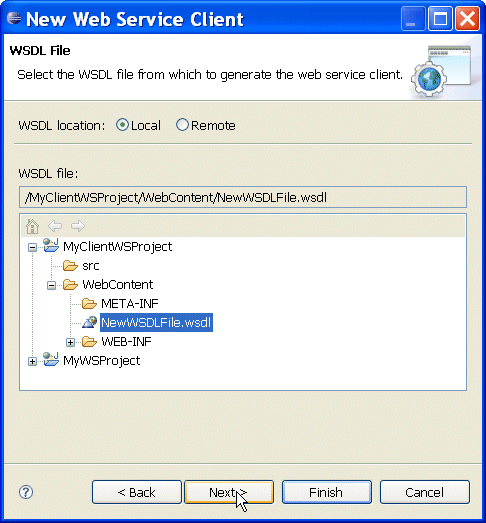
Figure 5. New Web Service Client Wizard - WSDL File Selection
Using this dialog, select the WSDL file from which you want to generate the Web service client indicating if this file is local or remote (in this case, enter a remote URL), and then proceed with your other settings.
2.2 Deploying Java Web Service Applications to Oracle WebLogic Server
Typically, Eclipse builds your files automatically and you can deploy your application at any time. Note that in order to deploy, you must have a successful build completed.You can start Oracle Weblogic Server in either development or production mode: in development mode, the server behaves in ways that make it easier to iteratively develop and test applications (for example, the server automatically deploys the current application in an exploded format and relaxes certain security restrictions on deployment); in production mode, WebLogic Web Service test client is not deployed. For more information, see Testing Web Services.
Application deployment consists of the following three steps:
Usually these steps are done seamlessly, by explosion of the WAR file.
When you deploy, all open projects associated with the server are deployed. To undeploy a project or prevent it from being deployed, remove it from the server. Alternatively, you can close projects by selecting Project > Close Projects from the menu. You can also specify working sets (see Eclipse help system in the Workbench User Guide) to control how many artifacts to build and deploy.
However, even though an entire application or group of projects was deployed, only the file or folder that you clicked on to trigger the deployment will display its results. When you deploy your Web service, the test client page for that Web service will run in a new tab in the editor area - you can use it to specify the parameters to an operation and make a request to that operation. The response from the operation is displayed in the same tab. If the page flow or Web service relies on other Web services to run correctly, it will still work because all components are deployed.
To deploy your Web service application, perform one of the following:
If you wish to simply publish your files to the server, you can use the Servers view by selecting Window > Show View > Servers from the main menu. Note that this view also lets you undeploy applications from the server.
After you deploy your application, the Servers view is displayed automatically.
