9 Balancing the Workload
Oracle Fail Safe Manager makes it easy to balance the workload across the nodes in the cluster using a process called planned failover. You can use planned failover to adjust the initial setup of the cluster, or to adjust the setup if the cluster environment changes.
9.1 Initial Set Up for Performing a Planned Failover
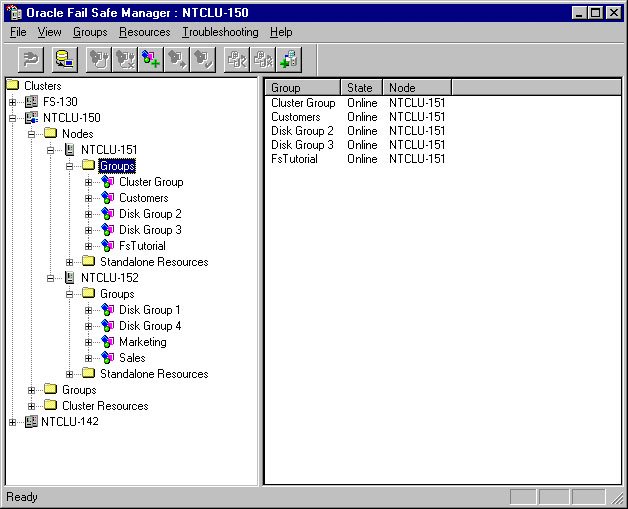
Create three groups: Sales, Marketing, and Customers. Create Sales and Marketing on one node (NTCLU-151 is used in this example); create Customers on the other node (NTCLU-152 is used in this example).
Enable failback for each group, and set the current node of each group at the top of the Preferred Owner Nodes list. See Chapter 3 for instructions on creating a group. For this example, you must not add virtual addresses to the new groups.
The following figure shows the initial configuration of the cluster:
Description of the illustration balstart.gif
Suppose that you have recently added more CPUs to NTCLU-152. Node NTCLU-152 can better handle the load of the Sales and Marketing groups, and NTCLU-151 would now be a better place for the Customers group. You can move the groups to the new, more capable system with minimal interruption in service to your users.
9.2 Moving the Sales Group
Because NTCLU-152 is the more robust system, the first step is to move Sales and Marketing groups to NTCLU-152.
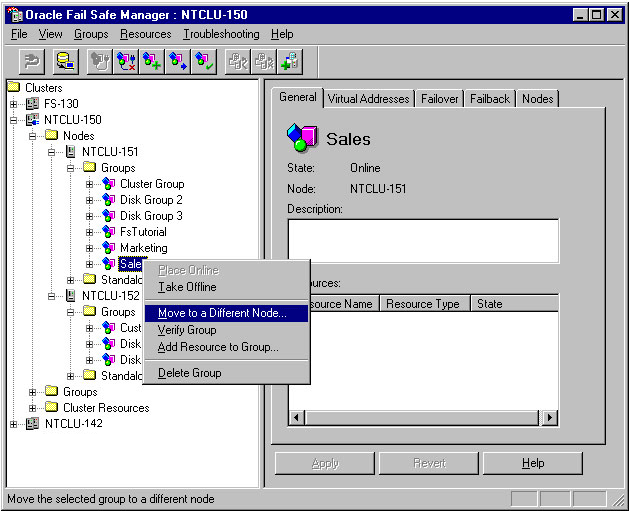
To move the Sales group from NTCLU-151 to NTCLU-152, right-click the Sales group and select Move to a Different Node. (Your node names will be different.)
9.3 Confirming the Move Group Operation
A confirmation window asks if you want to move the Sales group to NTCLU-152. Click Yes.
9.4 Finishing Moving the Group
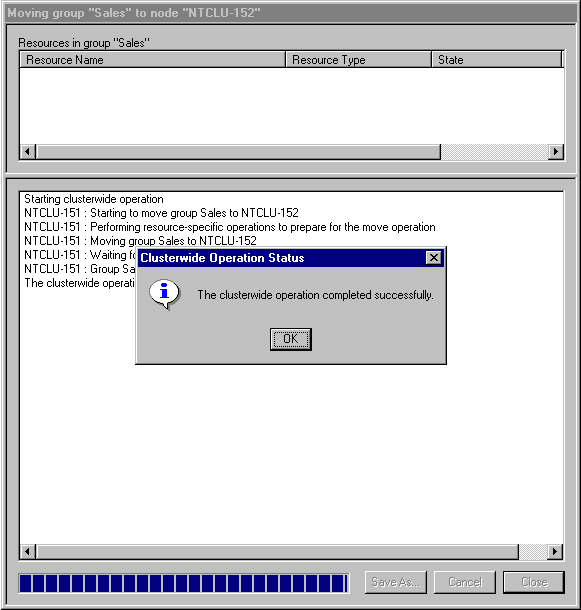
The Moving Group window displays the progress of the move operation. When the move is finished, click Yes in the Clusterwide Operation Status window, then click Close in the Moving Group window.
9.5 Moving the Marketing Group
To move the Marketing group from NTCLU-151 to NTCLU-152, right-click the Marketing group and select Move to a Different Node.
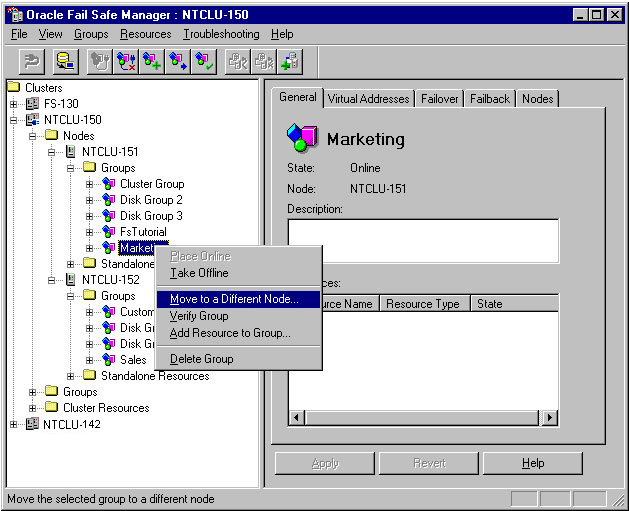
Description of the illustration balmarketing.gif
Complete the move operation as described in Section 9.3 and Section 9.4.
9.6 Moving the Customers Group
To move the Customers group from NTCLU-152 to NTCLU-151, right-click the Customers group and select Move to a Different Node.
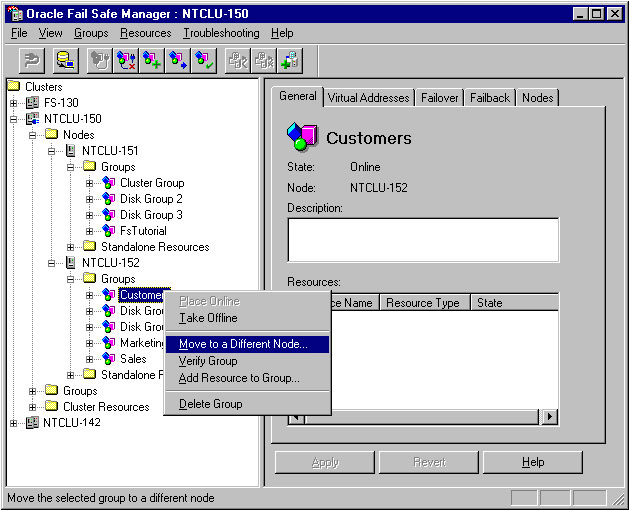
Description of the illustration balcustomers.gif
Complete the move operation as described in Section 9.3 and Section 9.4.
9.7 Checking the Preferred Owner Nodes List
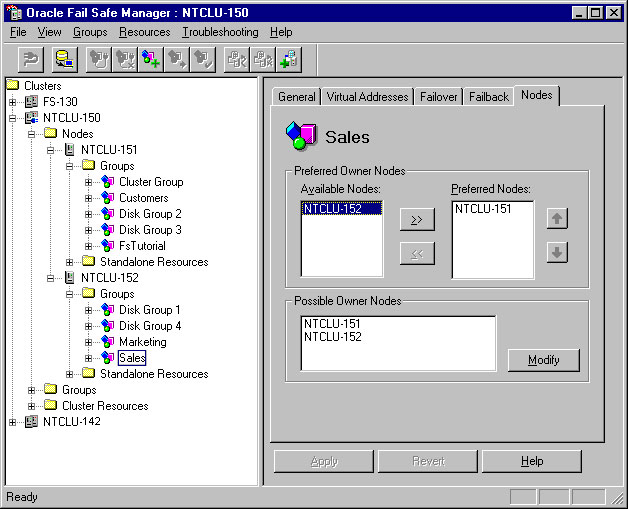
Check the Preferred Owner Nodes list. Select the Sales group from the tree view and click the Nodes tab. The data on this page indicates that NTCLU-151 is the preferred owner node. However, now that you have rearranged the configuration, you probably want NTCLU-152 to be the preferred owner node. With the current settings, if NTCLU-152 fails and the Sales group fails over to NTCLU-151, the Preferred Nodes list indicates that you prefer the Sales group to reside on NTCLU-151; failback does not occur when NTCLU-152 comes online.
9.8 Rearranging the Preferred Nodes List
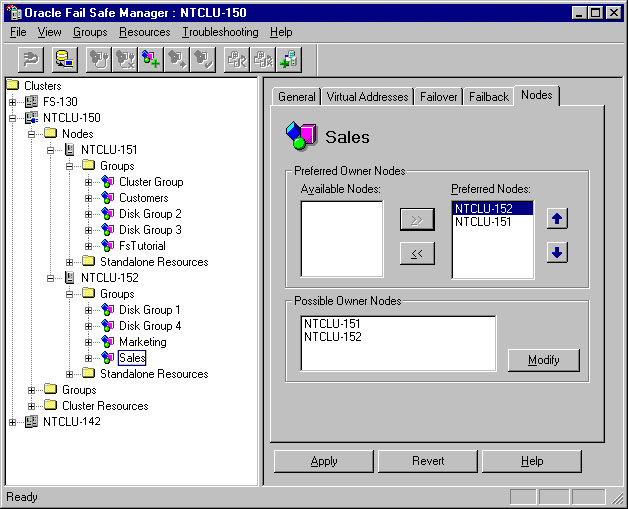
Re-arrange the Preferred Nodes list so that NTCLU-152 is first in the list and NTCLU-151 is second. Select NTCLU-152 from the Available Nodes list and click the right-arrow button, then select NTCLU-152 from the Preferred Nodes list and click the up-arrow button. The Preferred Nodes list should list NTCLU-152 first and NTCLU-151 second.
Repeat this process for Customers and Marketing, ensuring that the node on which you want each group to reside when both cluster nodes are up is first in their respective Preferred Nodes list.
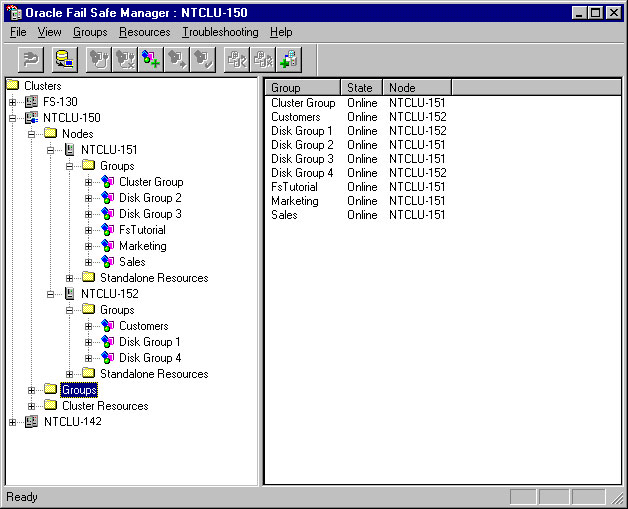
9.9 Viewing the Balanced Workload
When you finish the planned failover, the Oracle Fail Safe Manager tree view should appear similar to the following image when you expand both of the Nodes folders for NTCLU-150 and the Groups folder below each Nodes folder in the tree view, then click a Groups folders.
