3 Creating a Group
This chapter describes the steps necessary to create a group with Oracle Fail Safe Manager. Creating a group is the first step in making most resources (such as single-instance databases) highly available. In newer releases of failover clusters a group is sometimes refered to as a "service or application".
3.1 Invoking the Create Group Wizard
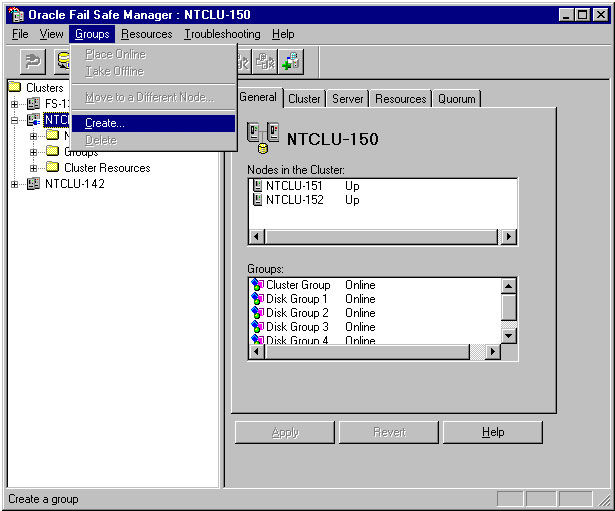
In the tree view, select the cluster on which you want to create a group. Then, on the Groups menu, select Create to open the Create Group Wizard.
3.2 Naming and Describing the Group
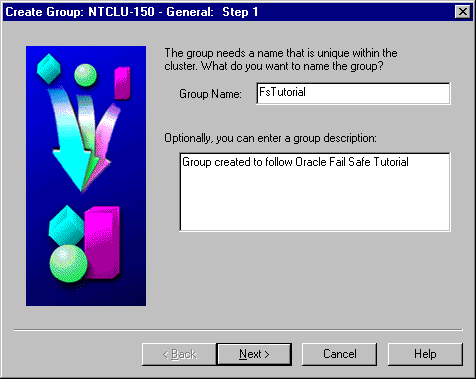
The Create Group Wizard guides you through the process of creating a group. Enter FSTutorial as the name of the group, and if you want, enter a description of the group.
3.3 Specifying the Failback Policy
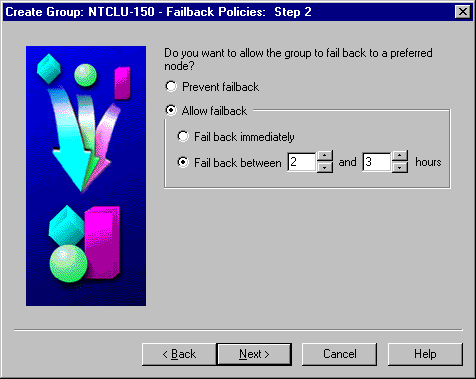
The Failback policy determines whether a group that has previously failed over is returned to the node on which you prefer it to run when that node comes back online. Select Allow failback. Then select Fail back between and enter 2 and then 3. This specifies that if a previously unavailable node comes back online, failback will be scheduled to occur between the hours of 2 a.m. and 3 a.m.
See the Oracle Fail Safe Concepts and Administration Guide for more information on the various failback policy options.
3.4 Specifying the Preferred Nodes
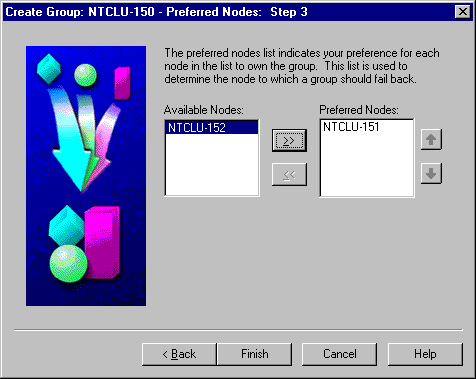
A preferred node is the node on which you want the group to run when all cluster nodes are in use. When a previously unavailable node comes back online, the cluster software reads the preferred nodes list to determine if the group should be failed back to a preferred node. The first running node in the preferred nodes list is the one to which the group fails back. If you do not specify a preferred nodes list, failback is disabled and the group never fails back.
Move a node in the Available Nodes list to the Preferred Nodes list.
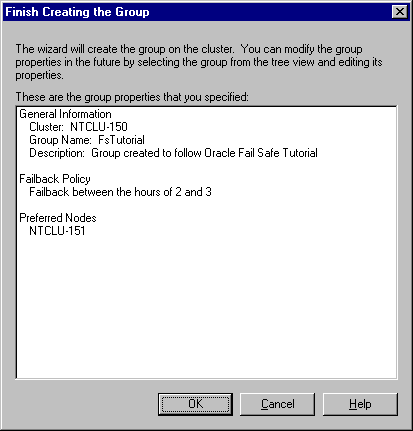
3.5 Finishing Creating a Group
Before the group is created, you have an opportunity to review the properties you have selected. If the properties are incorrect, click Cancel and then Back to make corrections. If the properties are correct, click OK, and Oracle Fail Safe creates the group.
3.6 Responding to the Virtual Address Question
After creating the group, Oracle Fail Safe asks if you want to add a virtual address to the group. When a group contains a virtual address, the group is accessible by clients at the same network address, regardless of which cluster node is hosting the group.
If you click Yes, Oracle Fail Safe opens the Add Virtual Address Wizard immediately. Typically, you would click Yes. However, for the purposes of this tutorial, click No.
In Chapter 4, the tutorial shows you how to create a virtual address as a separate step.
