4 Adding a Virtual Address to a Group
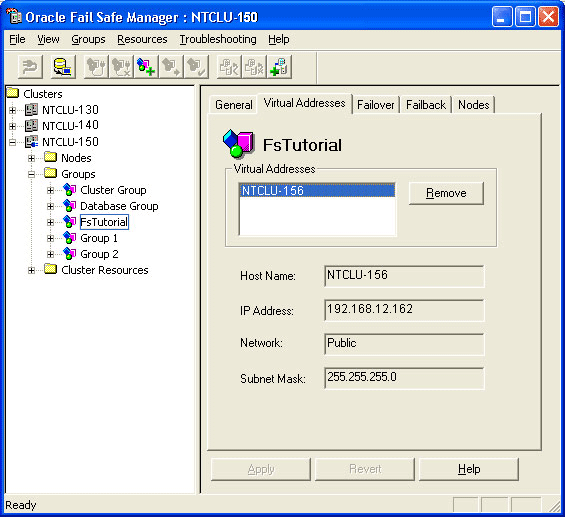
This chapter describes the steps necessary to add a virtual address to a group with Oracle Fail Safe Manager. Oracle Fail Safe Manager does not allow you to add any other resources (other than a generic service) to a group until at least one virtual address has been added to the group. Without a virtual address, clients cannot connect to resources that have been added to a group.
4.1 Opening the Add Resource to Group Wizard
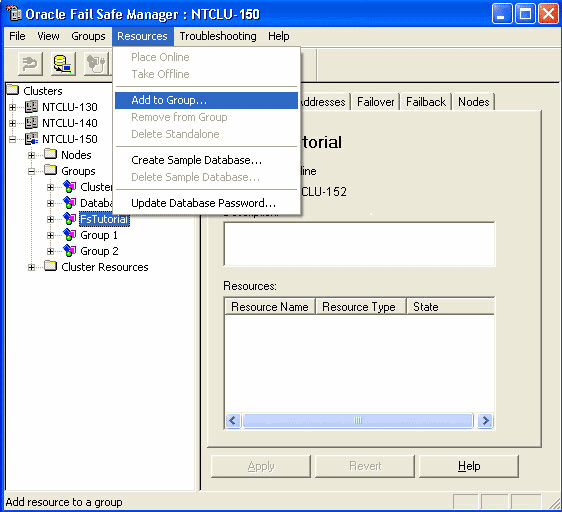
In the tree view, select the group to which you want to add a virtual address. Next, on the Resources menu, select Add to Group to open the Add Resource to Group Wizard.
4.2 Specifying the Resource Type and Group
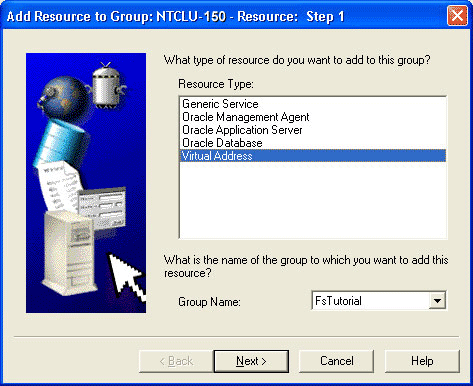
On the first page of the wizard, select the Virtual Address resource type, the FSTutorial group, and then click Next.
4.3 Describing the Network
When you add a virtual address to a group, you must define the network on which the virtual address runs. If you do not know which virtual nodes are available on your cluster, ask your cluster administrator.
Enter the data on the wizard page as follows:
-
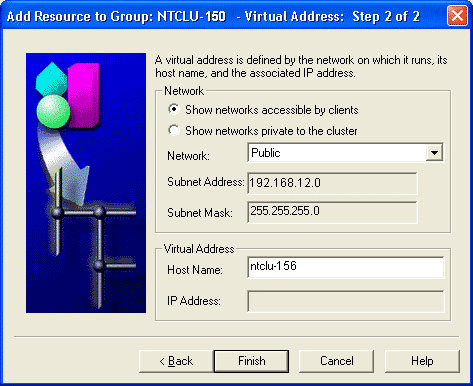
In the Network section of the page, select Show networks accessible by clients, and in the Network box, select Public.
-
In the Virtual Address section of the page, enter the host name for the virtual address that you want to create in the Host Name box (your value will be different than the one shown in the image), and then press the Tab key.
When you press the Tab key, Oracle Fail Safe resolves the host name to an IP address.
Your values for the virtual address will be different from the ones shown in the image. Also, do not use the cluster alias; in this example, the cluster alias is ntclu-150.
-
Click Finish.
4.4 Finishing Adding the Virtual Address
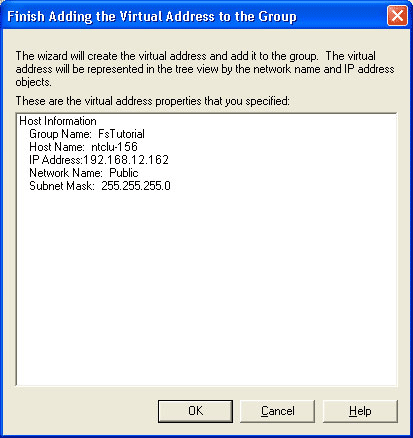
Oracle Fail Safe asks you to check the properties you have selected for the virtual address. If they are correct, click OK. Otherwise, click Cancel and then Back to change the properties.
After you add at least one virtual address to the group, you are ready to add a resource to the group (such as an Oracle single-instance database or other resource).
