5 Synchronizing Purchase Order (Contract) Data
This chapter contains the following topics:
-
Section 5.2, "Purchase Order Integration Assumptions and Constraints"
-
Section 5.4, "Importing Contract Data into Contract Management"
5.1 Understanding the Purchase Order Flow
After you synchronize projects from EnterpriseOne to Contract Management, you can then use the EnterpriseOne system to create purchase orders for that project. Purchase orders are authorizations to procure goods or services from an outside vendor. Purchase orders are the equivalent of a committed contract in Contract Management. Purchase orders are always created in the EnterpriseOne system and then synchronized to the Contract Management system. Also note that all approval processing for the purchase order is also completed in the EnterpriseOne system.
When you create a purchase order, you enter individual line items on the order. These line items include detailed information about each type of item or service that is being ordered. When you synchronize purchase order data to the Contract Management system, each individual line is sent. This enables job site personnel to receive detailed information about the goods and services that should be delivered to their job site.
Also, EnterpriseOne users must ensure that their system is set up so that changes to a purchase order line results in the creation of a new line on the purchase order, and not simply a revision to the existing purchase order line. These new lines are then handled through the change request process, which is discussed in more detail later in this guide.
Payments are made at the purchase order (committed contract) line level, and not at the header level. This table illustrates the relationship between purchase order lines, committed contract lines, and the payments that might be made for each line:
| Purchase Order in EnterpriseOne | Committed Contract in Contract Management | Payment Example |
|---|---|---|
| Purchase Order Line 1 | Committed Contract Line 1 | Full Payment |
| Purchase Order Line 2 | Committed Contract Line 2 | Full Payment |
| Purchase Order Line 3 | Committed Contract Line 3 | Partial Payment |
| Purchase Order Line 4 (resulting from a change to line 1) | Committed Contract Change Order Line 1 | Partial Payment |
| Purchase Order Line 5 (resulting from a change to line 2) | Committed Contract Change Order Line 2 | No Payment At This Time |
|
Note: Only lines with an EnterpriseOne inventory interface of A are included in the XML file, and subsequently consumed by Contract Management. |
The purchase order flow is a one-directional flow from EnterpriseOne to Contract Management. If users create committed contracts for a project in Contract Management, those contracts will not be synchronized to EnterpriseOne. Additionally, once you synchronize a purchase order from EnterpriseOne to Contract Management, you must use the change request process to revise that purchase order. If you simply change the purchase order after it has been sent to Contract Management, those changes will not be synchronized to Contract Management.
|
Note: For the purposes of this integration, a purchase order must be associated with an existing project. Therefore, you must first create a project in EnterpriseOne and synchronize project data to Contract Management before you can utilize the purchase order integration flow. |
The purchase order process begins after the project has been created and synchronized, and typically includes these steps:
-
An EnterpriseOne user enters a purchase order, which includes individual lines for each type of item or service that is ordered.
-
The purchase order data extracted from EnterpriseOne and an XML file with the data is created by running the Purchase Order Extract program (R4310CMD).
Note:
Only lines with an inventory interface of A are included in the XML file. -
The file is sent to the specified Contract Management server location using either the manual or automated method.
If you are using the automated method, the R4310CMD calls an FTP script which sends the XML file to a predefined server location where it can be consumed by the Contract Management system. If you are using the manual method, the EnterpriseOne user must manually send the file to a Contract Management user, or copy the file to a location where it can be consumed by Contract Management.
-
The user signs into the Contract Management Exchange application and imports the data into Contract Management.
The purchase orders from EnterpriseOne are now available as committed contracts in Contract Management.
See Using Contract Management Exchange, "Using Contract Management Exchange.".
-
Job-site personnel can now review the contracts so that they are aware of the goods and services that have been ordered for the project, and when those items should be delivered.
-
As goods and services are delivered to the project site, or as work that is done by vendors is completed, job-site personnel can update each line of the committed contract in Contract Management.
See Oracle Primavera Contract Management User's Guide, Managing Contracts and Purchase Orders.
5.2 Purchase Order Integration Assumptions and Constraints
This section lists the solution assumptions and constraints of the purchase order flow:
-
Each purchase order can be synchronized from EnterpriseOne to Contract Management only once. No updates to purchase orders that have previously been synchronized will be sent from EnterpriseOne to Contract Management.
-
The currency code from the company that is associated with the purchase order is used when sending data from EnterpriseOne to Contract Management.
-
The ability to split purchase order lines into multiple cost centers is not supported by this integration.
EnterpriseOne enables users to split lines on a purchase order into multiple cost centers. For this integration, cost centers are the equivalent of the project in Contract Management, and a single purchase order cannot be associated with multiple projects. Therefore, if the system encounters a purchase order that includes lines that have been split across multiple cost centers, the system skips the entire purchase order, and does not include the purchase order in the XML file that is created.
-
Only purchase order lines with an inventory interface of A are included in the integration process.
-
The integration synchronizes retainage rules at the purchase order header level, and does not send retainage rules at the line level.
5.3 Running Purchase Order Data Extract Programs
You run the Purchase Order Extract program (R4310CMD) to extract purchase order data from the EnterpriseOne system. The purchase orders must be associated with projects that have already been synchronized to Contract Management. Purchase orders are the equivalent of committed contracts in Contract Management.
This program extracts data from these EnterpriseOne tables:
-
F4310 – Purchase Order Header
-
F4311 – Purchase Order Detail
In addition to creating an XML file, this program also creates a report and updates cross reference table F4310X in the EnterpriseOne database. This table stores cross reference information between the EnterpriseOne purchase order and Contract Management committed contract.
Before you run the program, you must set the processing options to ensure that data is processed correctly. Once you have set the processing options, you access and process the program from the Contract Management Integration Workbench. If you are using FTP to transfer files, when you run the program the system generates the XML files and sends them to the specified location, where they can be consumed by the Contract Management system. If you experience errors in the file transfer process, you can manually execute the FTP script again from the workbench. Alternatively, you can manually send the files to a Contract Management user.
This section discusses how to set processing options for the Purchase Order Extract program (R4310CMD).
See Chapter 3, "Using the Contract Management Integration Workbench."
5.3.1 Setting Processing Options for the Purchase Order Extract Program (R4310CMD)
You set processing options to ensure that data is processed correctly when you run a program.
5.3.1.1 Process Tab
Set these processing options to specify how the Purchase Order Extract program processes data.
- 1. Allow re-export
-
Use this processing option to specify that the XML files will include previously exported purchase orders. Blank - Exclude previously extracted purchase orders. 1 - Re-extract previously extracted purchase orders.
- 2. Contact Who's Who Line Number
-
Enter the who's who line number for the supplier address number on the purchase order to use to retrieve a default contact name. This option will only be used if a valid address book data item is entered. Line 0 will be used by default. If a who's who record is not found in the Address Book - Who's Who table (F0111) a default contact will not be written to the XML file. "
5.3.1.2 File Transfer Tab
Set these processing options to specify how the Purchase Order Extract program transfers data.
- 1. Manual File Transfer Path Where XML File Will Be Written
-
Use this processing option to specify the file location that the system uses for storing the resulting XML file.
The name of the resulting XML file will be in the format of E1ToCMCommitmentContract_MMDDYY_hhmmss.xml. The file name is appended to the value entered in this processing option to determine the fully qualified path and name.
For example if you enter C:\B9\DV900\Export\ in this option, the resulting XML file will be written as:
C:\B9\DV900\Export\ E1ToCMCommitmentContract _MMDDYY_hhmmss.xml
For Linux and IBM i on IBM Power Systems implementations, you can use these examples:
Linux: /slot/ems3561/appmgr/CMExchange/E1toCMContract/
IBM i on IBM Power Systems: /E900SYS_9/CMExchange/E1toCMContract/
All directories specified in the path must already exist. If this processing option is left blank, the resulting XML file will be written to the B9 directory where R4310CMD is running. For example C:\B9\.
- 2. Automated File Transfer Path — Including FTP Script Name
-
Use this processing option to specify the file location and name of the FTP script on the enterprise server. Include the file extension, for example: C:\CMExchange\E1toCMContract.bat or /slot/ems1234/CMExchange/E1toCMContract.sh). This option is only used when running in automated mode. This path will also indicate where the resulting XML files are written, they will be in a subdirectory of the path indicated. The name of the resulting XML files will be in the format of E1toCMCommitmentContract_MMDDYY_hhmmss.xml All directories specified in the path must already exist.
Linux and IBM i on IBM Power Systems implementations can use these examples:
Linux: /slot/ems3561/appmgr/CMExchange/E1toCMContract.sh
IBM i on IBM Power Systems: /E900SYS_9/CMExchange/E1toCMContract_IBMi.sh')
- 3. Automated Mode
-
Use this processing option to specify whether you are running the integration in manual mode or automated mode. If you select manual mode, the system does not use FTP to transfer files between EnterpriseOne and Contract Management.
5.4 Importing Contract Data into Contract Management
After you create XML files by running data extract programs in EnterpriseOne and you send the files to the defined Contract Management location, you can then import those files into Contract Management, where the data is added to the database and made available for use.
5.4.1 Importing Contract Data into Contract Management
To import contract (purchase order) data into Contract Management, complete the following steps. Your system administrator can assist you with determining which values to use during this task.
-
Access the Contract Management Exchange application.
-
Complete these fields and then click Next:
-
CM Server Host
-
CM Server Port
-
CM Service Type
-
-
Enter a valid user name and password for the Contract Management system and then click Next.
Note:
The user that you log in as must have access and permission to insert and update data into the Contract Management database. If the user credentials that are entered do not have sufficient access, the system will produce an error, and the user will not be able to continue. -
Select the Contract Management database you want to import data into and then click Next.
-
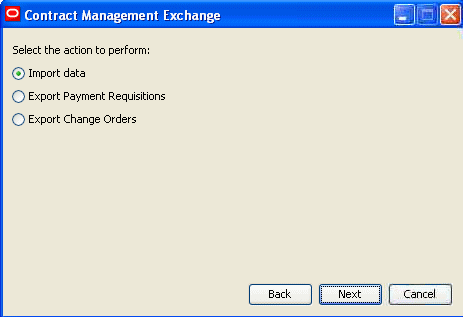
Select the Import Data option and then click Next.
-
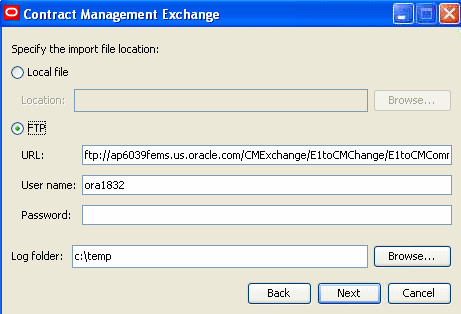
Specify the location of the file that you want to import and then click Next.
Figure 5-2 Specify the import file location

Description of "Figure 5-2 Specify the import file location"
-
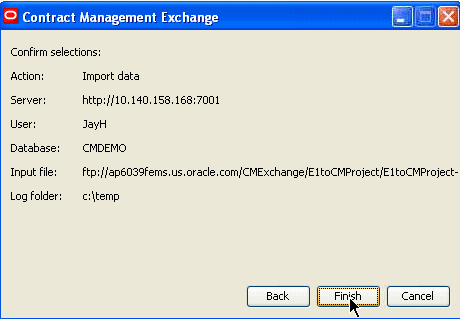
Confirm your selections and then click Finish.
The system imports the selected data and produces a log file for review.
|
Note: You can import only one file at a time. If you created multiple files from the EnterpriseOne system, you must run this process multiple times for each file that you want to import into the Contract Management system. |

