| Oracle® Fusion Middleware User's Guide for Oracle WebCenter 11g Release 1 (11.1.1) E10149-02 |
|
 Previous |
 Next |
| Oracle® Fusion Middleware User's Guide for Oracle WebCenter 11g Release 1 (11.1.1) E10149-02 |
|
 Previous |
 Next |
The Worklist service provides access to all the worklist items that require your attention. These worklist items are displayed on your application page, where you can view and act on all items in one place. These worklist items may be queried from any of the BPEL servers configured in your application.
This chapter contains the following sections:
Audience
This chapter is intended for users interested in understanding and using the features of the Worklist service to track their tasks, notifications, and alerts. Much of this information also applies to custom WebCenter applications, though it is written with WebCenter Spaces users in mind. For information about custom WebCenter applications, see "Integrating the Worklist Service" in Oracle Fusion Middleware Developer's Guide for Oracle WebCenter.
The WebCenter Spaces application administrator has the authority to expose or hide task flows from a particular service. Tasks discussed in this chapter are not available to you if the relevant service is hidden.
|
Note: For information about WebCenter Spaces seeded user roles, see "Managing Users and Roles for WebCenter Spaces" in Oracle Fusion Middleware Administrator's Guide for Oracle WebCenter. |
The Worklist service provides access to BPEL Worklist items that are a result of a task invoked as part of a BPEL Workflow process, or are a result of a message being sent to the Worklist channel on the Oracle User Messaging Service.
The Worklist task flow (Figure 28-1) is available in both WebCenter Spaces and custom WebCenter applications. In WebCenter Spaces applications, the Worklist task flow can be accessed from the Worklist pane in the Sidebar.
The Worklist task flow provides a fast and easy way to view and respond to messages, alerts, and notifications from the automated processes in place in your organization. You can click an item in the Worklist task flow to view details in a separate window (Figure 28-2).
For example, in WebCenter Spaces, if you are selected as an approver for group space membership, every time a user applies to become a member of the group space a notification is sent to your Worklist. This is just one example of the types of notifications and requests that can be posted on your Worklist.
One Worklist item might be a request for group space membership. Response to such a request would be to approve or reject it. Another Worklist item might be a notice of acceptance as a member of a group space. Response to such a notification would be to acknowledge that you have received it. These are two small examples of a much wider range of possible messages, alerts, notifications, and responses.
The Worklist only shows items from the Oracle SOA Suite BPEL Servers. Some Worklist items are kicked off by events that are associated with an externally defined workflow. A workflow maps the route an item follows after an event kicks off. For example, a workflow might define the way a project assignment is routed, such as from administrator, to moderator, and then to participant. Additionally, it specifies what happens (if anything) when the assignee responds (such as with an Acknowledge). This type of workflow is enabled in a Workflow server that comes with Oracle SOA Suite. The definition of these workflows is an administrative or development task.
The WebCenter Spaces application also has internally-defined workflows. An example of an internally-defined workflow includes the process of subscribing to a WebCenter Spaces group space. A user requests a subscription. The request appears on the group space moderator's Worklist. If the group space has multiple moderators, the first response to the Worklist item is to claim ownership of the request, so that only one moderator responds to the request itself.
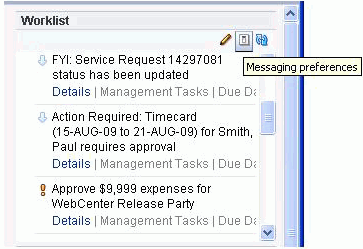
Messages, alerts, and notifications might also come from the User Messaging Service. The Worklist task flow includes a control for accessing messaging preferences on this server (Figure 28-3). Clicking the Messaging preferences icon displays the User Messaging Preferences page in which you can specify the channels over which to receive User Messaging Service messages and define messaging filters.
Figure 28-3 Worklist Messaging Preferences Icon

For information about setting messaging preferences for the User Messaging Service through WebCenter Spaces, see Section 28.2.2, "Setting Messaging Preferences."
Every 15 minutes, the Worklist task flow refreshes automatically with new messages, alerts, and notifications. Optionally, you can update your view yourself by clicking the task flow's Refresh Worklist icon (Figure 28-4).
|
Note: The Worklist task flow does not get refreshed automatically when you perform an action on any task. You must refresh the task flow to list the latest items. |
Roll your mouse pointer over the Refresh Worklist icon to display the date and time the task flow was last refreshed.
To assist you in maintaining an organized view of your Worklist items, the Worklist task flow provides a variety of display options, accessible from the Worklist toolbar (Figure 28-5).
Worklist display options enable you to approach responding to messages, alerts, and notifications according to timeliness and relevance.
For more information about Worklist display options, see Section 28.2.3, "Arranging Your Display of Worklist Items."
The Worklist task flow provides a fast and easy way to read and respond to items from the automated processes in place in your organization. All of the information on the Worklist is specifically relevant to you.
This section provides information about the Worklist task flow and describes how to use it. The information in this section applies equally to the features available in the task flow and in the Sidebar pane.
This section includes the following subsections:
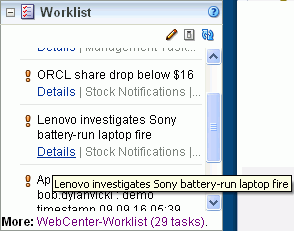
To view a task, message, alert, or notification, simply click the Details link. (Figure 28-6).
Figure 28-6 Selecting a Worklist Item for Viewing

Any Worklist item that is no longer of the Assigned state is removed from the Worklist during the next refresh.
|
Note: Some Worklist items may require actions in the BPEL repository itself. For information about how to respond to such items, see your BPEL documentation. |
The Worklist Messaging preferences icon provides access to controls for specifying your messaging preferences on the User Messaging Service. Use messaging preferences to specify the channels over which to receive User Messaging Service messages and to define messaging filters. User Messaging Service messages may include Worklist notifications in addition to other notifications and alerts from other consumers of the server.
Messaging channels are the channels over which messages, notifications, and alerts are received from the User Messaging Service. These include mail, voice over internet (VoIP), and the like. Messages, notifications, and alerts come from the services that are registered with the User Messaging Service.
Messaging filters define sorting conditions for messages and specify the channels through which to send messages that meet those conditions.
You can define messaging channels and filters using the User Messaging Preferences dialog. This section provides an overview of how to use this dialog to configure messaging channels and define messaging filters for messages generated from the User Messaging Service. For more information, see the User Messaging Service online help and the chapter "Oracle User Messaging Service Applications" in Oracle Fusion Middleware Developer's Guide for Oracle SOA Suite.
To access the User Messaging Preferences dialog from the Worklist task flow:
Log in to your application.
For information about logging into Oracle WebCenter Spaces, see Section 2.2.1, "Logging In to WebCenter Spaces."
Click the Messaging preferences icon in the Worklist toolbar and specify credentials to log in to the BPEL server.
|
Note: In WebCenter Spaces, you can access the Worklist service by expanding the Worklist pane or clicking the Worklist icon in the Sidebar. |
A web page opens with two tabs (Figure 28-7):
Messaging Channels—Configure channels (such as mail, voice, and so on) to receive your User Messaging Service notifications and alerts.
Messaging Filters—Define rules for filtering your User Messaging Service notifications and alerts.
Configure channels and filters by referring to the User Messaging Service online help.
This section describes how to use Worklist sorting and grouping options to arrange your display of the Worklist. Sorting affects the display order of Worklist items. Grouping divides items into groups that share a common attribute, such as a common category, a shared priority level, or some other common attribute.
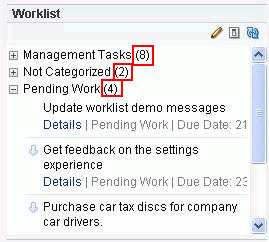
You may notice a number next to each group (Figure 28-8). These indicate the number of items contained in a particular group. To expand a group and see the items it contains, click the Expand icon to the left of the group title.
Figure 28-8 Numbers Next to Worklist Groups

To arrange your display of Worklist items:
Log in to your application.
For information about logging in to Oracle WebCenter Spaces, see Section 2.2.1, "Logging In to WebCenter Spaces."
Click the Display Options icon at the top of the Worklist on your application page.
|
Note: In WebCenter Spaces, you can access the Worklist by expanding the Worklist pane or clicking the Worklist icon in the Sidebar. |
In the Display Options dialog box, expand the Group By list (Figure 28-9), and select an option for grouping your Worklist items.
Choose from:
Category—Group Worklist items into their assigned categories. Items that do not belong to a category are grouped under the heading Not Categorized. Whether a Worklist item includes a category is determined by the workflow developer; consequently, not all items might include categories.
Create Date—Group Worklist items according to the date they were created, starting with the most recent.
Due Date—Group Worklist items according to when they are due. Due dates are optional; therefore, some items may not have them. In such cases, the date the item was created is used.
Expiration Date—Group Worklist items according to when they are due to expire. Expiration dates are optional; therefore, some items may not have them. In such cases, the date the item was created is used.
Not Grouped—Do not group Worklist items. When you group Worklist items by Not Grouped, the Worklist displays items in a flat list. All other grouping options display the items in a tree format.
Priority—Group Worklist items according to priority, either high, normal, or low. Table 28-1 illustrates the priority indicators that are used in the Worklist.
Worklist Server—Group Worklist items according to the server from which they originated.
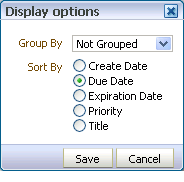
Select a Sort By option (Figure 28-10).
Figure 28-10 Sort By Options in the Worklist Display Options Dialog Box

Choose from:
Create Date—Sort Worklist items according to the date they were created, starting with the most recent.
Due Date—Sort Worklist items according to when they are due. Due dates are optional; therefore, some items may not have them. In such cases, the date the item was created is used.
Expiration Date—Sort Worklist items from the most recent expiration to the furthest away. Expiration dates are optional; therefore, some items may not have them. In such cases, the date the item was created is used.
Priority—Sort Worklist items from highest to lowest priority (see Table 28-1 for illustrations of priority indicators).
Title—Sort Worklist items first from 0 to 9 then from a to z.
Click Save to save your changes and close the Display Options dialog box.
The Worklist displays newest created 25 items per Worklist server connection. For items exceeding the 25-item limit, follow the link to the BPEL Worklist Application, where you can view and act on a larger volume of Worklist items.
The Worklist service task flow has associated properties, which users with sufficient privileges can access from the Component Properties dialog box in Oracle Composer. The method for accessing task flow properties is the same for all task flows. For more information, see Section 7.5, "Setting Properties on Page Content."
Changes to the display- and style-related properties listed on the other tabs affect the appearance and behavior of the Worklist task flow instance for all users. These properties are common to all users. For more information, see Section 7.5, "Setting Properties on Page Content."